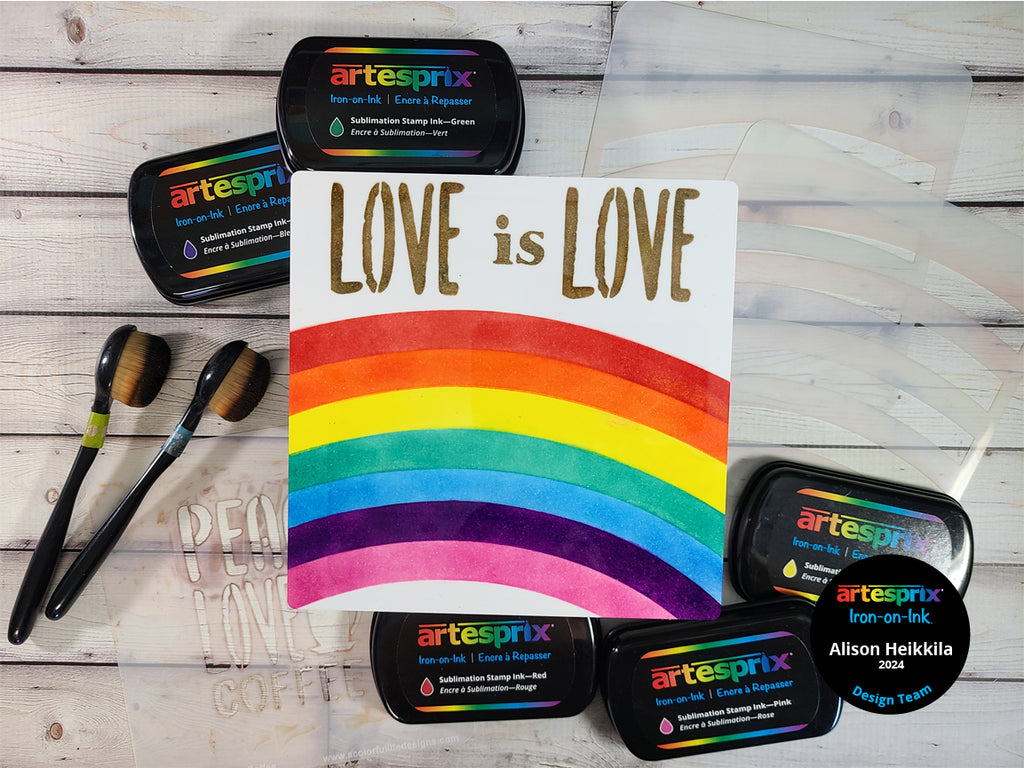
Hello! I’m Alison Heikkila and I appreciate you joining me today. My latest project, and last project for the Design Team term, is the Decorative Metal Panel. It’s 6"x6", which gives you a nice amount of space to play without it being too overwhelming. I decided to go with a love theme for my panel and I got to use lots of color and a few stencils to create my design.
**This post may contain affiliate links. That means that I may receive compensation if you purchase through the links I have provided. The price you pay for the product or service is not higher, but I may get compensated.**
What is Artesprix Iron-on-Ink?
Artesprix Sublimation Markers, Ink, and Paint are specially formulated to allow you to use basic copy paper to: color, stamp, stencil, and monoprint anything you wish and turn it into a heat-transferable design. These designs are then applied to a polyester or polyester coated substrate with heat and pressure. You can use a heat press or a home iron! These designs, through this process of sublimation, will become permanent on your substrates.
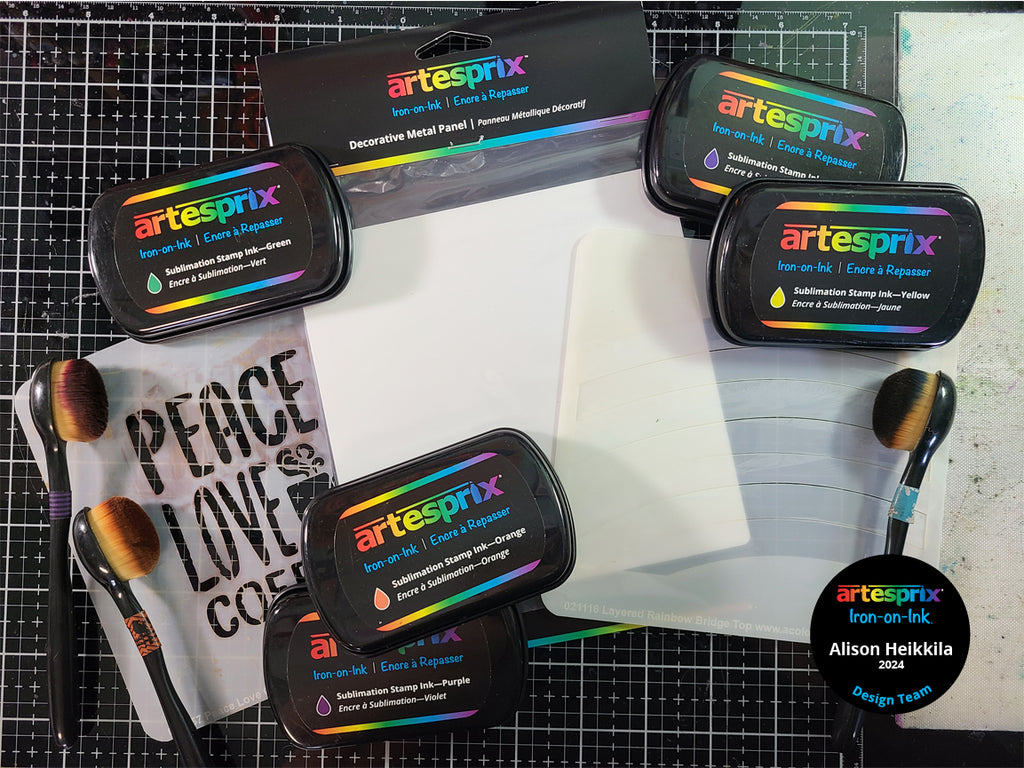
Supplies:
Artesprix Decorative Panel
Sublimation Stamp Pads: All colors except Black
Protective Paper
Heat Tape
A Colorful Life Designs: Layered Rainbow Bridge Stencil Set
A Colorful Life Designs: Peace, Love Coffee Stencil
Spellbinders: Be Bold Lowercase Letters & Numbers Die Set
Blending Brushes (A dedicated brush for each color)
Copy Paper
Pencil
Craft Foam
Low Tack Tape/Washi Tape
Heat Source: Home Iron or Heat Press
Step-by-Step Tutorial:
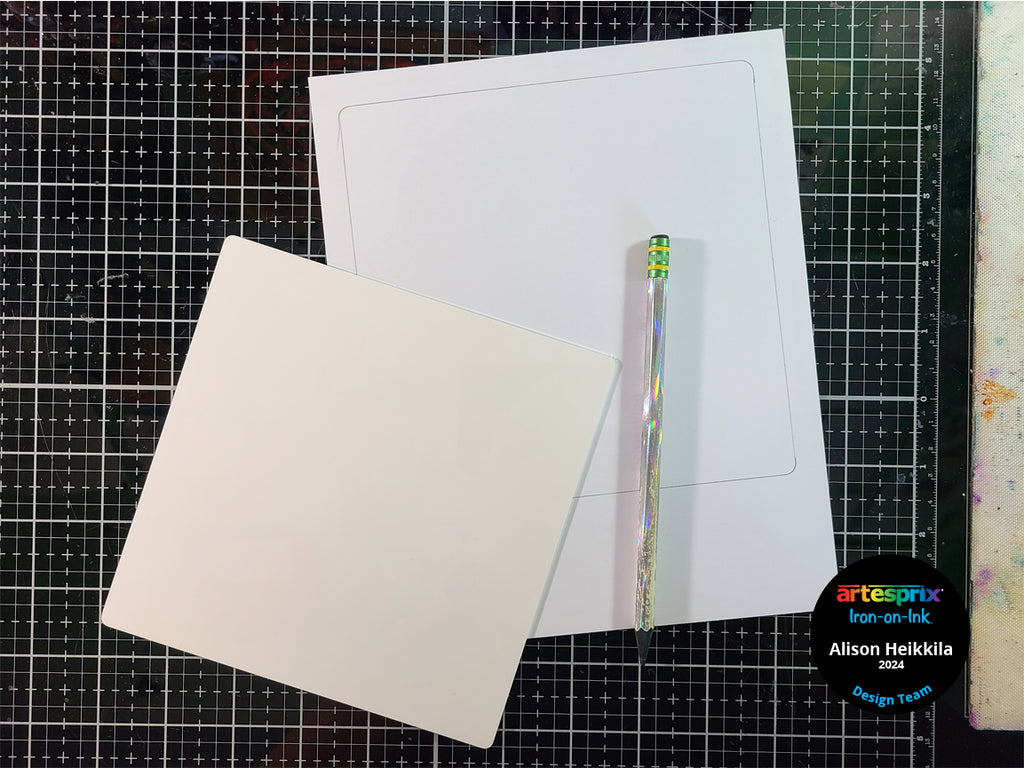
Step 1: Trace the Decorative Panel on to copy paper with a pencil. The pencil marks will not transfer during sublimation.
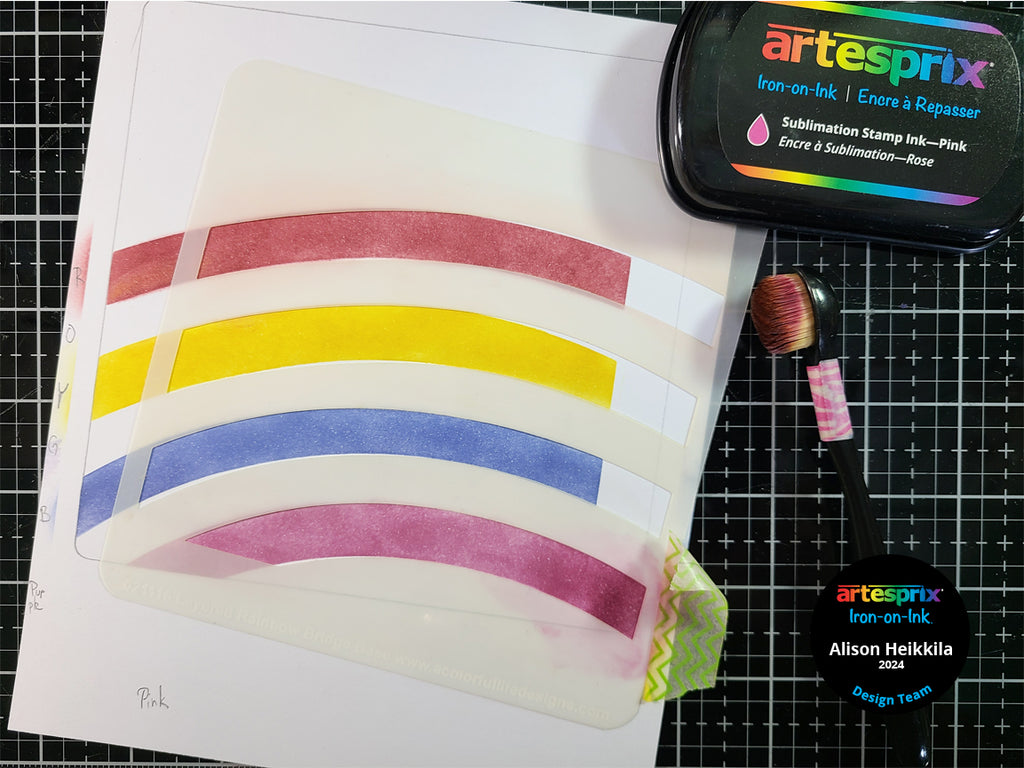
Step 2: Tape the first stencil to the paper. The stencil design isn’t long enough to bridge one side to the other, but we will fix that later.
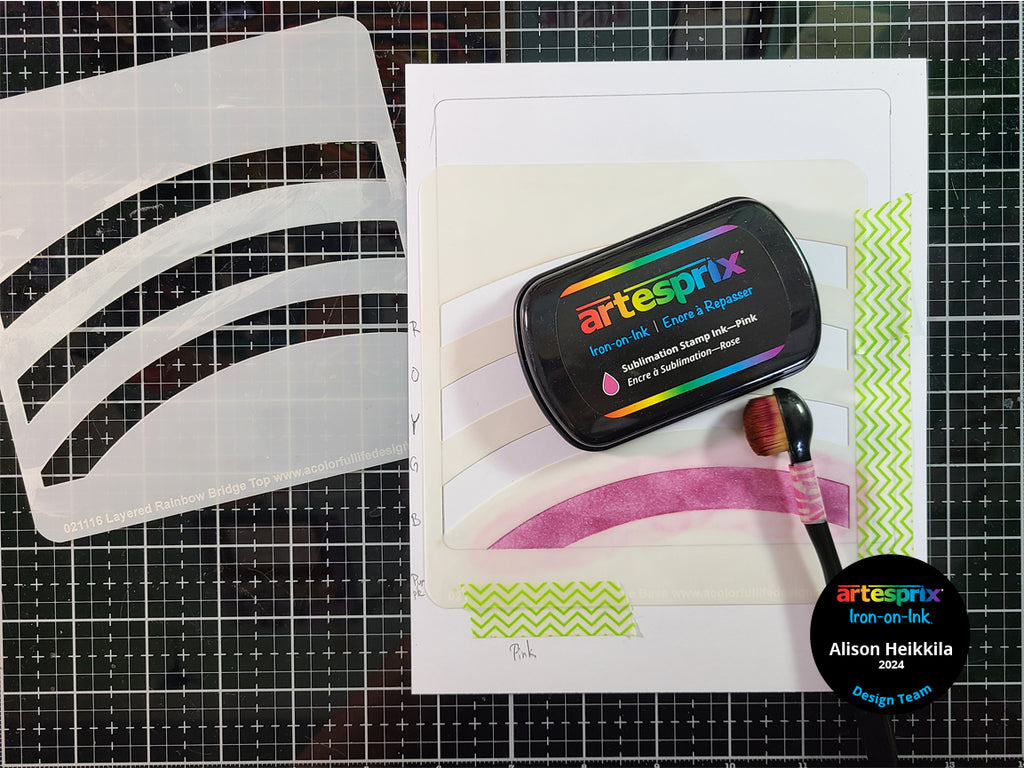
Step 3: Begin inking each band of color. This stencil set exposes every other band to make inking easy. To keep from getting confused, I labeled where each color will go.
Here is what the first four bands look like. Now we will extend them to the edge of our pencil line.
Step 4: Shift the stencil over to extend the pink band. Add color to complete it. Please note that you will need to shift the stencil for each band to make sure it lines up correctly. Repeat for all of the colors.
Step 5: Use the second stencil to complete the rainbow.
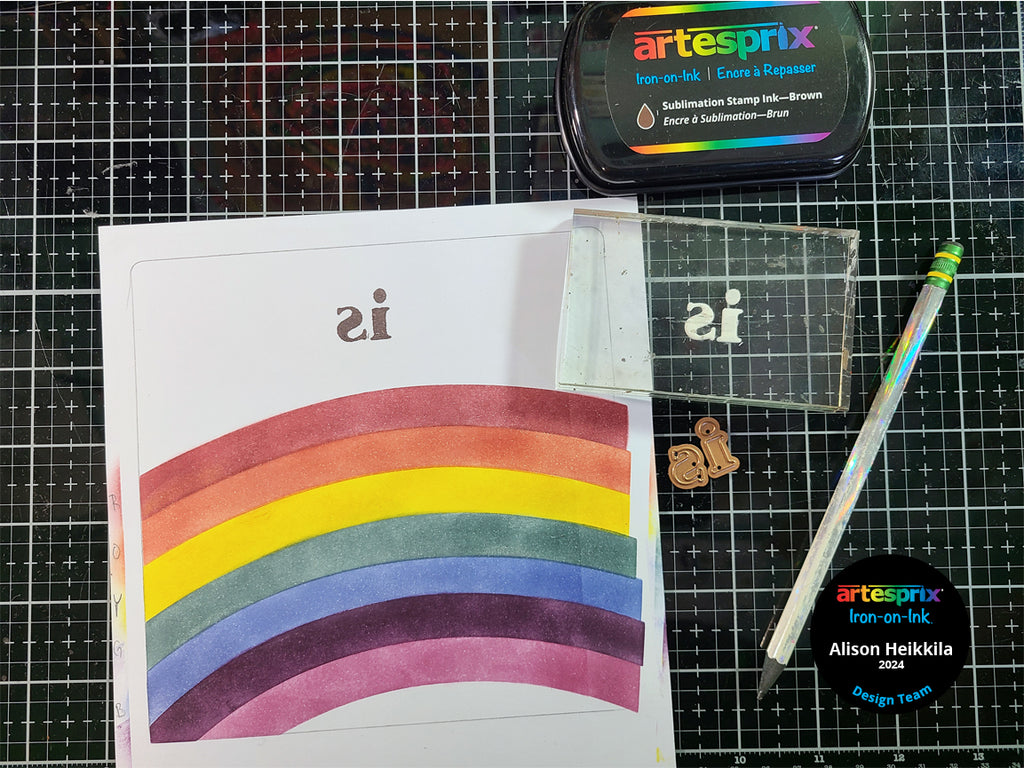
Step 6: I needed an “is” but I didn’t have a stencil that would work. Try this: die cut the letters needed from craft foam. Adhere them to an acrylic block backwards with temporary adhesive. Stamp them in the middle of the upper area of the Metal Panel with the Brown Sublimation Stamp Ink.
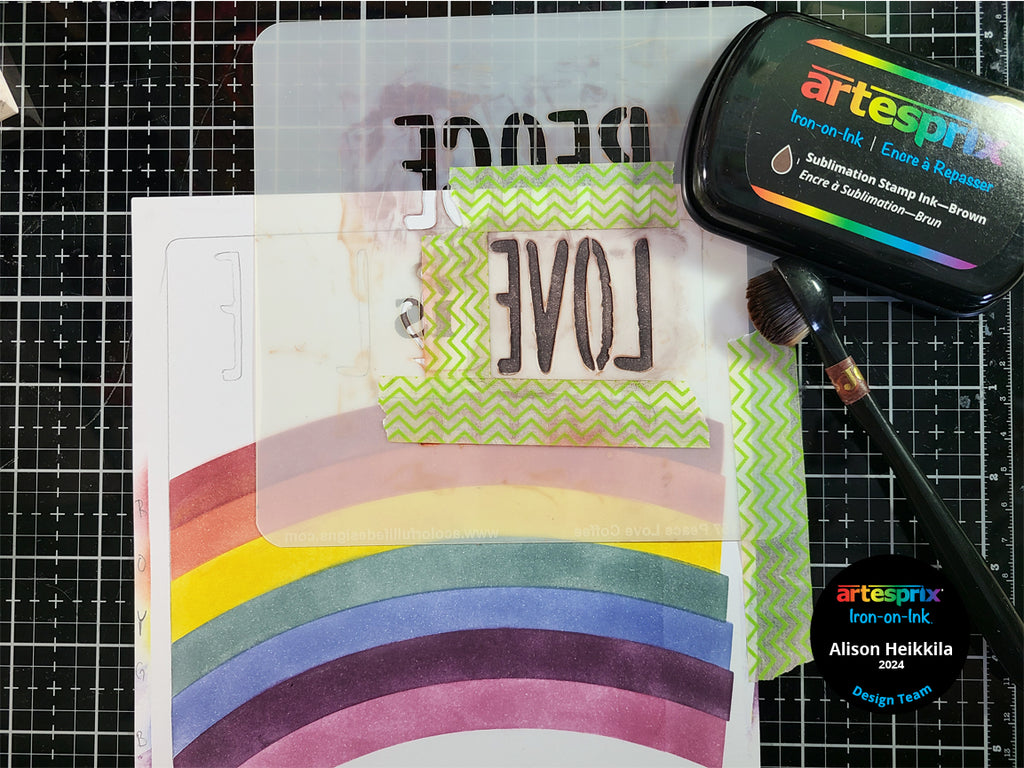
Step 7: Flip the Peace, Love, Coffee stencil over so that the words are backwards. Ink “love” before and after the “is” with the Brown Sublimation Stamp Ink. Be sure to use a low tack tape to mask off the areas you don’t want inked.
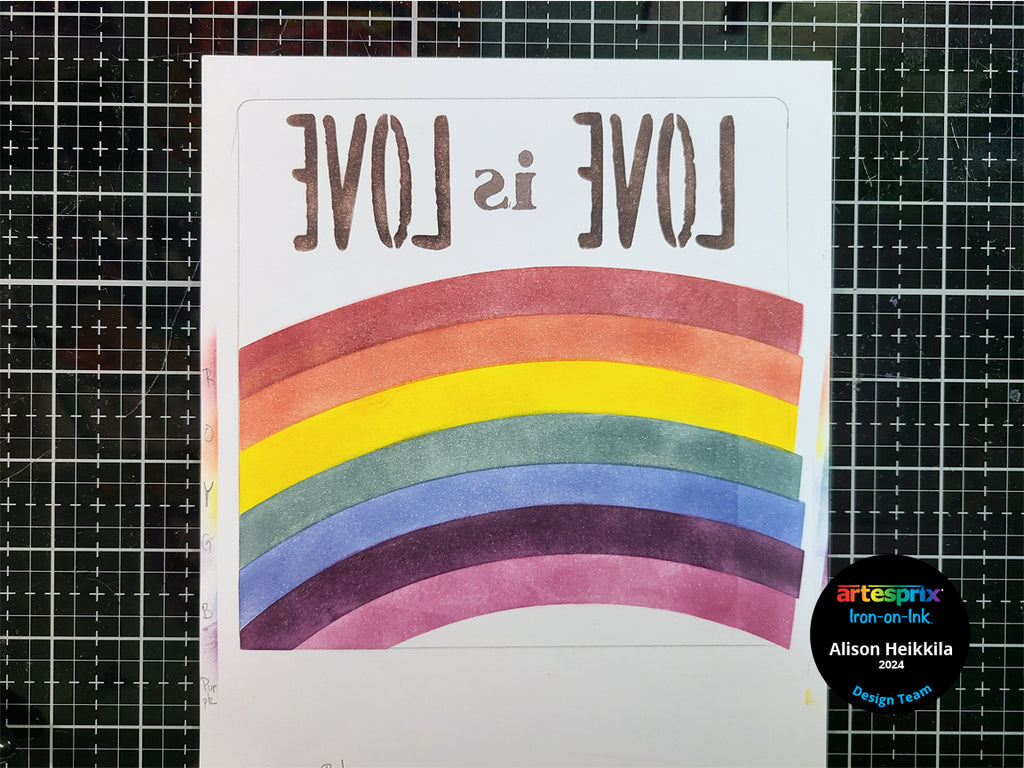
Here is my completed design. I think it’s going to look amazing after we sublimate and those rainbow colors brighten!
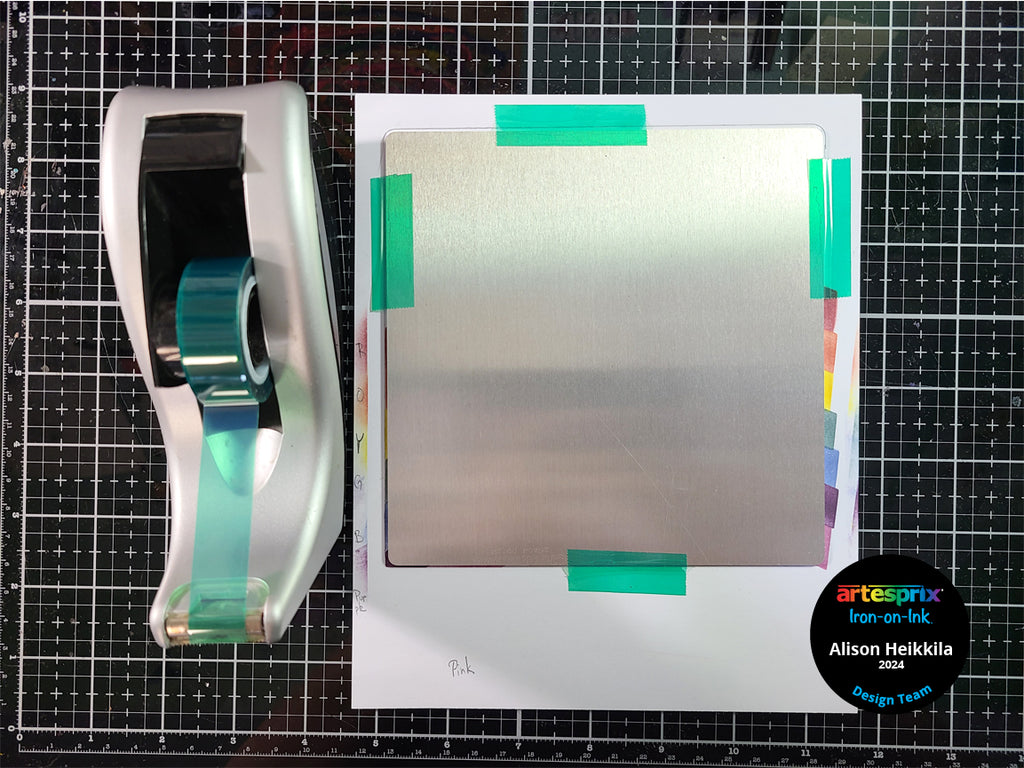
Step 8: Adhere the Decorative Panel face down to the design using Heat Tape.
Step 9: Let’s make our "Sublimation Sandwich"! Add a layer of siliconized paper to the top and bottom of your Blank. The Protective Paper prevents any ink from transferring to work surfaces. Ensure it is pressed as shown in the photo above with the design positioned closer to the heat.
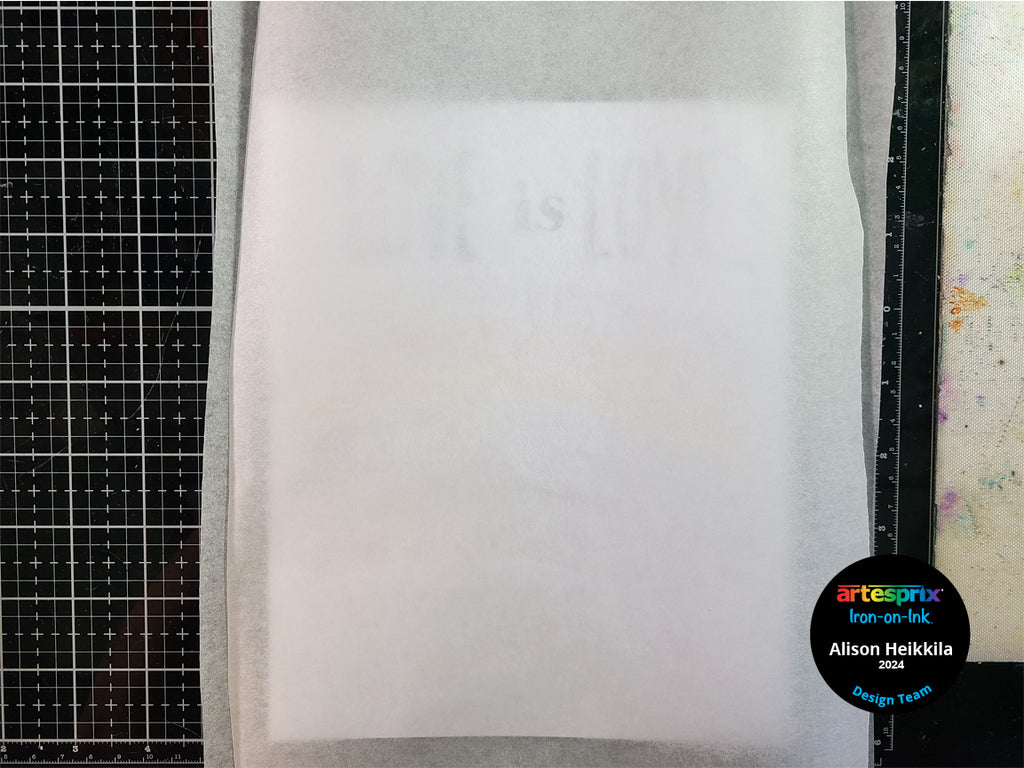
Step 10: Sublimate the Decorative Panel for 90 seconds at 400℉.
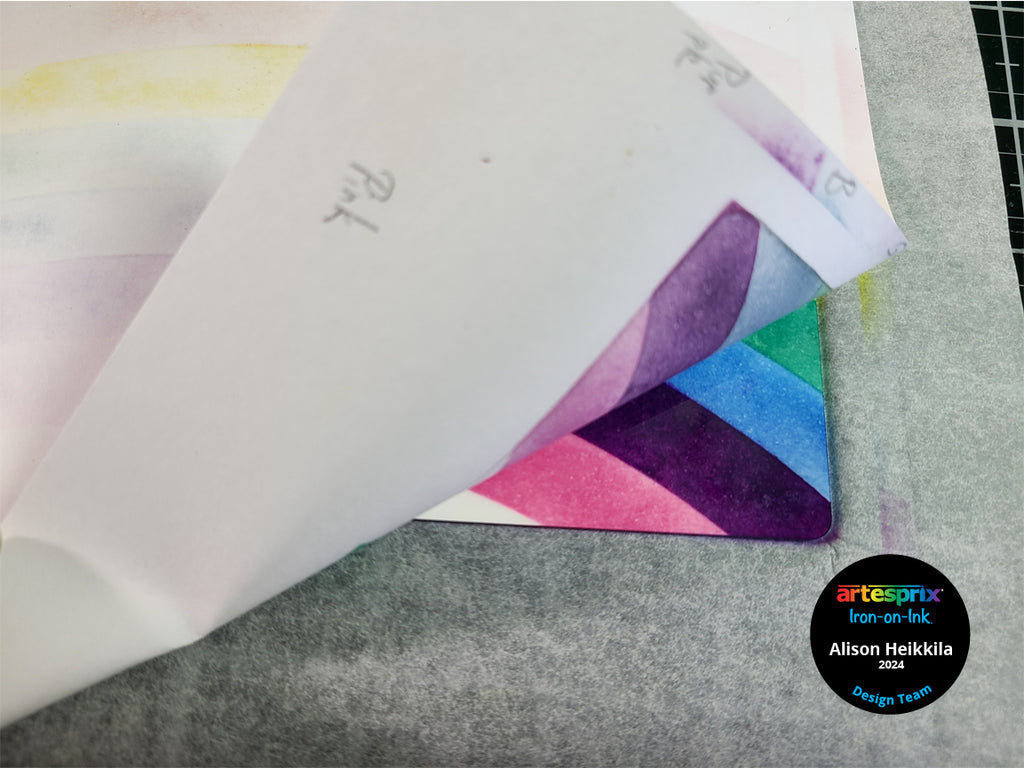
Step 11: It’s time for the Peek Test! Carefully lift a corner of the paper away from the Decorative Panel. Remember, this is VERY hot, so be careful! Make sure your design sublimated well before removing the paper completely. Mine looks great, so we can reveal the finished design.
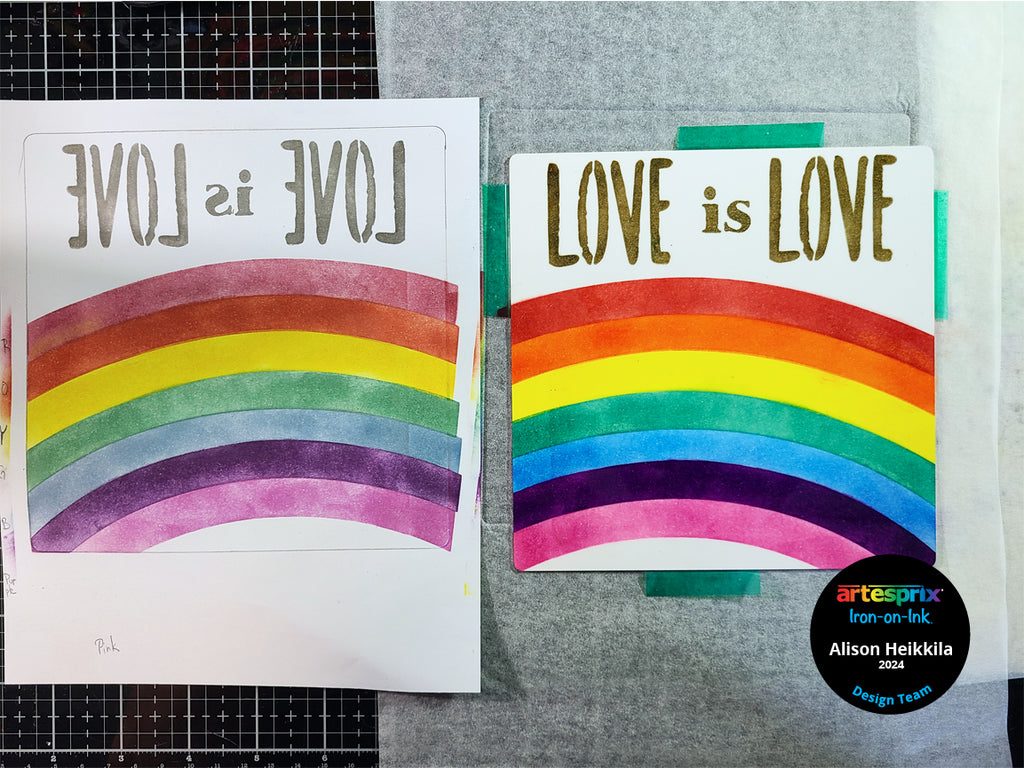
Take a look at how beautiful the Decorative Panel came out. The rainbow is so vibrant, and our message is very clear.
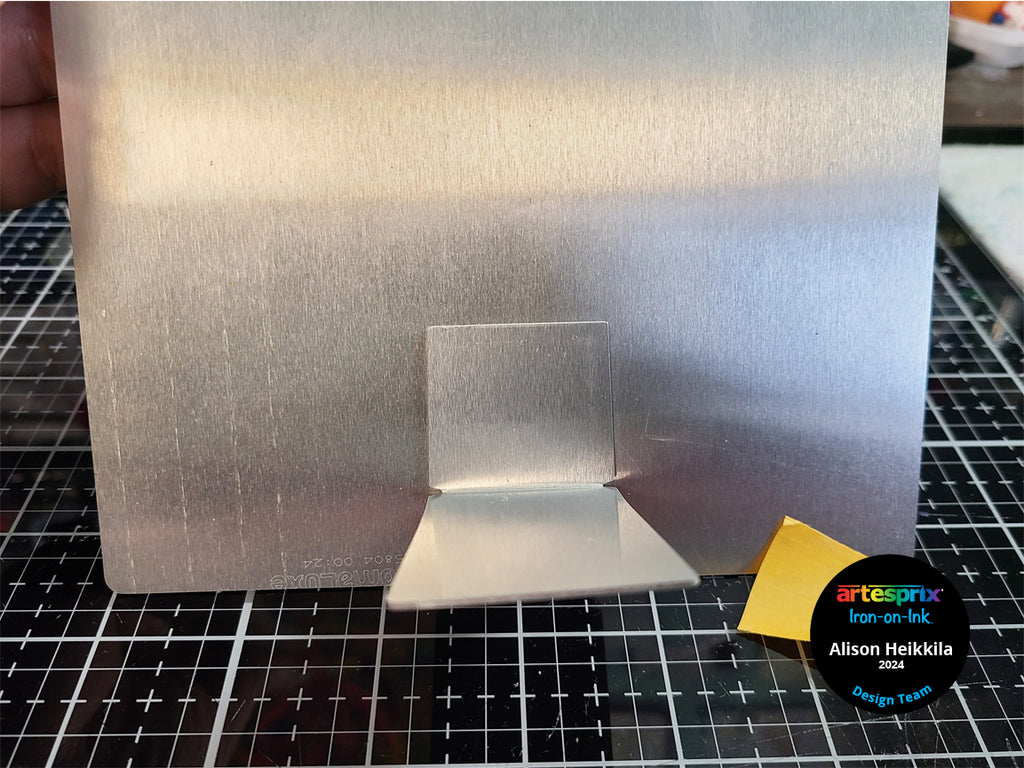
Step 12: Attach the metal foot to the back by removing the backer paper and pressing it on to the panel. Then, bend the foot upwards at the score line. Adjust as necessary.
Our Decorative Metal Panel is complete and is ready to be displayed! I think it came out so fabulous! How would you like to get more ideas on using Artesprix’s Sublimation Ink Pads, Markers, and Paint? There’s a Facebook Group that’s just for fans of Artesprix! You can click HERE to join. Also, don't forget to visit the Artesprix store to see all of the available blanks and bundles, so you can get started with sublimation.
Thanks so much for stopping by. Have an inspiring day!
Alison Heikkila
**This post may contain affiliate links. That means that I may receive compensation if you purchase through the links I have provided. The price you pay for the product or service is not higher, but I may get compensated.**
Comments