Hi there! I'm Debbie from Debbie J’s Crafting Corner. Today, I’m super excited to share a fun new project with you, perfect for the upcoming Halloween season. We’ll be making a spooky sign using Artesprix Iron-on-Ink Markers with our Brother Scan-N-Cut. This is a great way to let the machine do the work for you in regards to mirrored text and create consistent sublimation transfers. These Decorative Signs are the July Blank of the Month, so if you think you'd like to give this project a try, don't wait!

**This post may contain affiliate links. That means that I may receive compensation if you purchase through the links I have provided. The price you pay for the product or service is not higher, but I may get compensated.**
What is Artesprix Iron-on-Ink?
Artesprix Iron-on-Ink is a game-changer for crafters. It's a specialized sublimation ink that allows you to transfer vibrant designs onto compatible surfaces with heat and pressure. Unlike traditional sublimation, which requires expensive printers, Artesprix makes it accessible for all makers. Once your design is transferred, it's permanently infused, making it durable and long-lasting.
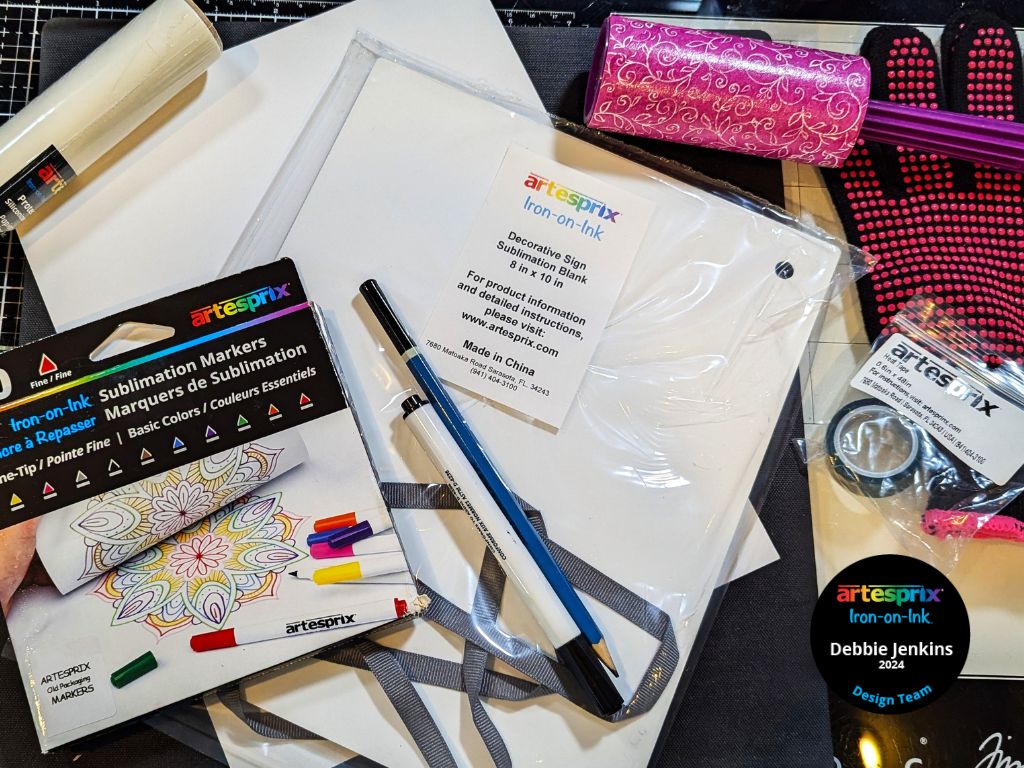
Supplies:
Sublimation Markers - Basic Chisel 10ct
Reverse Tweezers
Plain Card Stock
Heat Protective Gloves
Brother ScanNCut Machine
Universal Pen Holder for the ScanNCut
Step-by-Step Tutorial:
Step 1: Start by tracing shape of your sign onto card stock. This helps ensure your design fits perfectly on the blank.

Step 2: For this project, I’m using a design from Design Bundles. Head over to their website, download the Fresh Boo’d Coffee Halloween Decor SVG, and unzip the file.

Step 3: Open Brother Canvas Workspace, create an 8x10" rectangle to match the size of your blank, and import your SVG file. Adjust the design within the rectangle to ensure it fits perfectly. Remember to flip/mirror the design horizontally so it transfers correctly onto your blank!

Step 4: Use the universal pen holder to secure an Artesprix Marker in your Scan-N-Cut machine. Scan your card stock to ensure proper alignment, then let the machine draw and color your design. This might take some time, but the results are worth it! The machine adds PLENTY of ink so that you get a really dark colored result. To save some time, set your machine instead to "no fill" so it will draw the outline. It's best to color in by hand to extend the life of your markers.

Step 5: Trim down the paper if needed and tape the design onto the blank using heat-resistant tape,

Pro Tip: This is a thick blank and requires a lot of Heat Tape. It is important to ensure it is secure to avoid any shifting during the transfer process. My first sign was not secured well watch my YouTube video to see what happened.

Step 6: For the "Sublimation Sandwich” you need protective paper to protect your work surfaces. I cut a piece and folded in half and placed my secured project in side with the design face-down on on top. Make sure that each half is larger than your blank and design.

Step 7: Preheat your heat press to 400°F. Place your sublimation sandwich in the press and set the timer for 105 seconds. Be careful not to move the press to avoid ghosting if using a Hand Held Craft Press.
Step 8: After pressing, let the blank cool. It is VERY HOT. Before removing all the tape, peel back a small section of your design to ensure a successful transfer.

Step 9: Once you confirmed your transfer is bright, you can remove the rest and reveal your design.

Step 10: Add ribbon to the pre-made holes using the gray ribbon that is included or use whatever you prefer to match the theme of your sign of decor!
I’m thrilled with how this Halloween coffee sign turned out! It’s a perfect addition to the coffee area of my kitchen. Remember, the key to a successful transfer is securing your design well to prevent shifting. Thank you for joining me today as we explored the fun of sublimation with Artesprix Iron-On Ink. Share your Artesprix projects with us by using #debbiejscraftingcorner, #Artesprix and #IrononInk or post it to the Artesprix Facebook Group.
Because, if I can make it, You Can too!
Debbie Jenkins
**This post may contain affiliate links. That means that I may receive compensation if you purchase through the links I have provided. The price you pay for the product or service is not higher, but I may get compensated.**
Comments