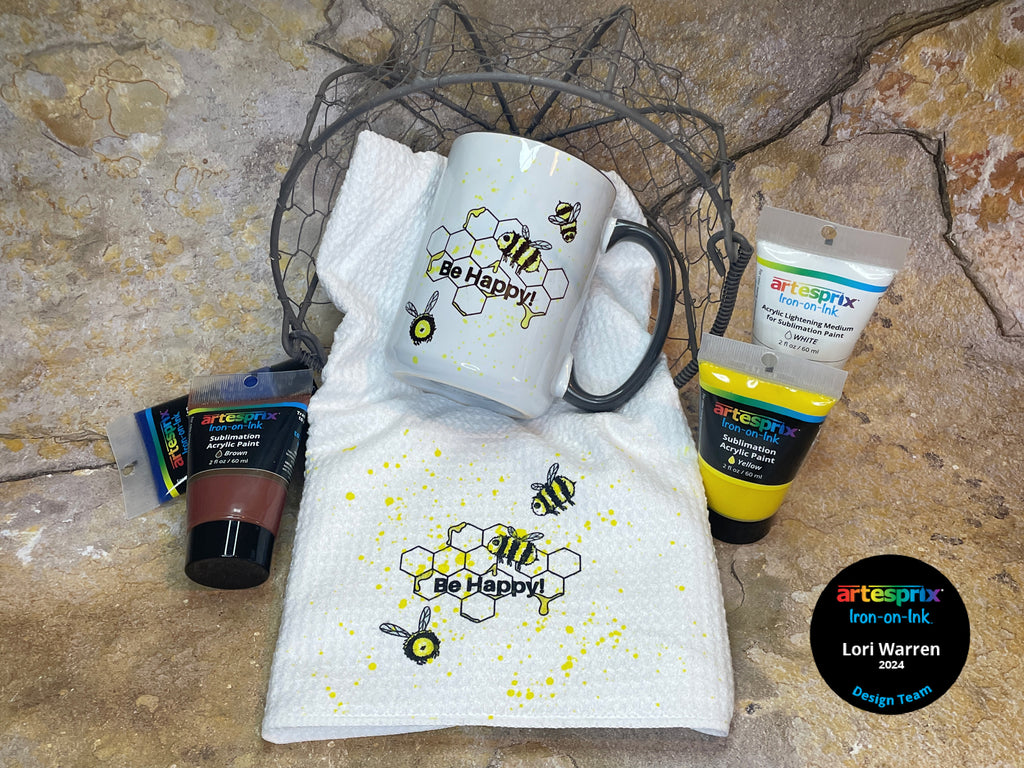
Be Happy Springtime Artesprix Kitchen Towel (& Matching Mug!)
Artesprix Design TeamInk Pads, Kitchen Towel, Paints
Products in this post


Hello! Lori here, with another quick, easy and creative way to craft with Artesprix Sublimation Stamp Ink and new Acrylic Paint colors! Fancy up your kitchen with hand stamped Sublimation Kitchen Towels and mugs. This project demonstrates how to use Sublimation Acrylic Paint to easily add vibrant color to stamped images. Check out the step by step instructions and Quick Tips Mixed Media Video below for the details. This is my last blog with Artesprix for the term so I had to go big for my last project with a matching sublimation mug! :)
**This post may contain affiliate links. That means that I may receive compensation if you purchase through the links I have provided. The price you pay for the product or service is not higher, but I may get compensated.**
What is Sublimation Iron-on-Ink?
It is an interesting and fun product that allows you to create a design on standard copy paper that can then be heat transferred onto surfaces (must have polyester in it or have a polyester coating). Once the project is transferred to the blank, it is lifetime permanent. Before Artesprix, you would need a fancy printer to experience this level of personalization, but not anymore!
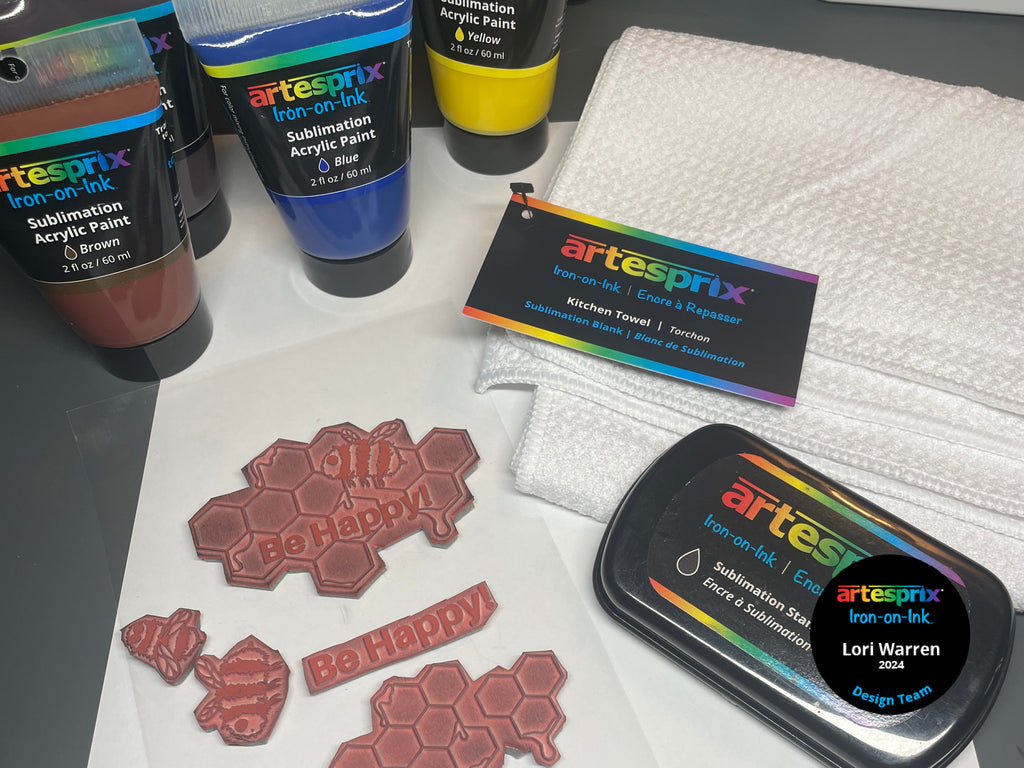
Supplies:
SublimationAcrylic Paint –Yellow, Brown, Blue
Sublimation Acrylic Lightening Medium -White
Kitchen Towel, Sublimation Blank
Lori’s Card & Creations –Be Happy Bee Stamp Set Sublimation
Computer Paper
Heat Press or Handheld Craft Press
Sublimation Mug (optional)
Craft Express Sublimation oven (optional)
Step-by-Step Tutorial:
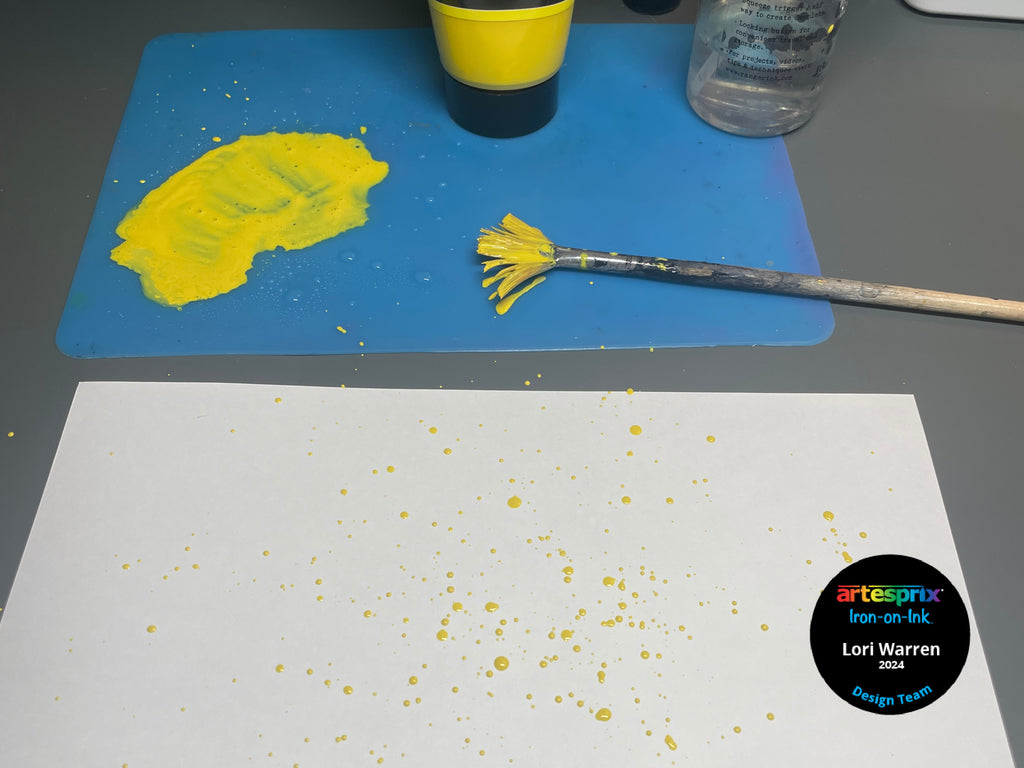
Step 1: Add water to Yellow Sublimation Acrylic paint to dilute, use fan brush to add paint splatters to paper.
Step 2: Ink rubber stamps with Black Sublimation Stamp Pad Ink and stamp over splatters.
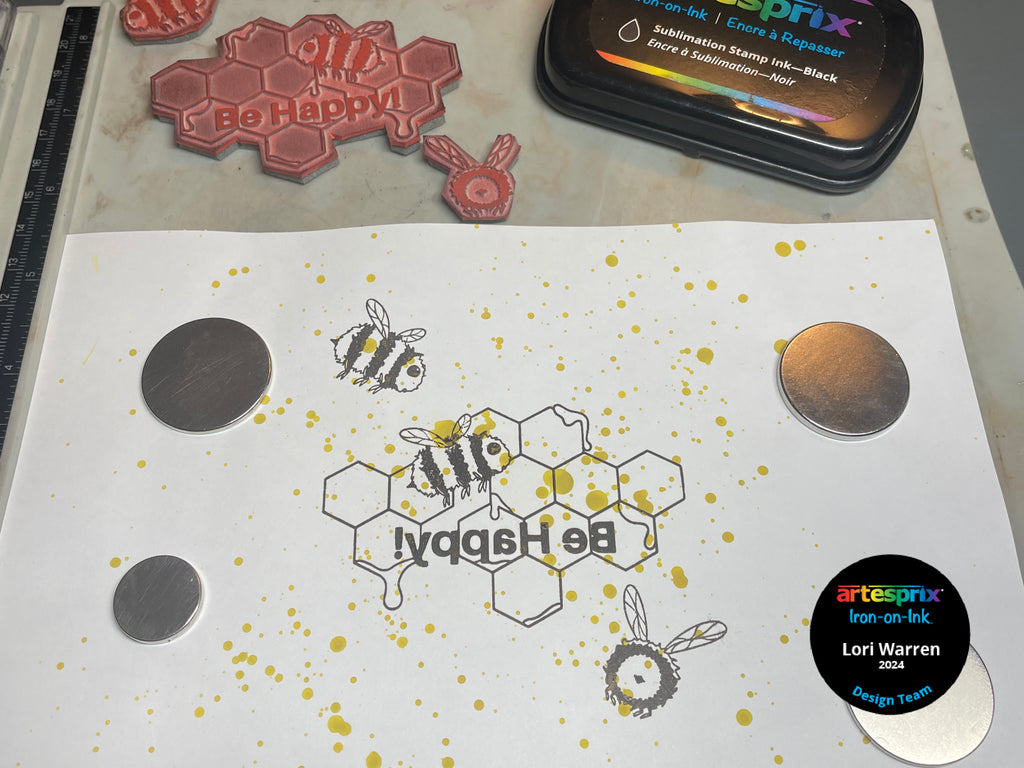
Pro Tip: Use a Stamp positioning tool to help with placement.
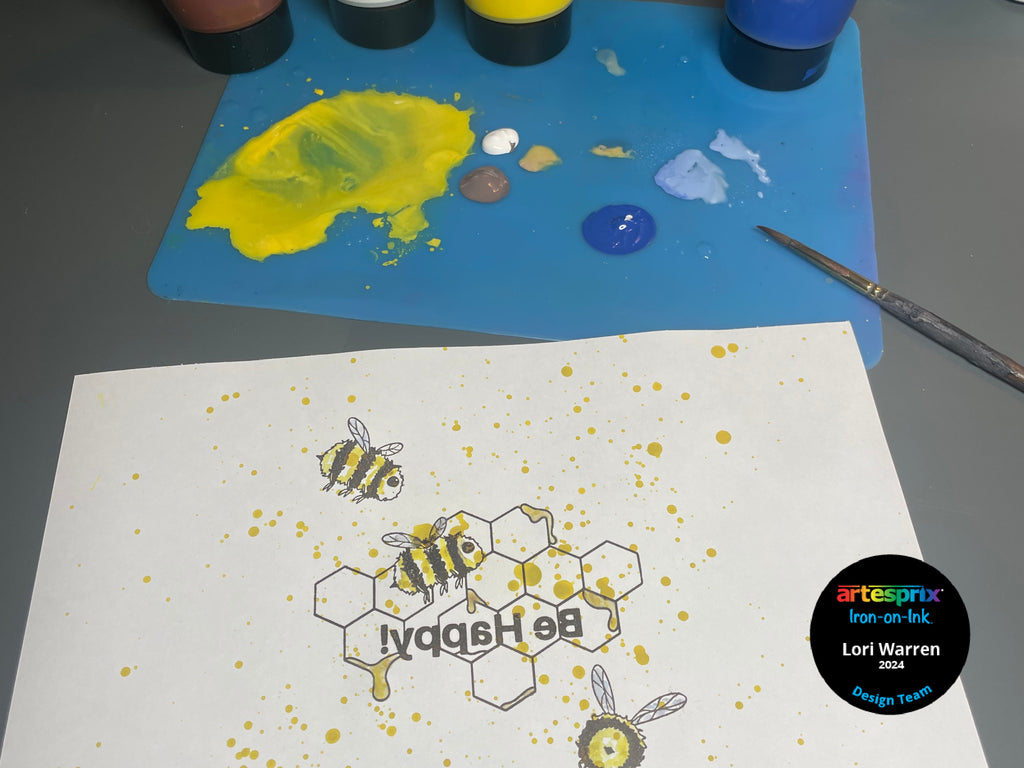
Step 3: Add color to stamped images using Sublimation Acrylic Paint and a fine paint brush.
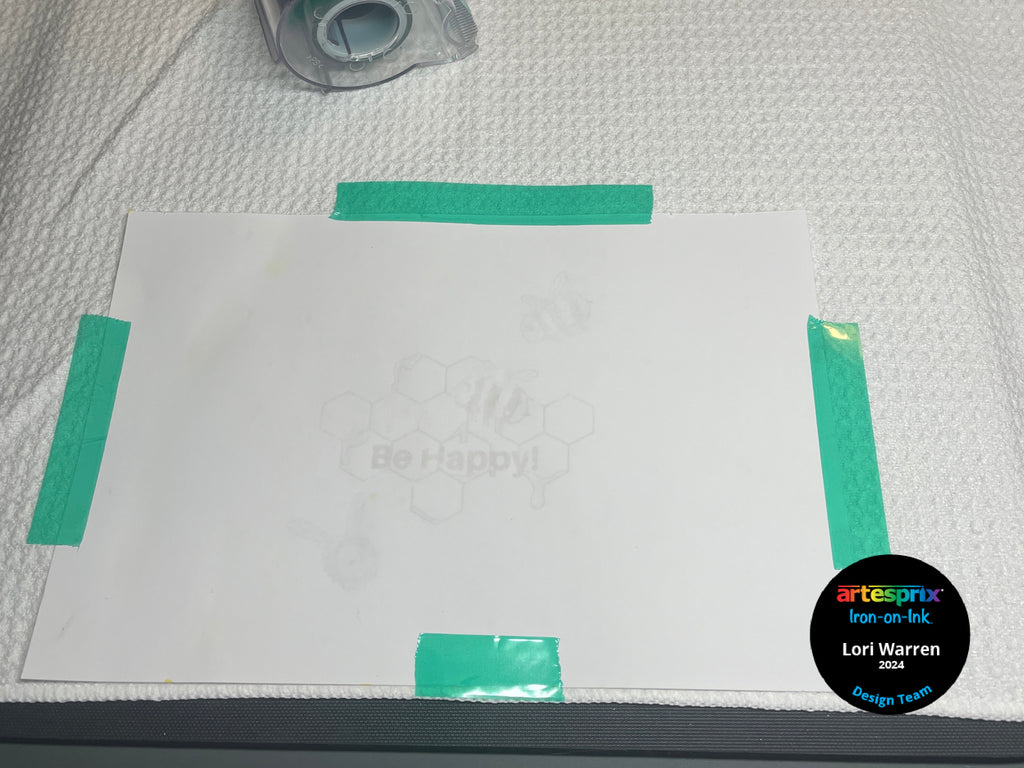
Step 4: Using Artesprix Heat safe tape to secure the finished design to the Kitchen Towel where desired.

Step 5: Make a "Sublimation Sandwich" by placing the prepared project between two pieces of protective paper.
Step 6: Heat set using appropriate settings for the project (60 seconds at 380 degrees with Medium pressure).
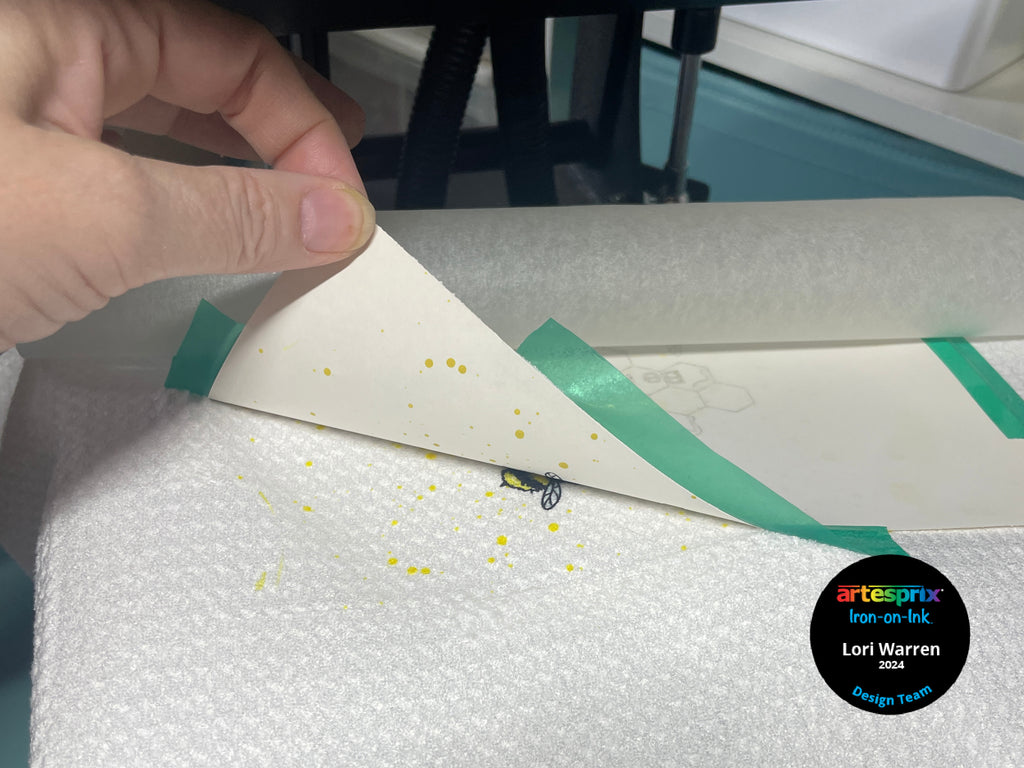
Step 7: After heat set, take-a-peek at the image to ensure transfer was successful, do not remove tape until transfer is confirmed. Re-heat if needed.
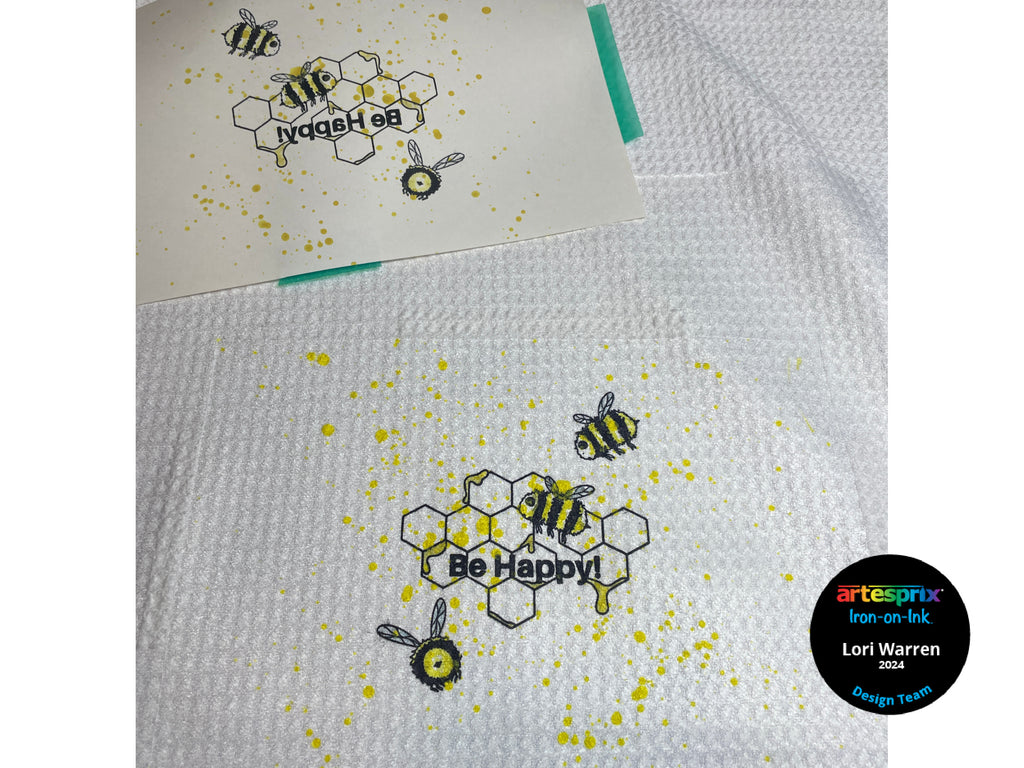
Step 8: Remove paper to reveal the transferred design!
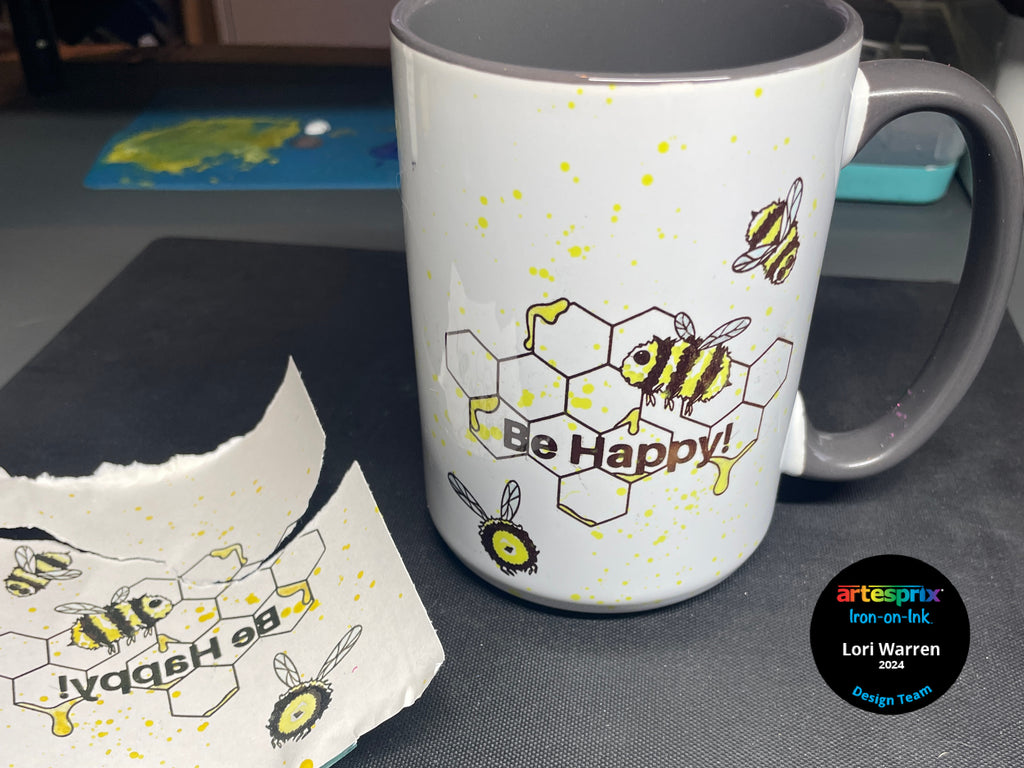
Step 9: (Optional) Repeat steps above to create matching design to transfer to a Sublimation Mug.
I hope you enjoyed this project on how to use Artesprix Sublimation products to create wonderful products for your home. It is easy to create multiple designs on plain copy paper to transfer to any sublimation blank you desire! Give your stencils and stamps a new life with Artesprix. Keep in touch with me by subscribing to my YouTube channel.
Stay Crafty, Happy Day!
Lori Warren
**This post may contain affiliate links. That means that I may receive compensation if you purchase through the links I have provided. The price you pay for the product or service is not higher, but I may get compensated.**


