Gel Press Mandala Sequin Pillow with Artesprix Paint
Artesprix Design TeamPaints, Pillow
Products in this post


Hello! I’m Alison Heikkila and I am excited to share a Sequin Pillow Case tutorial today that uses Artesprix’s fabulous Sublimation Paints on a Gel Press Impressable Plate. We’ll get two different styles of monoprints from one paint, and we will get to mix three beautiful colors of Sublimation Paint. I wanted to make a design that worked with the vibe I have in my teen’s “treeless treehouse.” It’s kind of boho, so the Rose Mandala Impressable was just perfect.
**This post may contain affiliate links. That means that I may receive compensation if you purchase through the links I have provided. The price you pay for the product or service is not higher, but I may get compensated.** 
What is Artesprix Iron-on-Ink?
Artesprix Sublimation Markers, Ink, and Paint are specially formulated to allow you to use basic copy paper to: color, stamp, stencil, and monoprint anything you wish and turn it into a heat-transferable design. These designs are then applied to a polyester or polyester coated substrate with heat and pressure. You can use a heat press or a home iron! These designs, through this process of sublimation, will become permanent on your substrates.

Supplies:
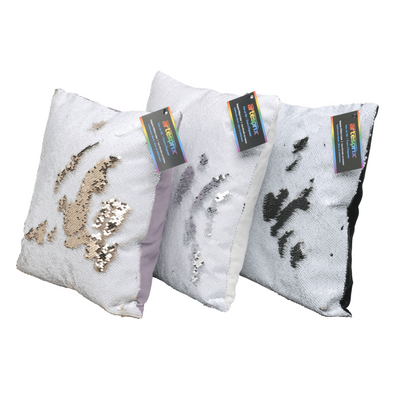
Sequin Pillow Case
Sublimation Acrylic Paint
Protective Paper
Heat Tape
Paint Color Mixing Chart
Gel Press: Rose Mandala Impressable
Speedball: 6” Brayer
Copy Paper
Heat Press or Home Iron
Paint Palette or Paint Storage Cups
Step-by-Step Tutorial:
Step 1: Mix your paints using the Paint Color Mixing Chart as a guide. I mixed up Pool, Purple, and Lime using the Sublimation Acrylic Paint Set.

Step 2: Apply the paints to the Gel Press Impressables. I used the spatula end of my pokey tool and 2 popsicle sticks.

Step 3: Roll the color across the Gel Press with a Brayer. Be careful to not mix the colors too much as you do this. You can see here that I mixed the colors too much and there aren't a lot of individual colors on top of the mandala itself. I wound up not using the prints I got from this pull.

This is a much better distribution of color.
Step 4: Pull your prints. We will make two monoprints per application of paint. For the first print, place your copy paper on top of the Gel Press and lightly rub just the surface where the mandala is raised. We just want the highest points. Pull the paper to reveal your monoprint.
Step 5: For the second pull, place a new sheet of copy paper on top of the Gel Press and rub the entire surface thoroughly. You want to get as much of the leftover paint as possible. This pull will give you what’s called a ghost print.
Pro Tip: Try to work quickly so that the paint doesn’t dry on the surface of the Plate.

Here are the four prints I’m using on my Sequin Pillow Case. The top right and lower left were the first pulls after applying the paint, and the upper left and lower left were the second. You can see how the prints look like opposites. I love how grungy they are!

Step 6: After trimming down your prints, tape your first into one of the corners of the Sequin Pillow Case with Heat Tape. Be sure that the sequins are all facing the correct side, in this case, the white side.

Step 7: Let’s make the "Sublimation Sandwich"! Add a layer of siliconized paper to the top and bottom of your Blank. Your sandwich will be: Protective Paper-Design-Blank-Protective Paper. The Protective Paper prevents any images accidentally transferring to either side of your Heat Press or to your home iron.
Step 8: Press the first mandala in the Heat Press for 60 seconds at 400℉.

Step 9: Time for the "Peek Test"! Carefully lift up one corner of the copy paper away from the Blank to be sure your design sublimated properly. If it didn’t, you can re-sublimate because you haven’t shifted your design. Mine looks great, so let’s move on.
Step 10: Let’s sublimate our second print. Tape the second monoprint to the Sequin Pillow Case.

Step 11: Make a new "Sublimation Sandwich". Note, be sure to have Protective Paper on top of the original sublimated area so that nothing accidentally transfers to your heat source.
Step 12: Repeat the steps above until you have transferred 4 individual designs.

Here is my completed Sequin Pillow Case next to each of the original designs. Please excuse the extra items all over my desk. Doesn’t the pillow case look cool?

Here is the filled Sequin Pillow Case in its new home. It looks so great with the pillows I already had!
And of course, I had to show you what it looks like when you flip some of the sequins over. I know my kids and their friends are going to love playing with it! How would you like to get more ideas on using Artesprix’s Sublimation Ink Pads, Markers, and Paint? There’s a Facebook Group that’s just for fans of Artesprix! You can click HERE to join. Also, don't forget to visit the Artesprix store to see all of the available blanks and bundles, so you can get started with sublimation.
Thanks so much for stopping by. Have an inspiring day!
Alison Heikkila
**This post may contain affiliate links. That means that I may receive compensation if you purchase through the links I have provided. The price you pay for the product or service is not higher, but I may get compensated.**


