Hero Arts Poppy Drawstring Bag with Artesprix Iron-on-Ink
Artesprix Design TeamDrawstring Bag, Ink Pads, Markers
Products in this post


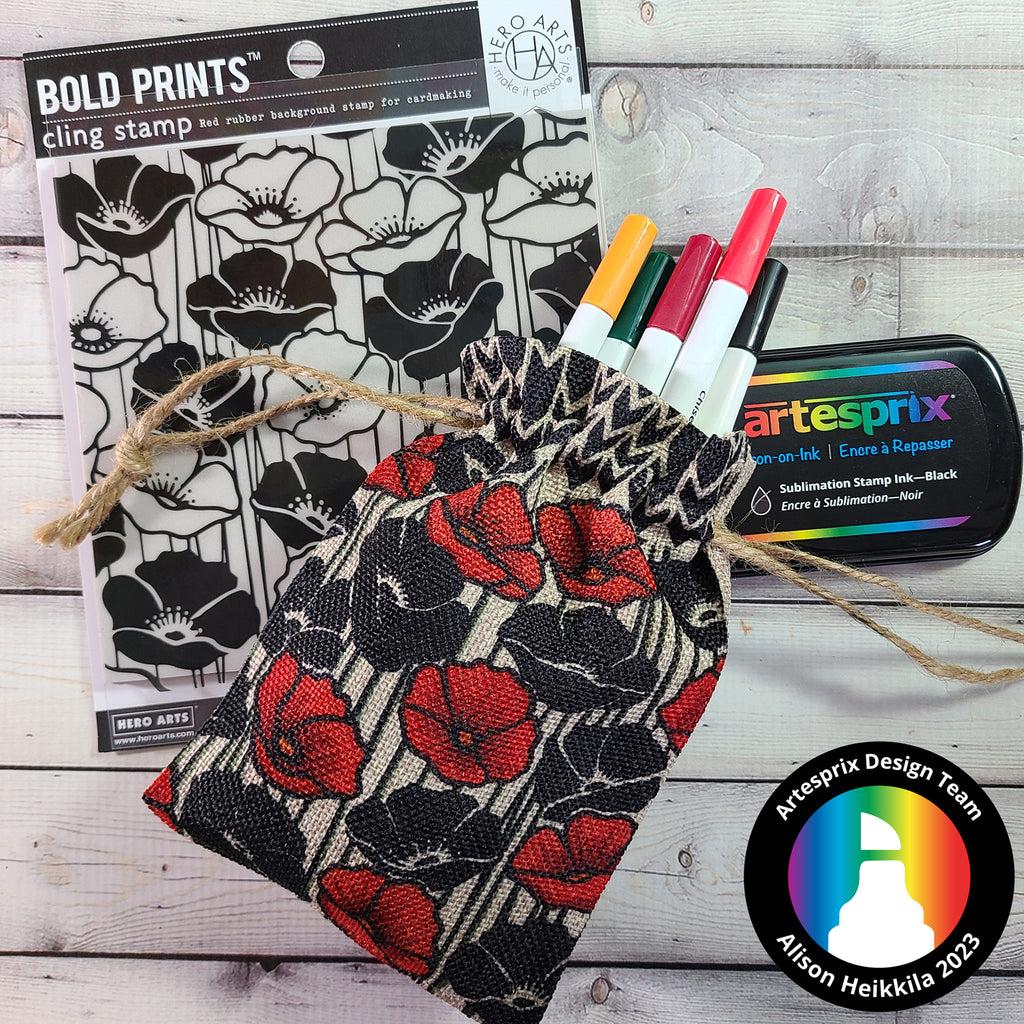
Hello! I’m Alison Heikkila and today I’m going to show you how to make a bold design on one of Artesprix’s fabulous Drawstring Bags. I love these little bags because they’re the perfect size for small gifts, you can sublimate on both sides, and I really like that they are a shiny brown, like burlap, but soft to the touch. I decided to use the cool Poppy Field Bold Prints stamp from Hero Arts, with a funky stencil from A Colorful LIfe Designs.
**This post may contain affiliate links. That means that I may receive compensation if you purchase through the links I have provided. The price you pay for the product or service is not higher, but I may get compensated.**
What is Artesprix Iron-on-Ink?
Artesprix Sublimation Markers, Ink, and Paint are specially formulated to allow you to use basic copy paper to: color, stamp, stencil, and monoprint anything you wish and turn it into a heat-transferable design. These designs are then applied to a polyester or polyester coated substrate with heat and pressure. You can use a heat press or a home iron! These designs, through this process of sublimation, will become permanent on your substrates.

Supplies:
Drawstring Bag
Black Sublimation Ink Pad
Bold Chisel Sublimation Markers (Blaze, Ruby, Marigold, and Pine)
Basic Fine Point Sublimation Markers (Black)
Protective Paper
Heat Tape
Hero Arts: Poppy Field Bold Prints
A Colorful Life Designs: Sweater Knit Stencil
Canson Mixed Media Paper XL
Stamp Positioner like the MISTI
Heat Press or Craft Press
Blending Brush
Pencil
Step-by-Step Tutorial:
Step 1: Trace the bag onto a piece of Mixed Media Paper with a pencil. The pencil will not transfer to your final sublimated design. I also added where the seams are for the drawstring. You’ll see why in Step 2.

Step 2: Center the outlined paper into your stamp positioner. Tape down the paper. Additionally, mask off the lower seam line with more tape. Our stamp is 6x6", but the bag is bigger than that. I didn’t want the stamped design to end in an awkward spot, so I have it end at the seam. Position the stamp on top.

Step 3: Ink up the Poppy Field stamp with the Black Sublimation Ink Pad. Stamp on to the paper. Because this print is bold and has a lot of solid areas, you may want to repeat stamp a few times like I did.

Step 4: If you find any areas that didn’t stamp perfectly, you can use the Black Fine Point Sublimation Marker to fill in those areas. I corrected a few lines and filled in some spots in the poppies that I didn’t stamp completely.

Step 5: Color in the poppies with Blaze and Ruby Sublimation Markers. I colored the entire flower with Blaze (the brighter red), and then darkened the centers and undersides of the petals with Ruby.
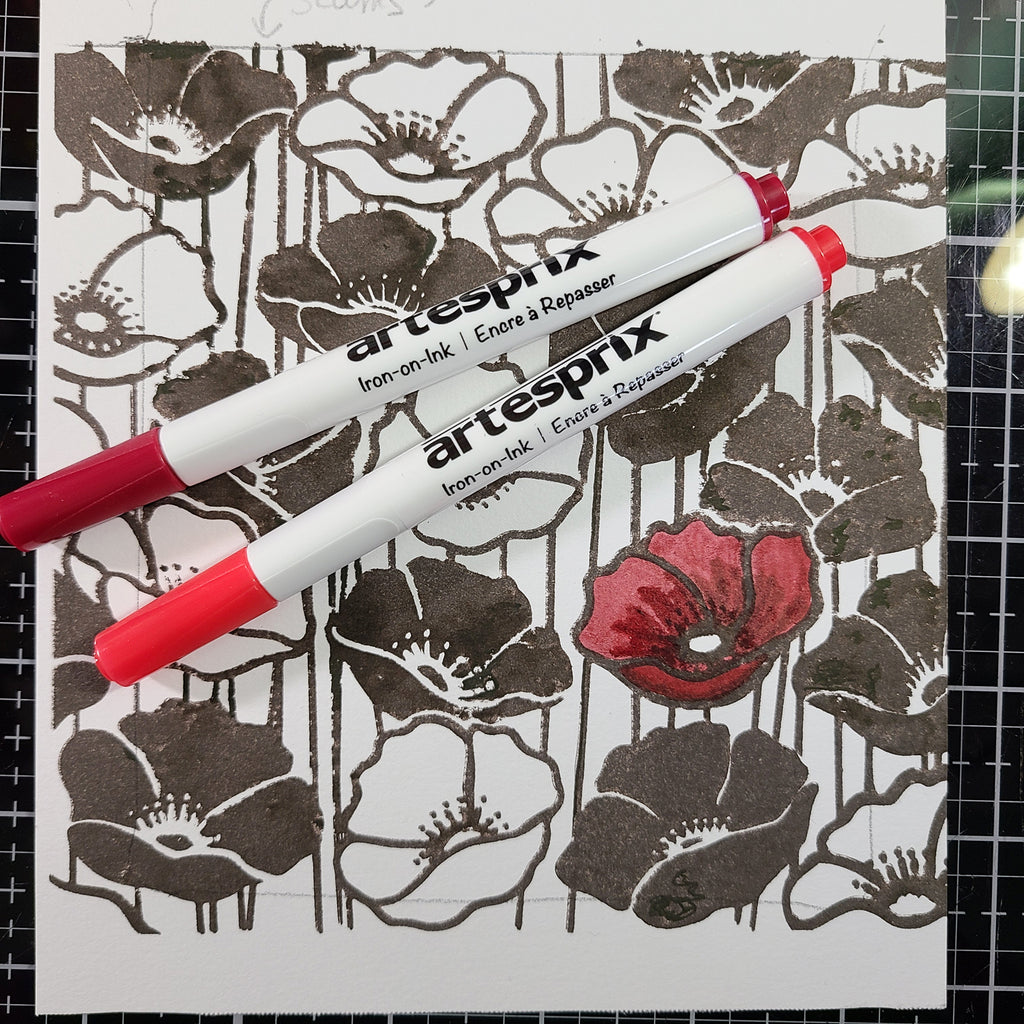
Step 6: Color in the centers of the poppies with the Marigold Sublimation Marker. Next, add lines right next to the stamped ones with the Pine Sublimation Marker. It’s hard to see them in the photo, but you’ll see them once the design has been sublimated.

Step 7: Mask below the lower seam line with tape. Tape the Sweater Knit stencil on top, having the design end at the lower seam line. Ink the stencil with the Black Sublimation Ink Pad and a blending brush. Here is my finished design. I love how those two bold prints work together!

Step 8: Attach your completed design face down on to the Wine Bag with Heat Tape. The bag can be sublimated on either side. Use plenty of Heat Tape if you’re using a handheld heat source.

Step 9: It’s time to make the "Sublimation Sandwich". This sandwich not only ensures a great transfer of your design, but it will protect your heat source as well. Your sandwich will be: Protective Paper, Design (face down) ,Wine Bag, Protective Paper.

Step 10: Press the "Sublimation Sandwich" for 45 seconds at 400℉.

Step 11: It’s time for the "Peek Test"! Lift up a corner of the design to make sure it sublimated properly. Look at how fabulous those poppies are!

Here is the completed Drawstring Bag next to the original design. Those colors really pop, even on the brown bag.
The bag is ready to fill! I love how this turned out, and I will definitely be sublimating the other side with the same design. How would you like to get more ideas on using Artesprix’s Sublimation Ink Pads, Markers, and Paint? There’s a Facebook Group that’s just for fans of Artesprix! You can click HERE to join. Also, don’t forget to visit the Artesprix store to see all of the available blanks and bundles, so you can get started with sublimation.
Thanks so much for stopping by. Have an inspiring day!
Alison Heikkila
**This post may contain affiliate links. That means that I may receive compensation if you purchase through the links I have provided. The price you pay for the product or service is not higher, but I may get compensated.**


1 comment
What a gorgeous bag! Learning to stamp like this is on my list.