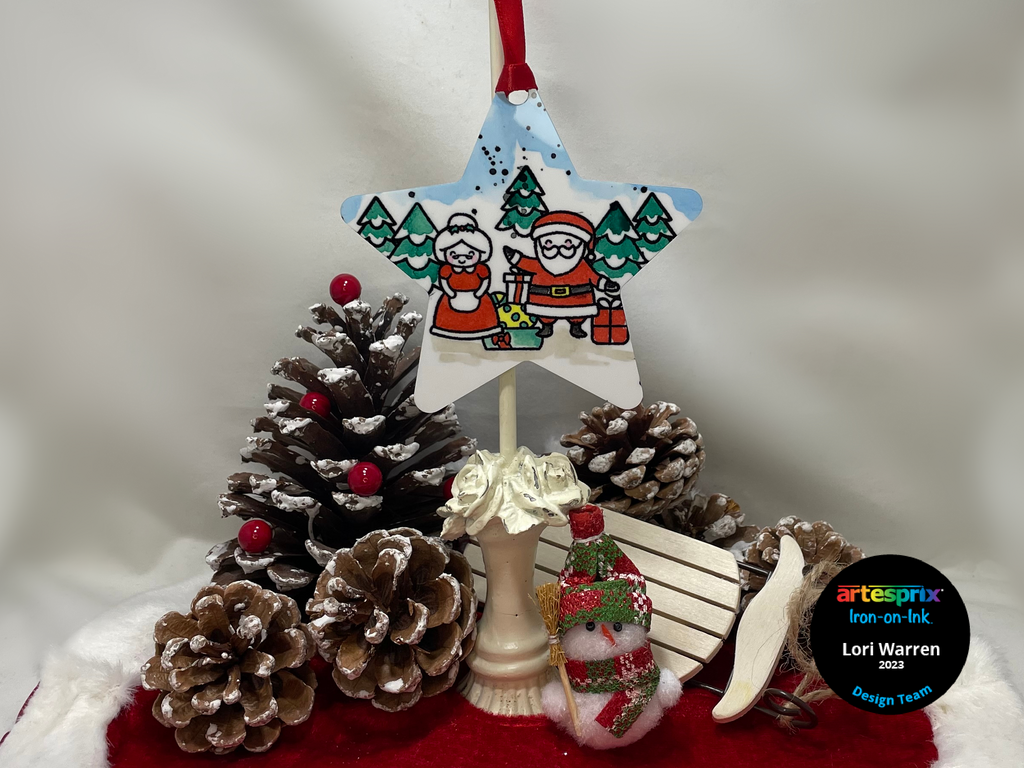
Sublimation Watercolor Santa Star Ornament with Heffy Doodle Stamps
Artesprix Design TeamChristmas Projects, Ink Pads, Inks, Ornament
Products in this post


Hello all, it's Design Team Member Lori here back for another Term with the Artesprix Design Team! We are kicking this term off with a collaboration with Heffy Doddle! I am traditionally a paper crafter but I have grown to love sublimation through Artesprix Iron-on-Ink. This month's featured blank in the Artesprix Shop is a Star Ornament. The below tutorial will walk you through how to use a simple mask technique to create a layered stamp transfer that shines forever!
**This post may contain affiliate links. That means that I may receive compensation if you purchase through the links I have provided. The price you pay for the product or service is not higher, but I may get compensated.**
What is Sublimation Iron-on-Ink?
It is an interesting and fun product that allows you to create a design on standard copy paper that can then be heat transferred onto surfaces (must have polyester in it or have a polyester coating). Once the project is transferred to the blank, it is lifetime permanent. Before Artesprix, you would need a fancy printer to experience this level of personalization, but not anymore!
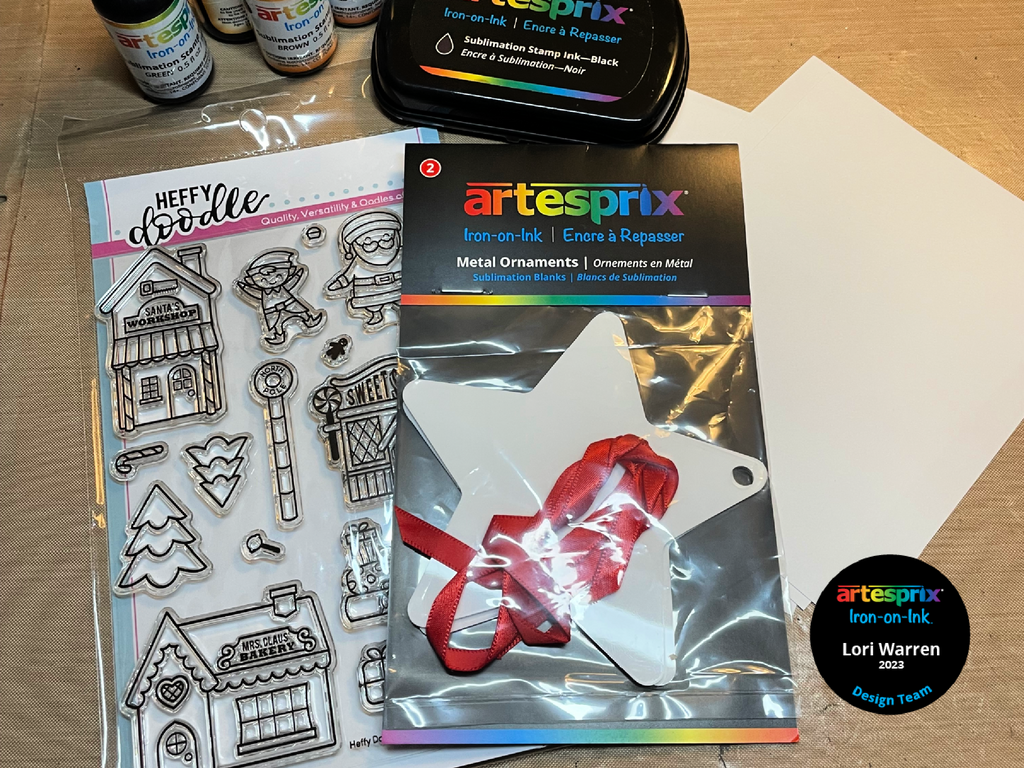
Supplies:
Sublimation Stamp Ink Refills - Red, Blue,, Yellow, Black & Green
Star Ornament 2ct
HeffyDoodle: Santa Village Stamp Set, Starfall Stencil
Regular Stamp Ink
Craft Mat
Paint Brush
Pencil
Computer Paper
Heat Press, Craft Press, or Home Iron
Step-by-Step Tutorial:
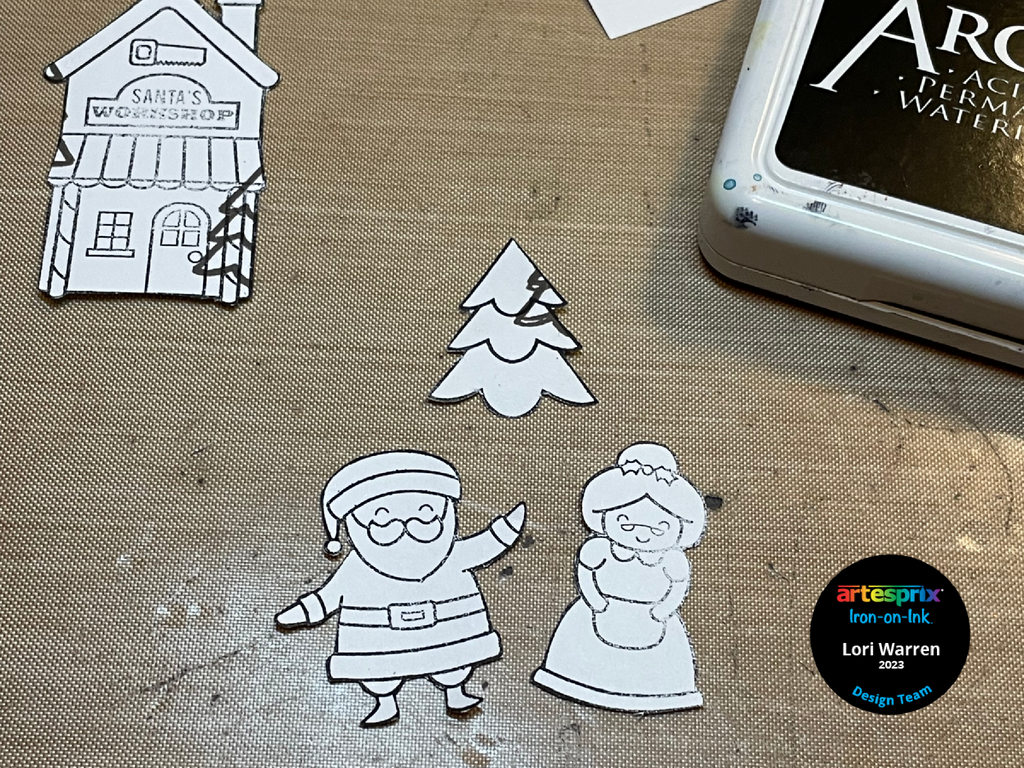
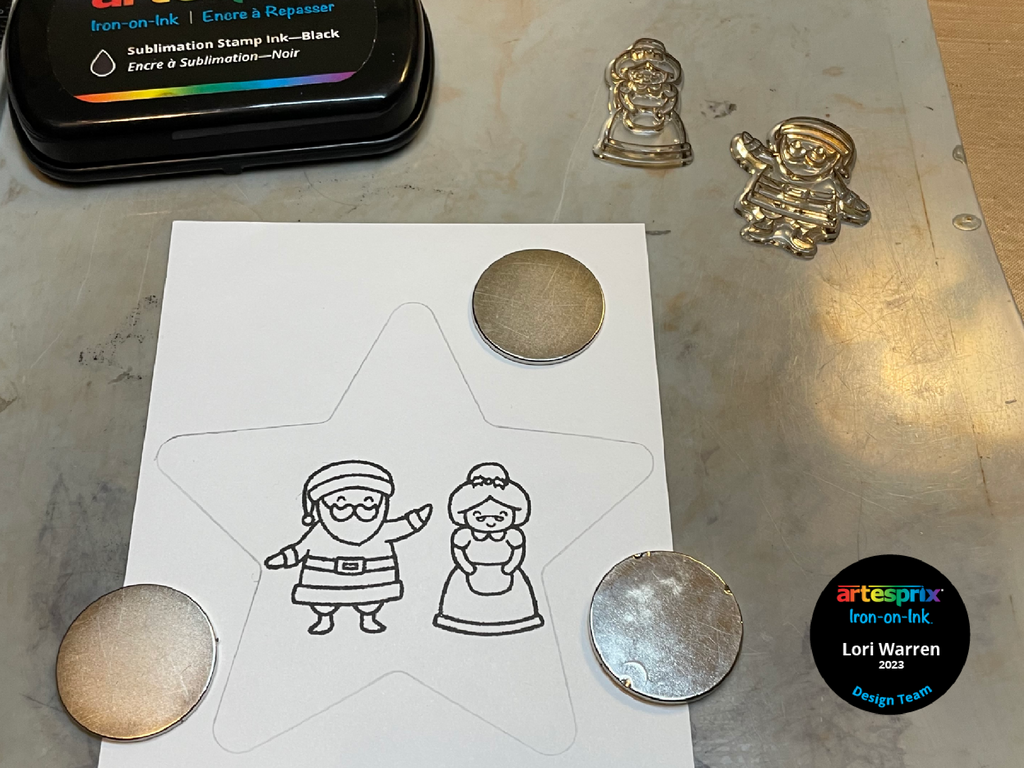
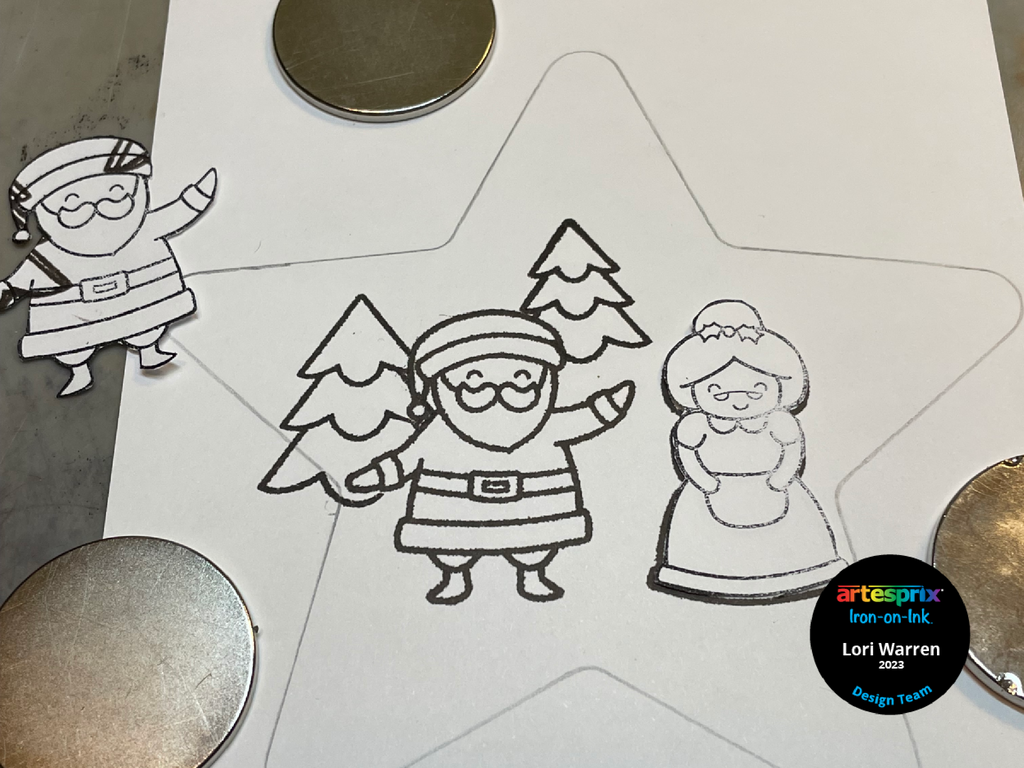
Step 1: Start by stamping designs with regular ink. "Fussy Cut" them out as we will be using them as a mask.
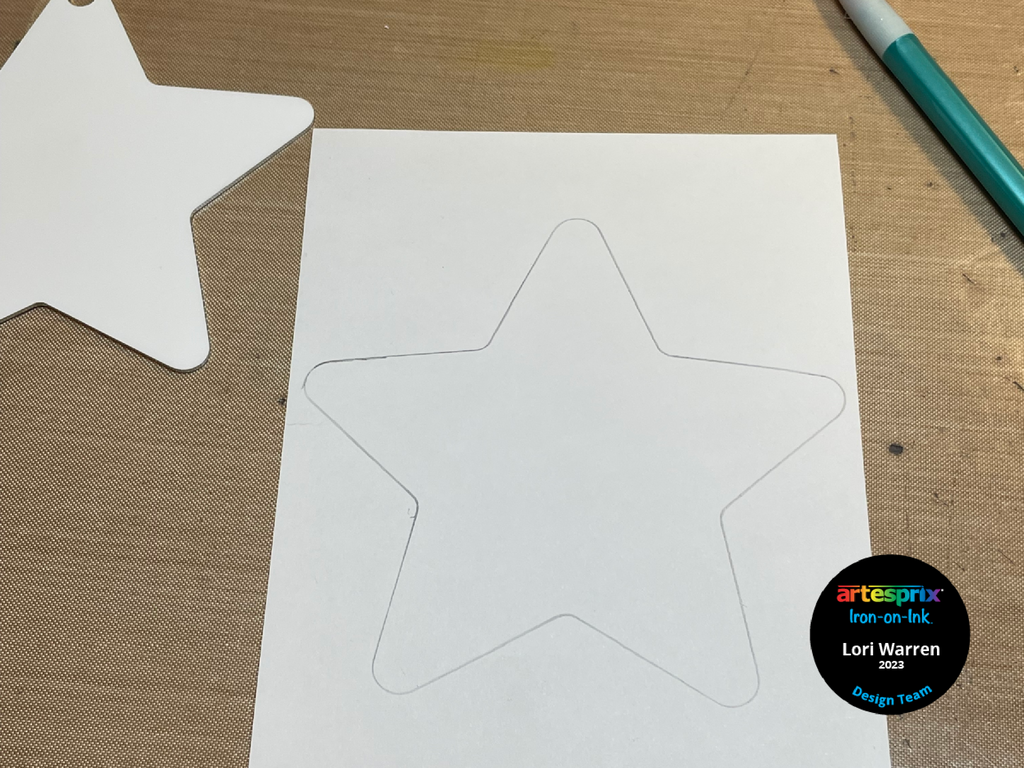
Step 2: Trace the Star Ornament using a pencil on plain copy paper.
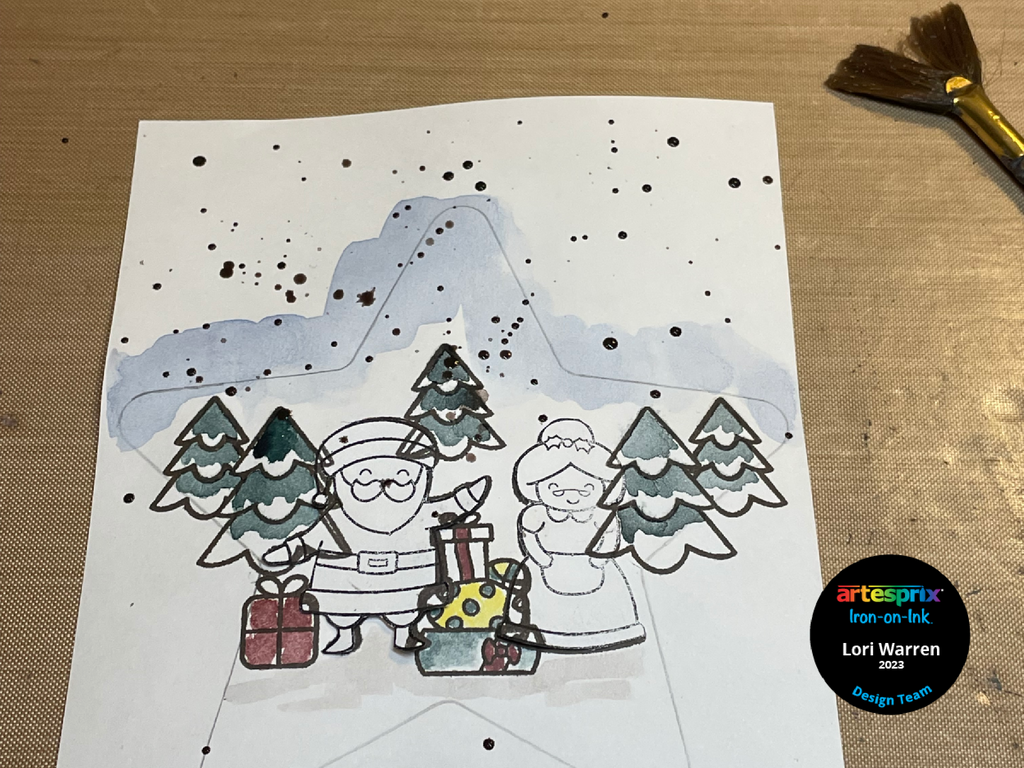
Step 3: Stamp the focal points, Mr. & Mrs. Claus in this case, onto the center of the star template using Blank Sublimation Stamp Pad Ink.
Step 4: Cover Mr. & Mrs. Claus with the “stamped masks” and stamp trees into the background.
Step 5: Apply Blue Sublimation Stamp Ink Refill onto craft mat (or non-porous surface) and dilute with water. Using a brush, apply to the design as desired.
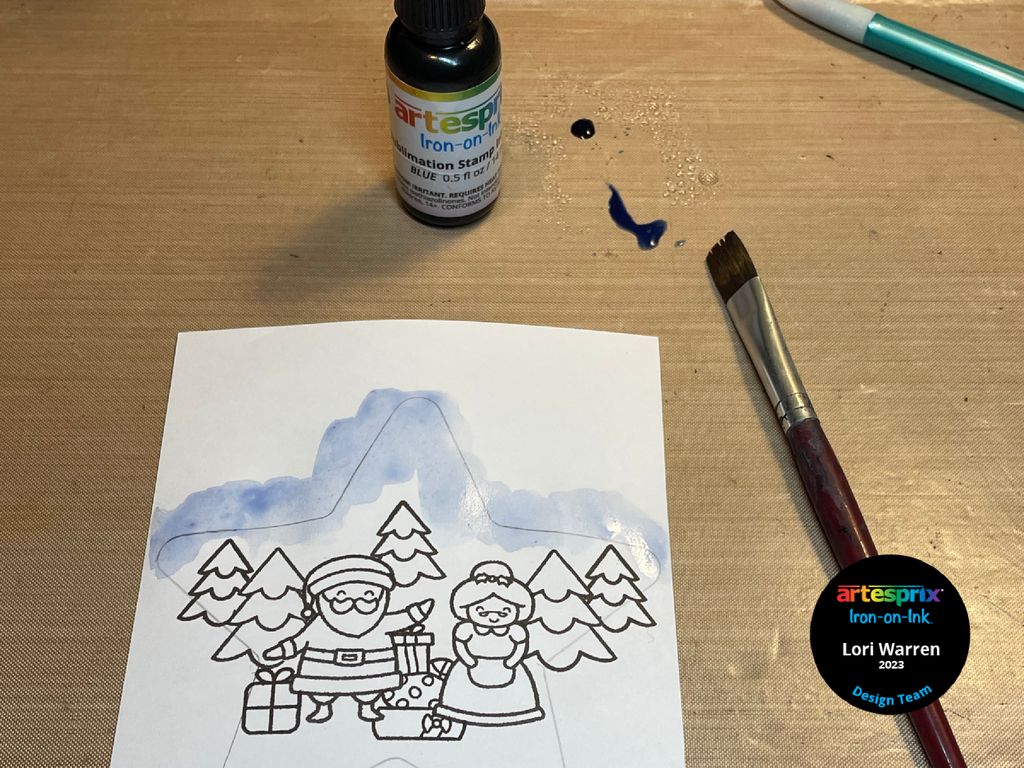
Step 6: Dilute other Sublimation Stamp Ink colors with water to complete the watercolor design.
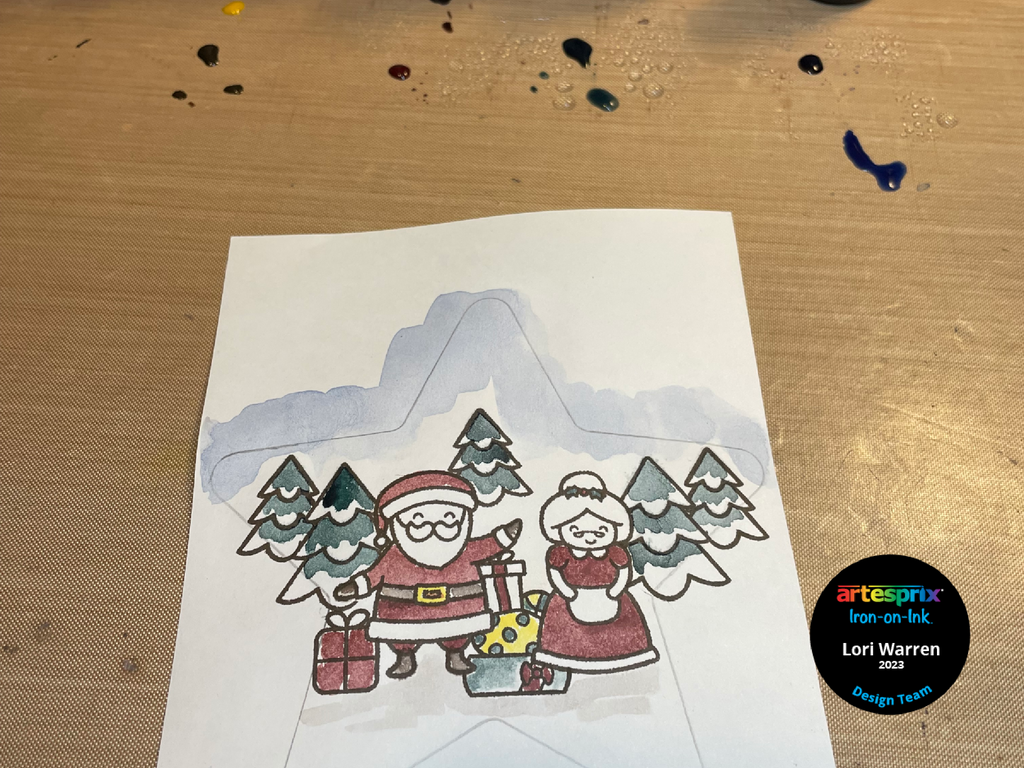
Step 7: (Optional) On a craft mat, dilute Black Sublimation Stamp Refill Ink. Use a fan brush to add paint splatters.
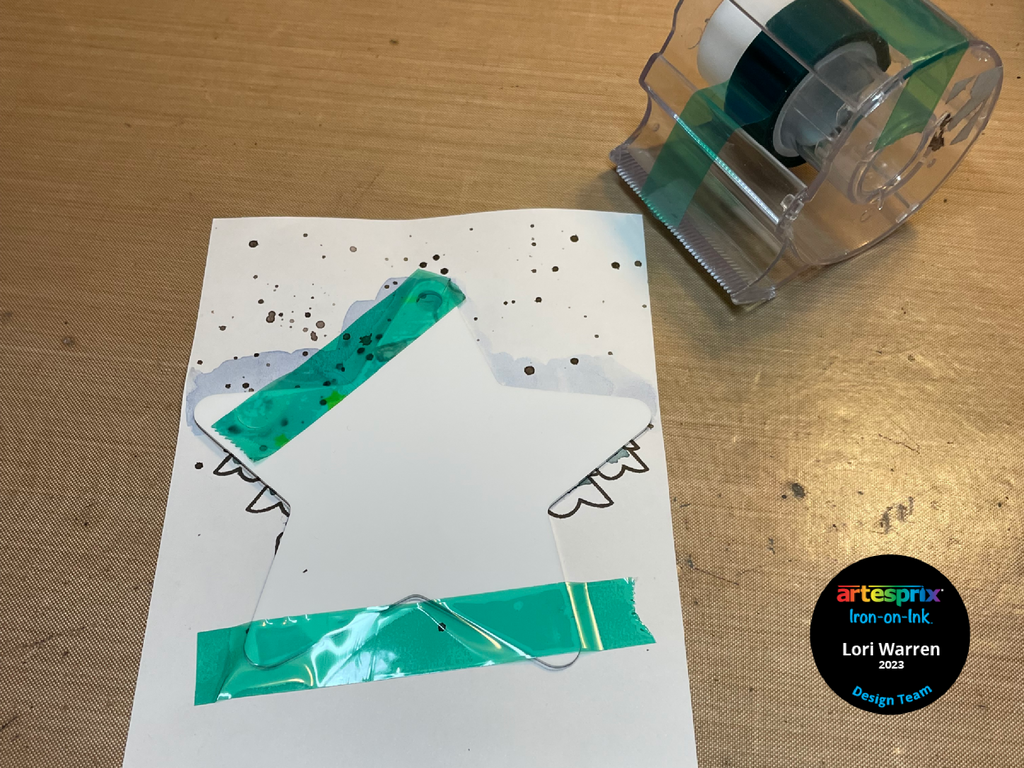
Step 8: Place Star Ornament onto inked paper and secure with heat tape.
Step 9: Make a "Sublimation Sandwich" by placing the secured project between two pieces of protective paper.
Step 10: Heat set in accordance to the blank speficiations. Star Ornaments call for 75 seconds at 400℉.
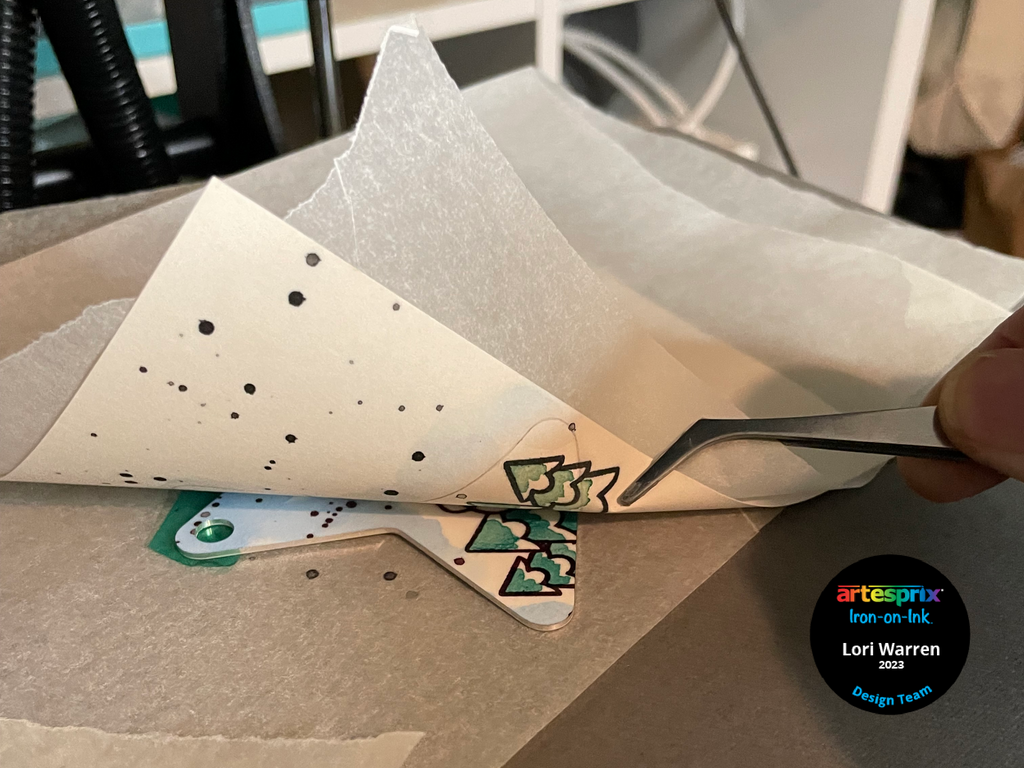
Step 11: After heat set, take-a-peek at the ornament to ensure transfer was successful Do not remove tape until transfer is confirmed so you can re-heat if needed.
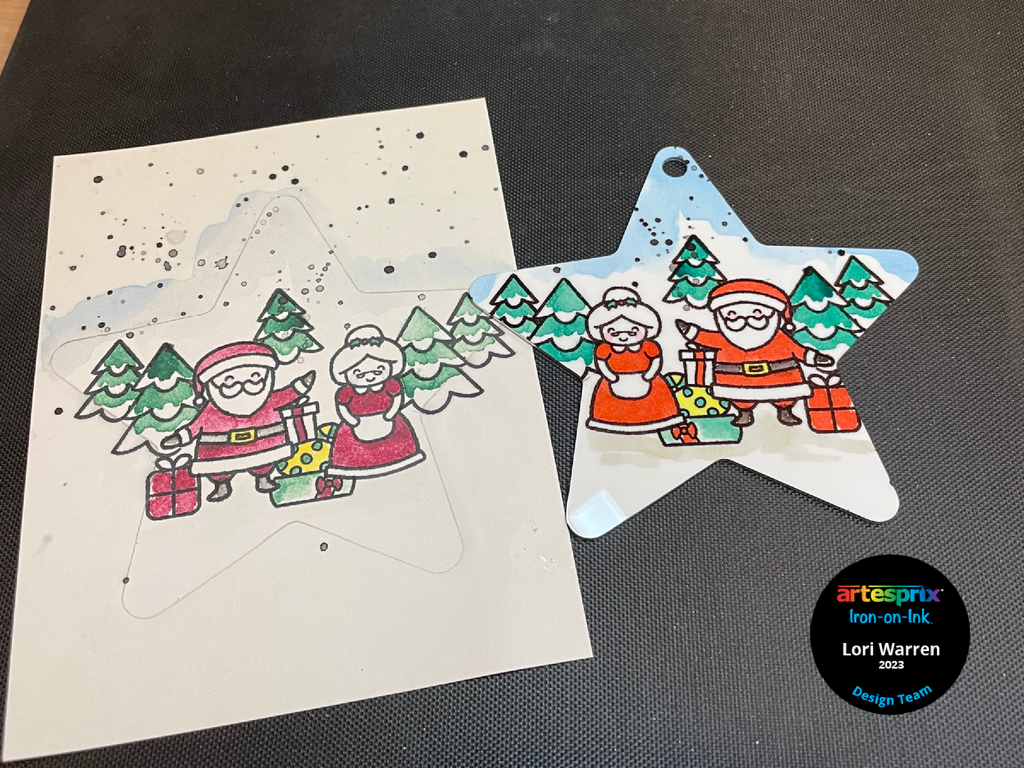
Step 12: Remove paper to reveal the transferred design.
Step 13: Allow to cool before personalizing the opposite side. Add the included red ribbon to ornament for easy hanging.
These Blank of the Month Star Ornaments are perfect for the holiday season. Whether it be for a Christmas Tree or gift wrapping accent, these blank ornaments are something you'll want to have on hand when holiday inspiration strikes. They are only available for the month of November so don't wait to grab yours!
The Artesprix Sublimation products make it so fun and easy to transfer designs created with my paper crafting supplies, the possibilities are endless! If you decide to try this project please share it with us using #Artesprix & #IrononInk, or post it to the Artesprix Facebook Group.
Looking forward to sharing more inspiration with you all for the next 6 months.
Happy Day!
Lori Warren
**This post may contain affiliate links. That means that I may receive compensation if you purchase through the links I have provided. The price you pay for the product or service is not higher, but I may get compensated.**


1 comment
That water color technique and the masking are really cool. Ok going to give it a try.