The Glitter Guy October Sublimation Subscription Box
Artesprix LLCBookmark, Key Chain, Markers, Tumbler
Products in this post

Artesprix Heat Tape
$8.49
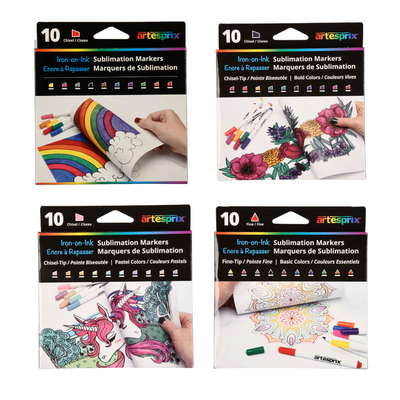
Hey Crafty Friends!! Team Artesprix is thrilled to be teaming up with The Glitter Guy on their October Subscription Box. The glitter lover in you will be blown away by the magic of these Sublimation Markers. The October edition of the Subscription Box from The Glitter Guy has everything you need to complete multiple sublimation projects, as well as all the usual TGG swag, so let's dive in! This Box Blog is divided into 3 separate projects, starting with the easiest and graduating to the tumbler. We recommend starting with the bookmark and keychain, then completing the tumbler project.

What are Artesprix Sublimation Markers?
Artesprix Sublimation Markers give anyone the opportunity to experience the professional level of personalization that traditional Sublimation offers, in craft form. The design created with the Sublimation Markers can be transferred with heat and pressure to compatible materials that will last for a lifetime. You can wash, scrub, or try to scratch it off but it will be 100% permanent.

Materials:
Included in The Glitter Guy October Subscription Box:
Other Tools:
Heat Source: Home Iron, Craft Press, or Heat Press
Designated Craft Oven
Heat Gun
Copy Paper
Scissors
Additional Helpful Tools, not required:
Heat resistant gloves
Stencils
Cutting Machine
Light Box for tracing
Before getting started: Sublimation Markers should be stored horizontally when not in use. Place markers tip down up to 30 minutes before use and keep tip down during use. You can find print friendly directions for each blank here.
Step-by-Step Tutorial:
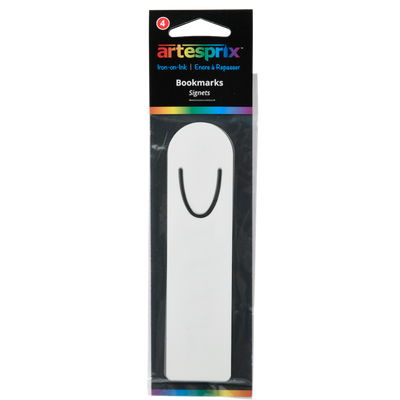
Project 1: Sublimation Bookmark
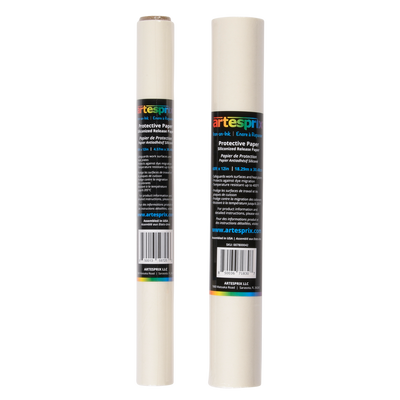
Step 1.1: The first thing we need to do is cut the 8x11" piece of protective paper accordingly so we are set up for our projects. Begin by folding the piece of paper "hamburger".

Next, cut each of those halves in half, one piece length wise and one piece width wise.

Step 1.2: Using a piece of copy paper, trace your bookmark with a pencil. This allows you to create your template.

Pro Tip: This is a great time to pre-heat your heat source. The directions are dependent on the blank.
| Heat Source: | Temperature: | Time: |
| Heat Press | 400 ℉ | 45 Seconds |
| Craft Press | 360 ℉ | 75 Seconds |
| Home Iron | Highest Heat, No Steam | 3 Minutes |
Step 1.3: Now it is time to get creative! You can free hand doodle with the Sublimation Markers, but keep in mind any text has to be mirrored. You can use stencils, a light box to trace. or your electronic cutting machine.

We used a stencil we snagged from Dollar Tree, we flipped the stencil over to create mirrored text and used a pencil to trace, then colored it in with the markers.
(Coloring outside the lines of the template is encouraged :) ).

Pro Tip: Do not worry if the marker colors looks muted on the paper, this is all a part of the magic and your colors will come to life after the design is transferred.
Step 1.4: If necessary, trim down your copy paper leaving 1 or more inches around your colored creation.
Step 1.5: Using your Heat Tape, secure your design to your bookmark. The white glossy side of the bookmark needs to be touching your design. If you are using a Heat Press, only 2-3 pieces should be necessary, if using a Home Iron or Easy Press adding more Heat Tape is recommended to prevent any shifting during the transformation process.

Step 1.6: Now you're ready to make your "Sublimation Sandwich". Flip your secured design over so the copy paper is on top and place on your pre-cut piece of siliconized protective paper. Take your other pre-cut piece of protective paper and place on top of your copy paper as your "top bun".

(If you are looking at your "Sublimation Sandwich" from the top you should be able to read any text correctly through your "top bun" and you should not see your bookmark.)
| Heat Source: | Temperature: | Time: |
| Heat Press | 400 ℉ | 45 Seconds |
| Cricut Easy Press 1 | 360 ℉ | 75 Seconds |
| Home Iron | Highest Heat, No Steam | 3 Minutes |
Step 1.7: Once your heat sourced as reached temperature, press. If using a Home Iron or Craft Press, add firm pressure.

Step 1.8: "Peek Test" Time. Before removing any heat tape, carefully (because it is hot!) peel back a some of the copy paper and see if you got a good transfer. If you didn't, check your time, temperature, pressure, and ensure your "Sublimation Sandwich" wasn't upside down, and try again.

Step 1.9: The BIG reveal! Once you have ensured your transfer was successful, pull back the copy paper and reveal your unique and vivid design!

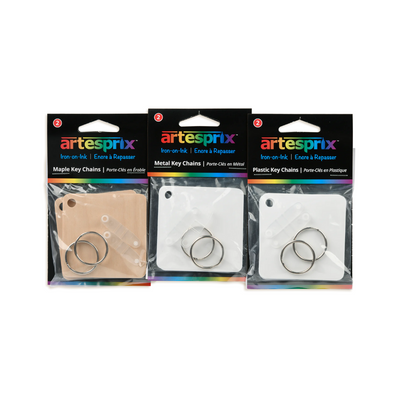
Project 2: Sublimation Key Chain
Step 2.1: It is super important that you follow Step 1.1 above to ensure you have the right size protective paper for both projects.
Step 2.2: Using plain copy paper, a pencil and your key chain, trace to create a template.

Pro Tip: This is a great time to pre-heat your heat source so it can warm up while you create.
| Maple Key Chain | Metal Key Chain | Plastic Key Chain | |
| Heat Press | 400℉, 60 Seconds | 400℉, 45 seconds | 400℉, 60 Seconds |
| Cricut Easy Press 1 | 360℉ , 90 seconds | 360℉, 75 seconds | 360℉, 90 Seconds |
| Home Iron | Highest Heat, No Steam, 3 minutes | Highest Heat, No Steam, 3 minutes | Highest Heat, No Steam, 3 Minutes |
Step 2.3: Now it is time to get creative! You can free hand doodle with the Sublimation Markers, but keep in mind any text has to be mirrored. You can use stencils, a light box to trace. or your electronic cutting machine.


We used a stencil we snagged from Dollar Tree, used a pencil to trace, then colored it in with the markers.

Pro Tip: Do not worry if the marker colors looks muted on the paper, this is all a part of the magic and your colors will come to life after the design is transferred.
Step 2.4: If necessary trim down your copy paper leaving 1 or more inches around your colored creation.
Step 2.5: Using your Heat Tape, secure your design to your keychain. It is double sided so it does not matter which side you transfer to first. If you are using a Heat Press, only 2-3 pieces should be necessary, if using a Home Iron or Cricut Easy Press adding more Heat Tape is recommended to prevent any shifting during the transformation process.

Step 2.6: Now you're ready to make your "Sublimation Sandwich". Flip your secured design over so the copy paper is on top and place on your pre-cut piece of siliconized protective paper. Take your other pre-cut piece of protective paper and place on top of your copy paper as your "top bun".


(If you are looking at your "Sublimation Sandwich" from the top you should be able (in this case) see the butterfly through your "top bun" and you should not see your key chain.)
Step 2.7: Transfer according to the directions, different materials can mean different transfer times.
| Maple Key Chain | Metal Key Chain | Plastic Key Chain | |
| Heat Press | 400℉, 60 Seconds | 400℉, 45 seconds | 400℉, 60 Seconds |
| Cricut Easy Press 1 | 360℉ , 90 seconds | 360℉, 75 seconds | 360℉, 90 Seconds |
| Home Iron | Highest Heat, No Steam, 3 minutes | Highest Heat, No Steam, 3 minutes | Highest Heat, No Steam, 3 Minutes |
Step 2.8: "Peek Test" Time. Before removing any heat tape, carefully (because it is hot!) peel back a some of the copy paper and see if you got a good transfer. If you didn't, check your time, temperature, pressure, and ensure your "Sublimation Sandwich" wasn't upside down, and try again.

Step 2.9: The BIG reveal! Once you have ensured your transfer was successful, pull back the copy paper and reveal your unique and vivid design!

Step 2.10: Repeat the steps above to create a design for the other side before securing your key ring using your key tab. If your Artesprix protective siliconized paper has no ink on it you can reuse it. Another substitute for protective paper is parchment paper or uncoated butcher paper, however, we do not recommend ever reusing these alternative tools in a transfer project.

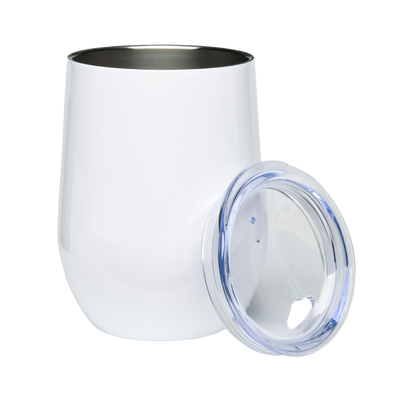
Project 3: Sublimation Tumbler
Step 3.1: Use a ruler or a measuring tape to get a general idea of your template, we recommend keeping your design in a 2"x6" template.
Pro Tip: This is a great time to preheat your designated Craft Oven to 350℉. You can also use an old Air Fryer but after you use it for Sublimation it should not be used for food consumption.
Step 3.2: Using plain copy paper, get creative with your Sublimation Markers!

You can free hand doodle with the Sublimation Markers, but keep in mind any text has to be mirrored. You can use stencils, a light box to trace. or your electronic cutting machine.

Pro Tip: Do not worry if the marker colors looks muted on the paper, this is all a part of the magic and your colors will come to life after the design is transferred.

Step 3.3: Cut your design down but leave space around so you have area to tape.
Step 3.4: Remove the lid. Using Heat Tape, secure each design, be sure to tape around your design and not over it as you do not want it to interfere with the transfer process. Do not be stingy with the tape, you do not want to let any color escape!

Pro Tip: Fray as needed to ensure your design is completely flat with no crinkles in the paper. We also cut smaller pieces of tape to ensure a successful transfer.

Step 3.5: Once all your designs are secure with Heat Tape, we need to add our "pressure". Place your Tumbler Wrap around your Tumbler.

Note: Try to make it look as close to the photo as possible, equal amounts of wrap under the tumbler and above the rim.
Step 3.5: Using a Heat Gun, quickly apply heat on all equal sides. This process happens quickly and as soon as you see it shrink down to the shape of the tumbler stop applying heat.

Step 3.6: Bake your tumbler at 350℉ for 5 minutes. You should be able to see the design through the wrap towards the end of the process.

Step 3.7: Once 5 minutes is reached, remove your tumbler with heat resistant tools like heat gloves/grilling gloves/oven mit and place on heat resistant work surface, it is hot!

Step 3.8: Remove your wrap while it is warm (scissors are helpful), but be sure to not burn yourself! If you can see the design on the inside of your wrap as you remove it, you most likely got a good transfer. You have a second Tumbler Wrap in case the baking process needs to be re-done.

Step 3.9: If you can see the design on the inside of the wrap that you completely removed. Begin to remove each piece of heat tape revealing your permanent design.


We hope you all enjoying exploring Sublimation through Crafting! All the directions can also be found under Support on the website. Don't forget to use your exclusive code for 15% off your order between now and the end of the year. Be sure to tell The Glitter Guy Crew how much you enjoyed this so we can make magic again!
Happy Creating!
Team Artesprix
Products in this post

Artesprix Heat Tape
$8.49

