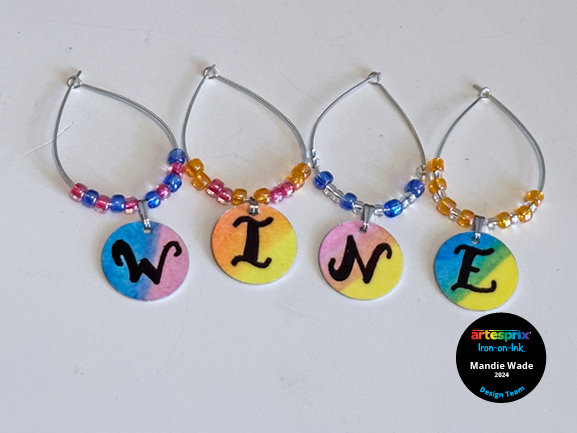
Hi everyone, it’s Mandie from the Mandie’s Scrappin' Blog and super happy to be back on the Artesprix Design Team for the next 6 months! I love how creative I can be with my supplies with Artesprix's line of Sublimation Arts & Crafts Supplies. I'm kicking off my first project for the term with the May Blank of the Month Charms. We will be personalizing them as wine glass charms. Perfect for a custom hostess gift or offer as a party favor.
**This post may contain affiliate links. That means that I may receive compensation if you purchase through the links I have provided. The price you pay for the product or service is not higher, but I may get compensated.**
What is Sublimation Iron-on-Ink?
Iron-on-Ink is an innovative craft sublimation medium to create unique designs that you can transfer to a endless selection of blanks. You can create some amazing one-of-a-kind gifts that will last a lifetime. When the finished sublimation design is combined with heat and pressure, the ink turns into a gas and binds to the polyester fabric or poly-coated blank leaving you with a permanent transfer. Between Artesprix's plethora of Iron-on-Ink products and the endless amount of compatible sublimation blanks, the possibilities are endless! Iron-on inks are so fabulous because you don’t have to invest in an expensive printer to create some very cool projects right in your home! Plus, if you’re more “hands on” or “hands inky” like me, I feel you can get so much more creative with the Sublimation Inks, Paints and Markers that Artesprix offers.
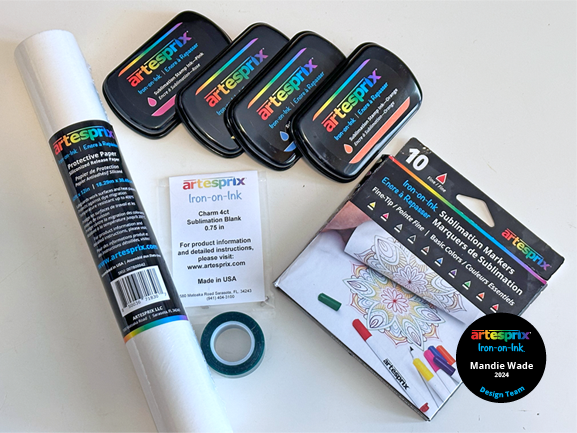
Supplies:
Charms 4ct
Sublimation Stamp Pad
Sublimation Markers - Basic Fine 10ct
Protective Paper Roll
Heat Tape
Pencil
Stamp Block
Paint Brush
Copy Paper
Step-by-Step Tutorial:
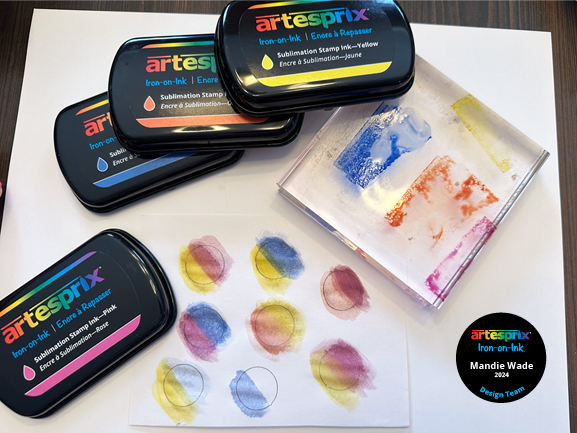
Step 1:Start by tracing a single Charm multiple times onto a blank sheet of copy paper with a pencil. Pencil will not transfer during the sublimation process.
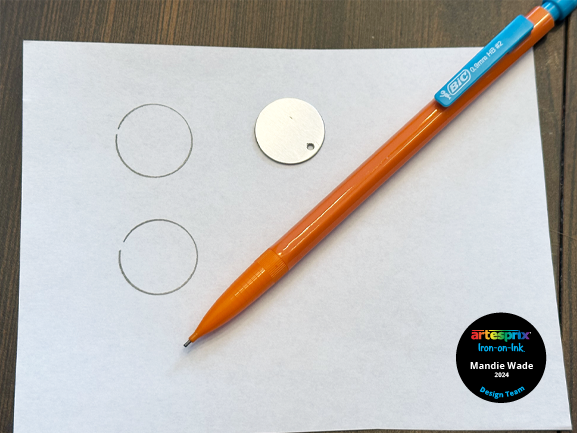
Pro Tip: Trace extra blank spots to play with color mixing. You can save finished transfers for future projects! Artesprix designs never expire!
Step 2: Stamp various Sublimation Ink Pads onto a non-porous surface or an acrylic stamp block. Then use paintbrushes with some water in the ink to create a watercolor effect within your traced circles.
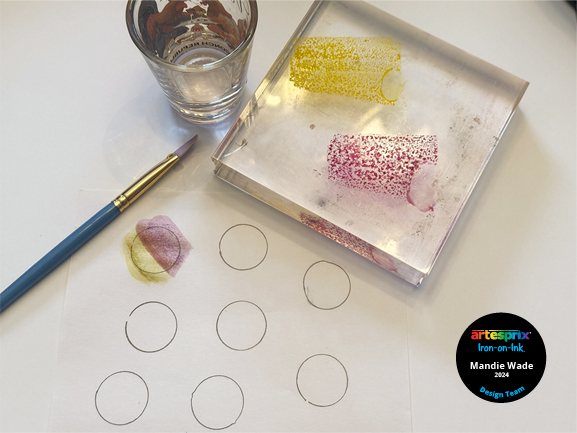
Step 3: Continue to add color to the templates as desired. Keep in mind, the colors will not be fully bright until after they are transferred. You can also mix the colors just like paints. I overlapped my colors for a fun effect.
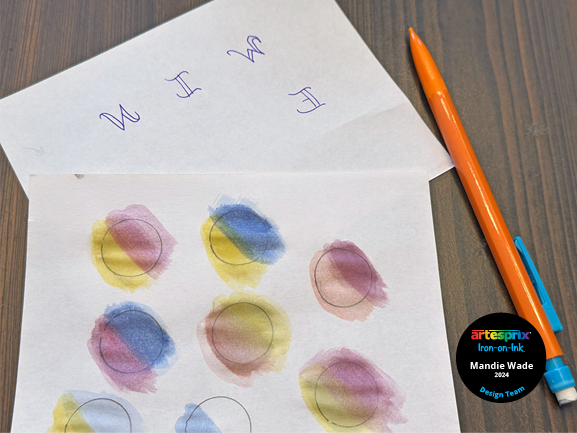
Step 4: Since there are four charms in the set, I decided to spell out "WINE". Sketch letters of my chosen word onto another set of blank circles. Then use a light box (or a window) to trace the reverse of the letters onto my water-colored circles in pencil. I wrote in ballpoint pen which won't affect the transfer.
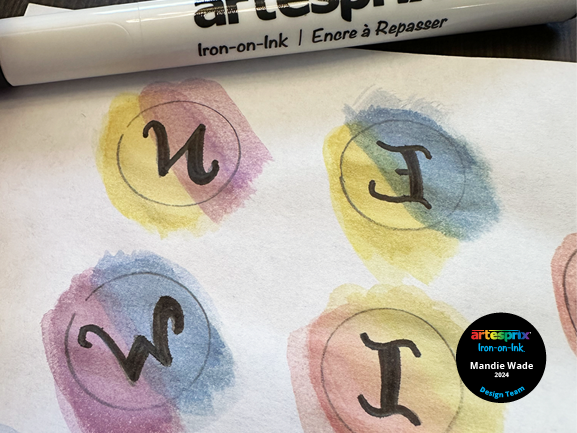
Step 5: Use the Black Fine Tip Sublimation Marker to fill in my letters so they transfer in addition to the background.
Step 6: Place each charm as desired to the finished design, white side face down, secure with the Heat Tape.
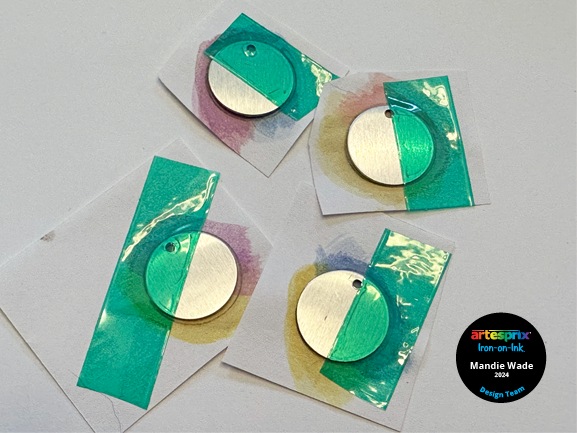
Step 7: Create your "sublimation sandwich". Use Protective Paper on top and bottom to absorb that excess ink from the transfer process.
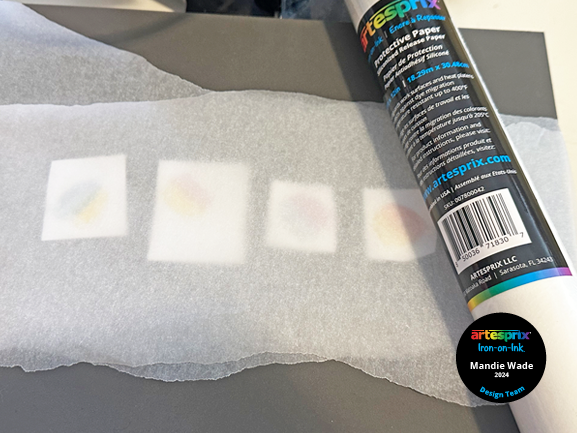
Step 8: We are ready to transfer the design to the Charms. Heat up your heat source to the recommended settings. For this blank it’s recommended 400℉ for 45 seconds with heavy pressure.
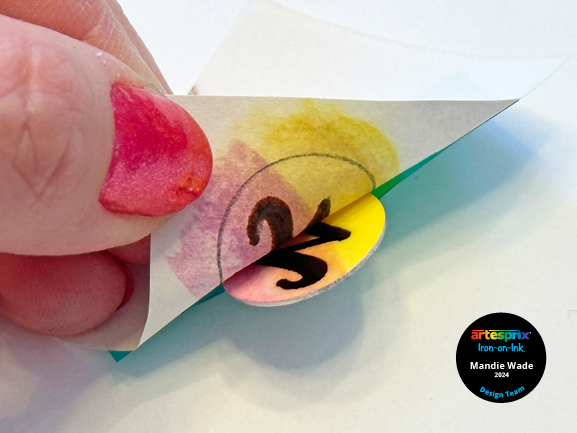
Step 9: After the transfer time is complete, do a "peek text", carefully lift the corner and see if your design has transferred. You’ll want to keep the tape in place in case you need to press again. In our case the color looks great and we can remove the paper from the blank.
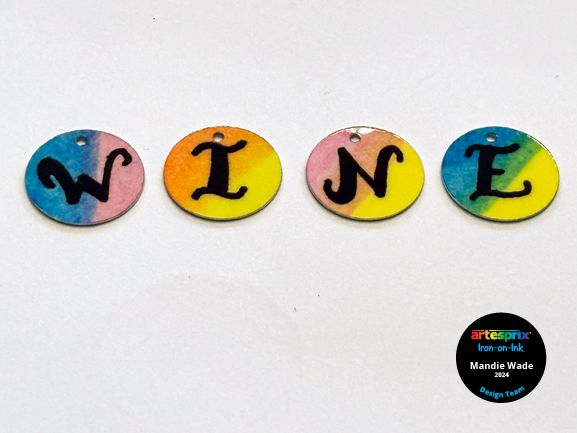
Step 10: Once cool, use the bails included in the set to easily add them to anything! I used hoop earrings to create the loop for the wineglass charms. I pulled out my collection of seed beads to add some bling to each one. Threading the beads onto each hoop.

This would be a fun housewarming gift, hostess gift, or a fun party favor for a small girls night. You could also personalize them with your recipient’s initials and favorite colors. There are so many fun possibilities! Don't forget that these are only available for the month of May so don't wait to grab your set. Looking forward to bringing you more inspiration this term!
Stay Crafty!
Mandie Wade
**This post may contain affiliate links. That means that I may receive compensation if you purchase through the links I have provided. The price you pay for the product or service is not higher, but I may get compensated.**