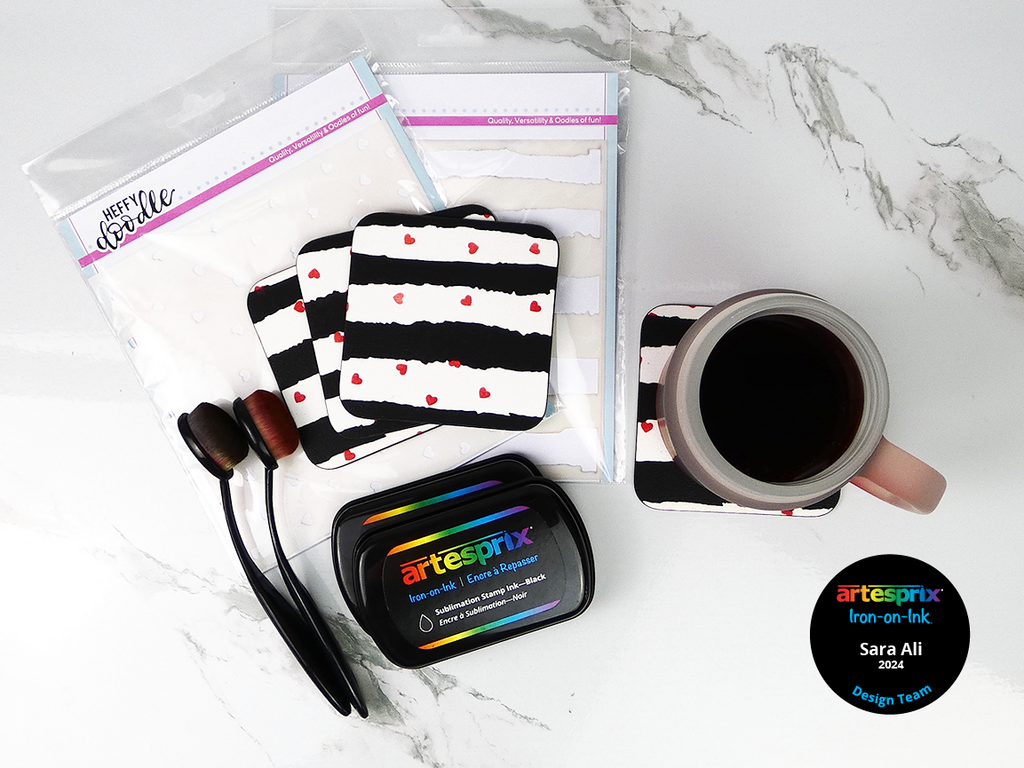
Lovely Textured Coasters with Artesprix Stamp Pads
Artesprix Design TeamCoaster, Ink Pads, Valentine's Day Projects
Products in this post


Hello friends! It’s Design Team Member Sara from One Craft Avenue and today we’re customizing Textured Coasters for your loved ones! This is such a beginner friendly project and it is just in time for the last week of the Patent Celebration Sale with BOGO Sublimation Stamp Pads & Ink Refills. But you can achieve this design with any Iron-on-Ink medium. follow along to learn how!
**This post may contain affiliate links. That means that I may receive compensation if you purchase through the links I have provided. The price you pay for the product or service is not higher, but I may get compensated.**
What is Artesprix Iron-on-Ink?
Artesprix sublimation stamp pads are made with Iron-on-Ink. Iron-on-Ink is a special ink that gets printed onto poly-coated substrates once it is subjected to heat. The inks are always muted on paper, and they become vibrant after they’re heat pressed onto your sublimation blank. Once it is heat pressed, the ink turns to a gas leaving you with a permanent design. The design will be infused into the blank permanently and the sublimated design will not need to be sealed and it will not peel or fade.
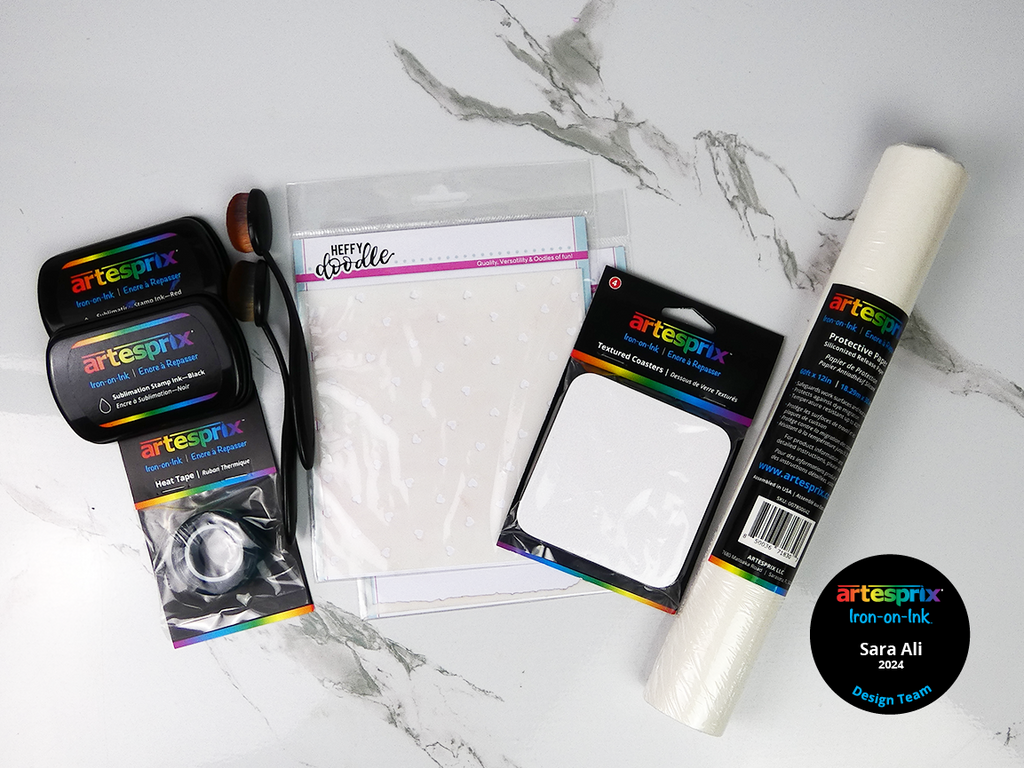
Supplies:
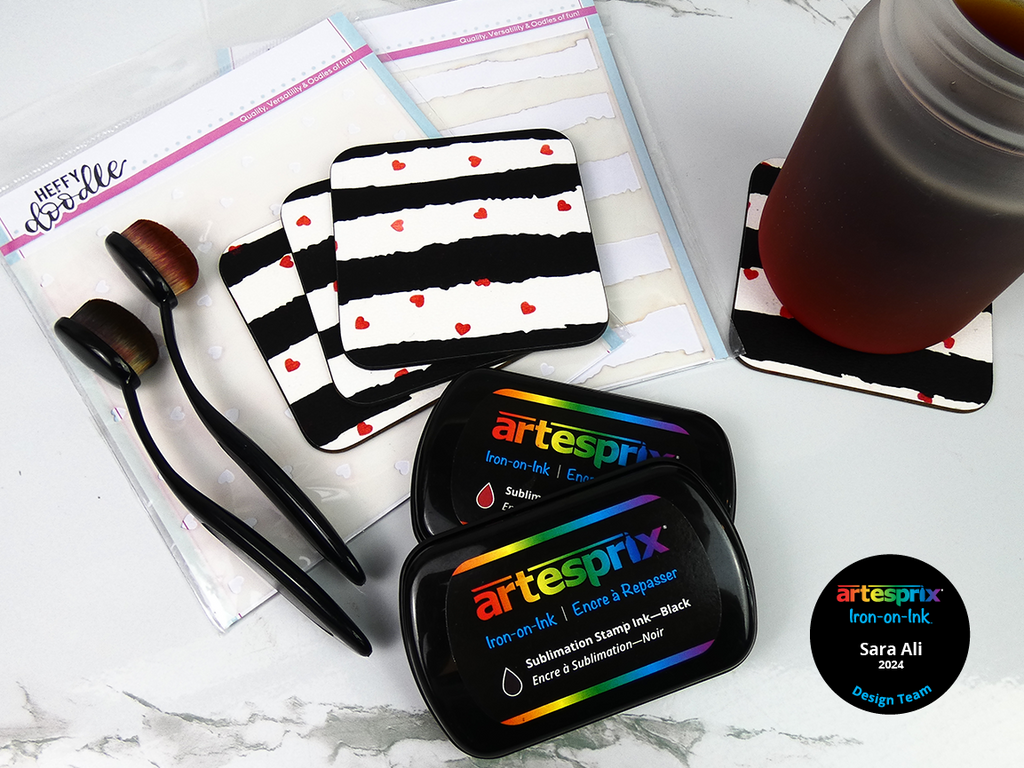
Textured Coasters
Artesprix Sublimation Stamp Pads
Protective Paper
Heat Resistant Tape
Broad Strokes Stencil
Confetti Hearts Stencil
Blending Brush
Mixed Media Paper
Pencil
Masking Tape
Heat Press
Step-by-Step Tutorial:
Step 1: Place your broad strokes stencil on a mixed media paper and secure it with masking tape. Since this stencil is a bit bigger than each coaster, I chose to use its size as a template for my design.
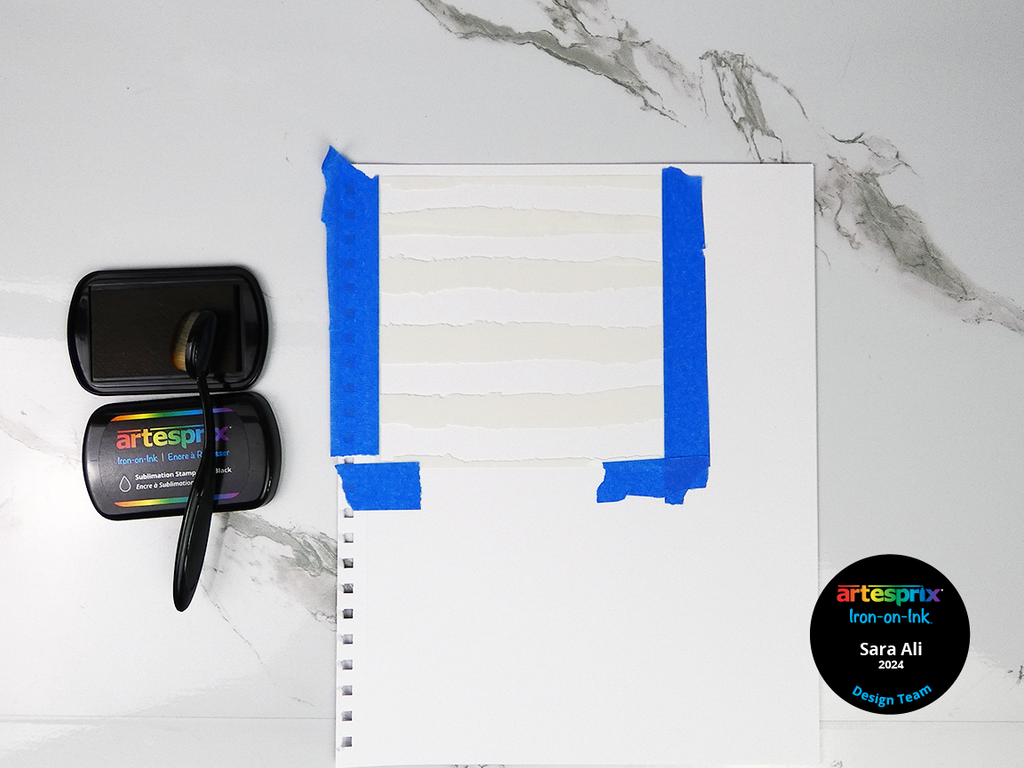
Pro Tip: For thick blanks like these coasters, I like to take it to my turned-off press, and adjust the pressure before turning it on. Then, turn on your press to warm up while we finish taping and preparing our design for pressing. For this blank, you’ll need to set it to 400°F for 90 seconds.
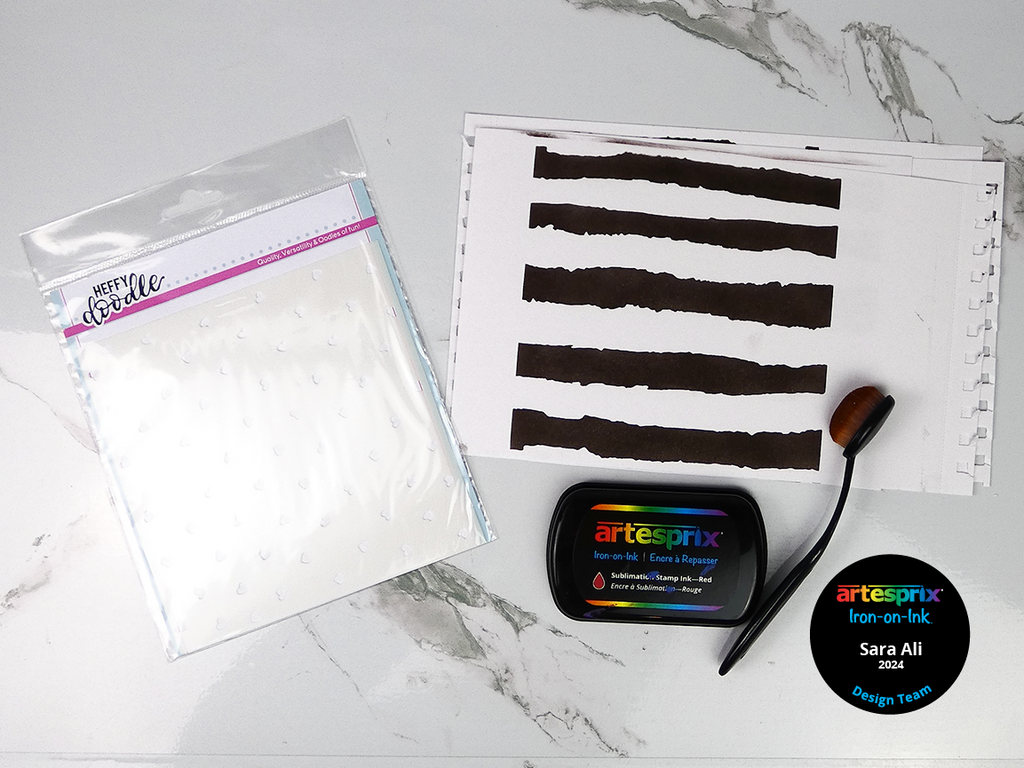
Step 2: Get your Black Sublimation Stamp Pad ready and use your blending brush to pick up ink off the stamp pad. Then, color through the stencil, and peel off the masking tape once you finish!
If you are planning on customizing multiple coasters, you’ll need to create multiple transfers for each coaster.

Step 3: Place your hearts stencil over the same area you colored and secure it with masking tape. Now, use your red sublimation stamp pad and blending brush to color these hearts.
Pro Tip #2 : The red will be overpowered by the black so, you can skip coloring where there are black strokes.
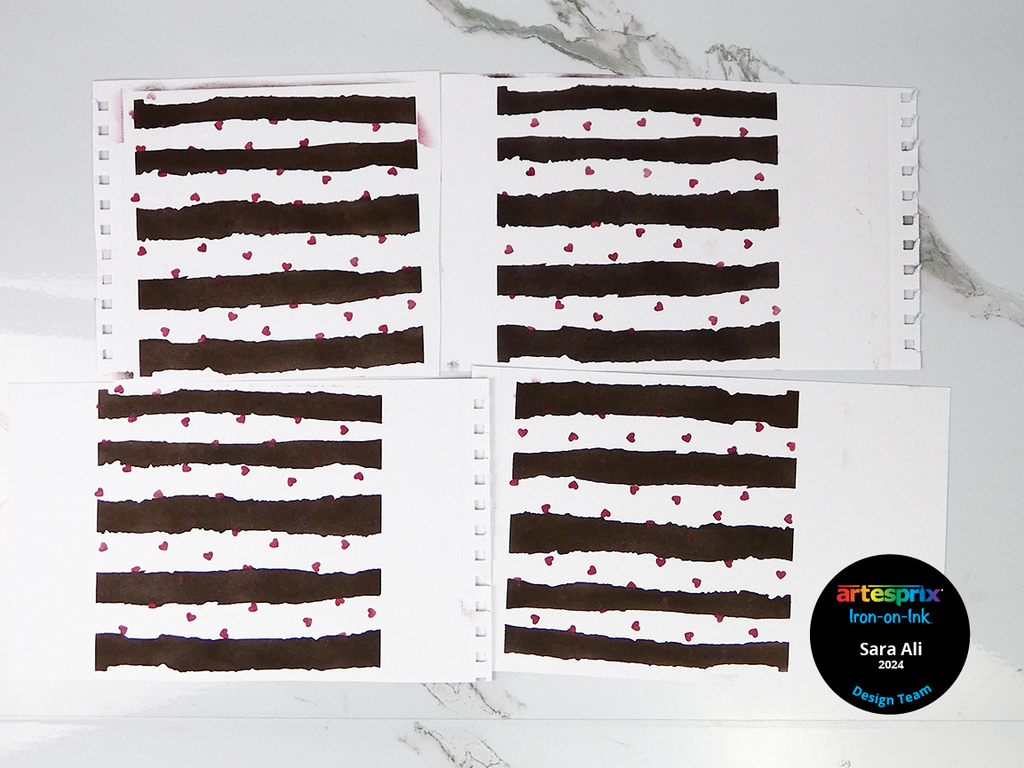
Once you finish, remove your masking tape and your design will be ready!
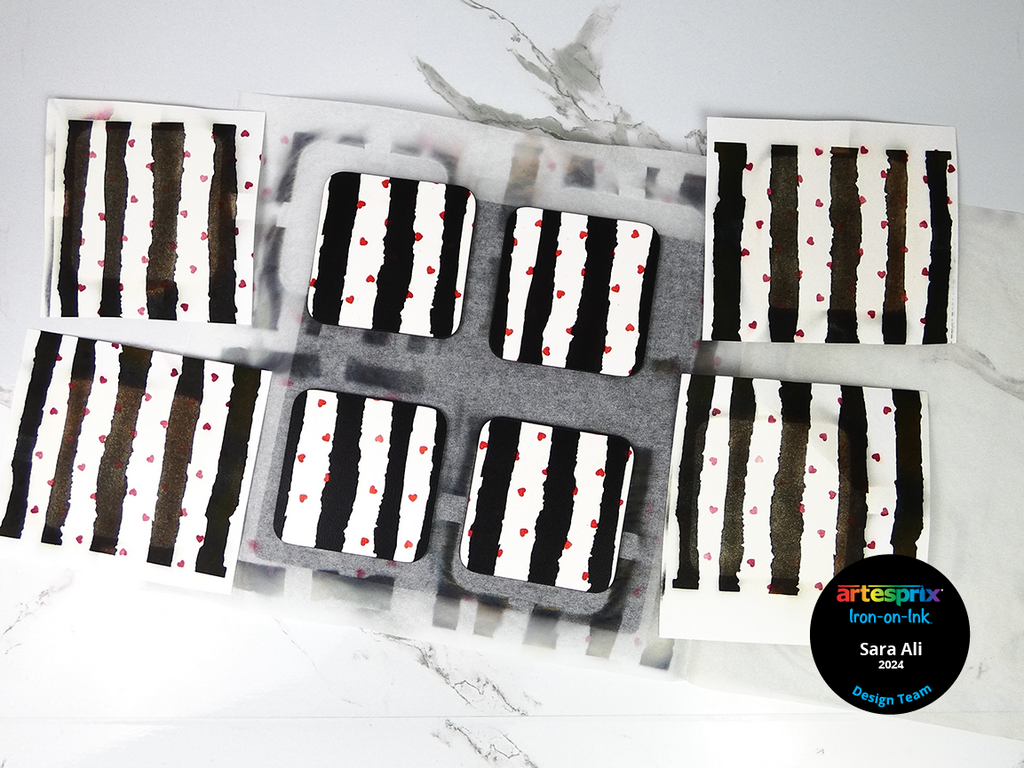
Step 4: Tape your coasters face down to your sublimation design. Secure each coaster with heat resistant tape.
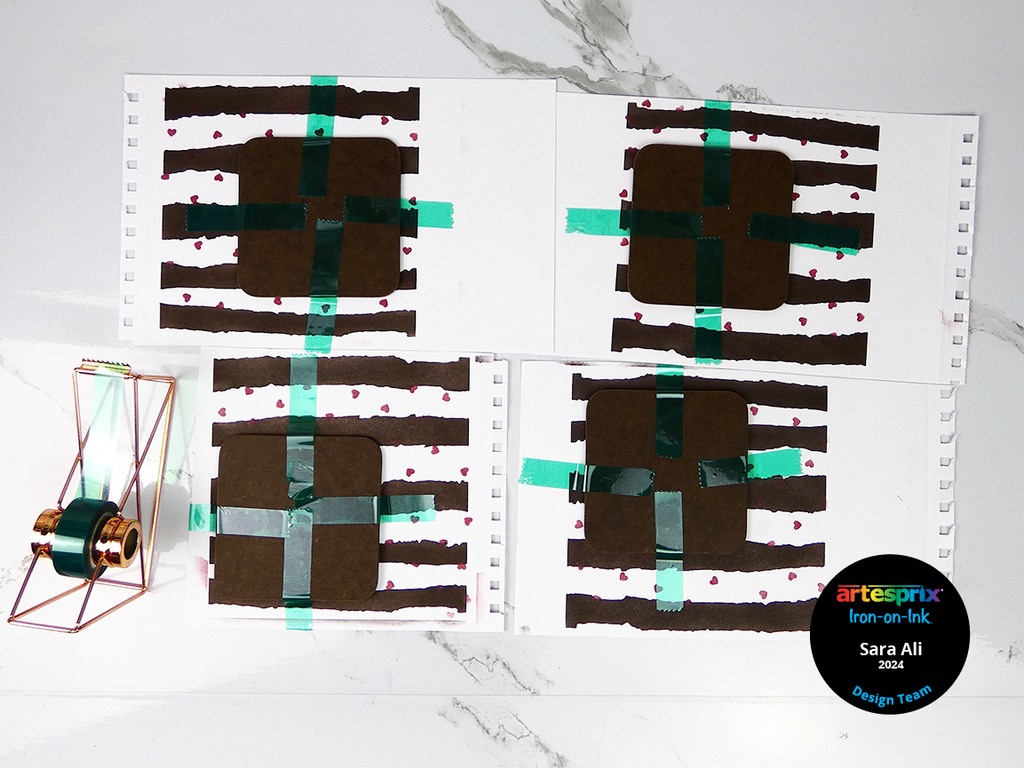
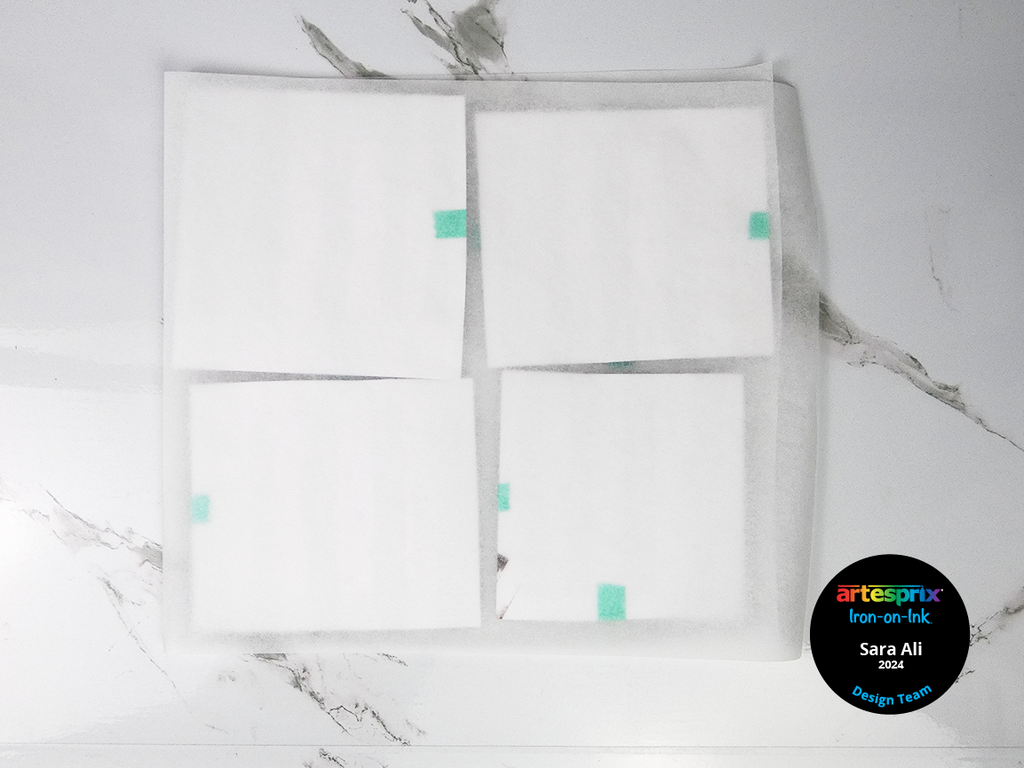
Step 5: Use protective paper to cover the top and bottom of each coaster with the design taped to it. It is very important to use protective paper because we know our design is bigger than the coaster. So, the protective paper will catch any extra Iron-on-Ink (that has no blank to go on) and you won’t have to deal with getting ink on your heat source.
Step 6: It is time to press your design! Your heat press should be set to 400°F and you’ll need to press it for 90 seconds. Check if your heat press can press all the coasters at once and if not plan accordingly. My heat press is 15”x15”, so I was able to press all my coasters at once since they are the same thickness.
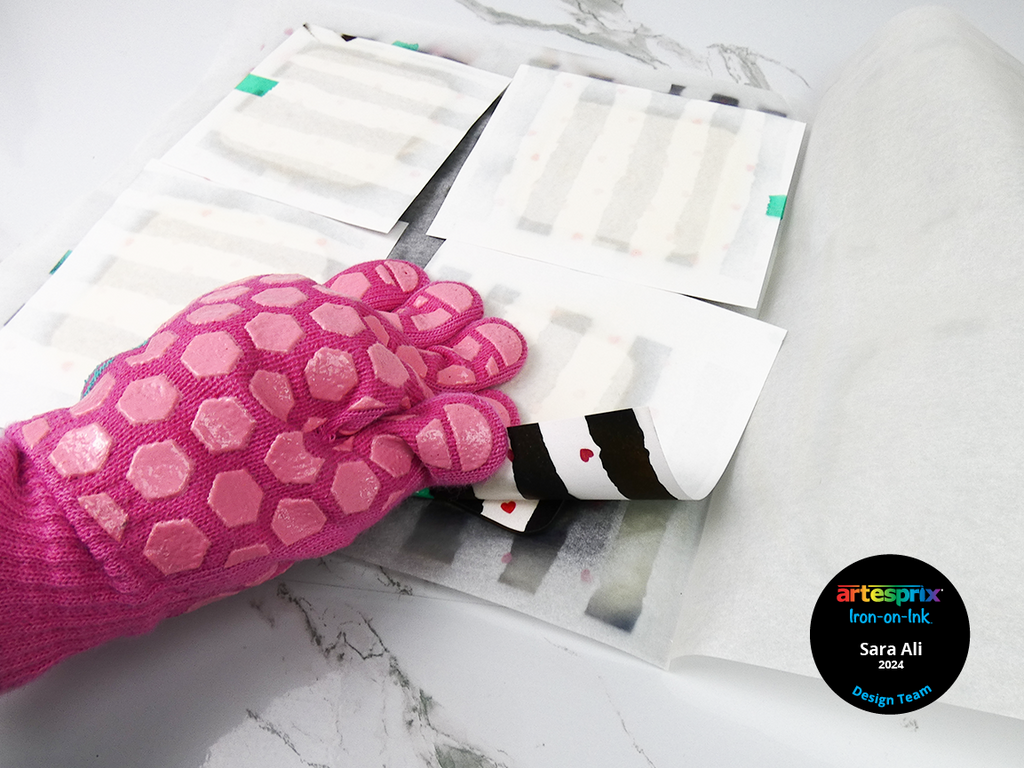
Step 7: After you press your design, it is time for a “peek test”. A peek test guarantees a vibrant transfer without wasting materials. Peel one corner of your design to get a peek of how good the design transferred. You’ll most likely get a vibrant transfer, but if not, you can re-press your design. The "peek test" step can be a true project saver!
Step 8: Reveal your design! These coasters turned out amazing! They’d a cute gift for anyone, you can personalize by using different colors or adding initials. This project is very beginner friendly, and you only need two sublimation stamp pads!
I hope this project inspired you to create with Artesprix’s sublimation supplies. Artesprix sublimation stamps are now BOGO. So, stock up on some sublimation stamp pads! When you use Artesprix sublimation stamp pads in your next sublimation project, please don’t forget to share your creations with us on Instagram or Facebook!
Thank you for reading, and Happy Valentine’s Day! I am on Instagram, Facebook and TikTok, let’s keep in touch!
Keep on crafting!
Best,
Sara Ali
**This post may contain affiliate links. That means that I may receive compensation if you purchase through the links I have provided. The price you pay for the product or service is not higher, but I may get compensated.**


