Artesprix Crafter's Apron
Artesprix Design TeamApron, Cricut, Paints
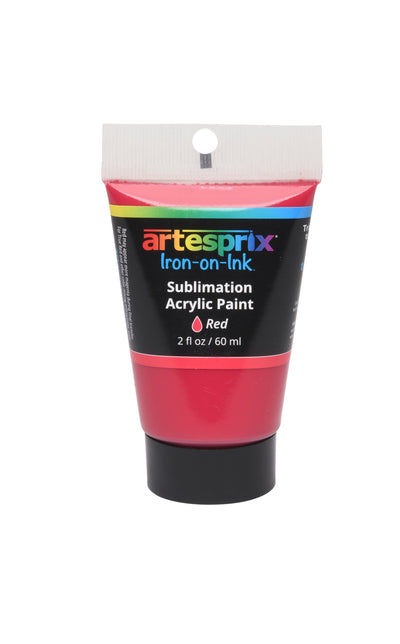
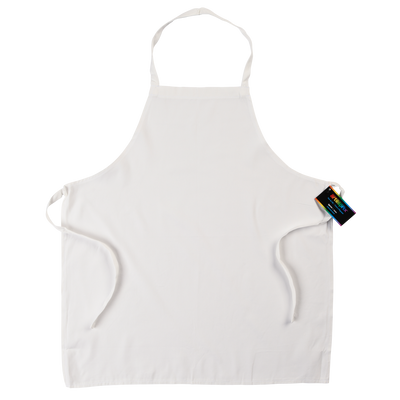
Hi friends, happy Fall! I’m Sara from One Craft Avenue and I have a fun project for both my Cricut and sublimation crafters. We will use Artesprix’s sublimation acrylic paint to customize an apron blank with a design for crafters. This blank is only available for the month of October 2022 from the Artesprix Shop, so do not wait to get one! This will be your favorite crafting apron once we are finished, so let’s get started!

What is Sublimation Iron-on-Ink?
Artesprix’s sublimation acrylic paint is formulated with sublimation ink. Therefore, we can transfer any designs painted with Artesprix Sublimation Paint onto poly-coated substrates or polyester fabrics. When the design is heat pressed, the ink turns to a gas, and you will end up with a permanent design that is embedded into the substrate. The same principal applies to all Artesprix’s sublimation supplies. Any design we create with Artesprix markers, stamp pads or paints can be transferred onto any sublimation blank once it is heat pressed.

Materials:
Blank of the Month Apron
Sublimation Acrylic Paint
Multi-mixed Media Paper
Siser TTD Easy Mask
Step-by-Step Tutorial:
Step 1: Place your mixed media paper on the apron and measure how big you’d like your design to be. I measured mine to be about 9” wide by 6” high. I kept these dimensions in mind and started coloring my design, you could also create a template with pencil for reference.

Step 2: Let’s get our sublimation paint out and mix the color shades that we like. For me, I want to use this apron in my crafting corner so, I chose a color palette that matches the colors in my logo. I created burnt orange, emerald and royal. Once I got all my paint colors mixed and ready, I painted a sheet of mixed media paper in an ombre fashion.

Pro Tip: Artesprix has a great color mixing chart on the website under support.
Step 3: After you ensure that the paint has completely dried, flip it and apply a sheet of Siser TTD easy mask to the back.

Pro Tip #2: Using a felt squeegee might be helpful to secure the easy mask to the paper properly.
Step 4: We are now ready to use our Cricut (or other cutting machine) to cut our design! If you’d like to do this design, this is the link for the project in Cricut design space . Open this project in Cricut design space and reduce its size to approximately 9”x6”.

Step 5: Place your mixed media paper on your mat with the painted side up. Insert your mat into your Cricut machine. We will need to ensure we are cutting the design in the extent of our painted area. Also, we will have to mirror the design before we click on "make it". I have a Cricut Maker, and I used the setting “paper, adhesive backed”. I lowered the pressure of this setting to be 185. This made sure I only cut through the mixed media paper only which is very important.
Step 6: After everything is loaded and set, select "make it" and cut your design.
Step 7: Once the design is cut, unload the mat and weed it out. Weeding was easy, and I decided to have the wording be the negative space in the design. So, I tore the edges all around the design.

Pro Tip #3: Before weeding, let’s turn on our heat press, this blank calls 400°F for 60 seconds. By the time we finish weeding, our heat press will be ready!
Step 8: For this apron and any fabric blank, you should pre-press it to get any moisture out and go over it with a lint roller before taping your design!

Step 9: After pre-pressing your apron and going over it with a lint roller, it is time to apply your sublimation design. The Siser easy mask will stick to the apron, but I wanted to secure it further. Place your design painted side down on the apron. (Now you will see the text in the right direction.) Then, secure the Easy Mask sheet with heat resistant tape.

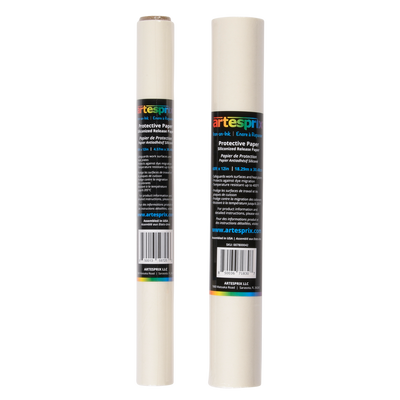
Step 10: Let’s make a "sublimation sandwich"! Since the area is big, I used a big sheet of protective paper on top of the design as well as under the apron.

Step 11: It is time to press your design! Your heat press should be set to 400°F and you will need to press it for 60 seconds.
Step 12: After you press your design, it is a good practice to do a "peek test"! Do not remove the tape and slightly peel one corner of your design to see if we got a good transfer. The apron turned out so vibrant, so I removed my design.

Step 13: Reveal your design!

I love how this apron turned out! This will be my attire when I’m painting or making any acrylic paint pours! The colors came out so vibrant and the wording remained the color of the apron. I suggest you use more tape if you do this technique, but other than that it was a success! If you’re a mom crafter, you could make an “assistant crafter” for your toddler, I know I will!
This project was so much fun, and you could customize this apron for a thanksgiving host too! This apron is only available this month, so make sure you grab it! I hope today’s this inspired you to get creative! Sublimation acrylic paint is a must have in your crafting space! You can also get started with the sublimation starter kit that has everything to make your first project with Artesprix!

Don’t forget to share your creations with us on instagram or Facebook! If you’d like to keep in touch, check out my instagram!
Keep on crafting!
Best,
Sara Ali
**This post may contain affiliate links. That means that I may receive compensation if you purchase through the links I have provided. The price you pay for the product or service is not higher, but I may get compensated.**

Learn how to make a custom sublimation tumbler using Artesprix Sublimation Inks in this beginner-friendly tutorial. We will show you how to use Artesprix inks, plastic wrap, and heat-resistant transfer...
Learn how to make a custom sublimation tumbler using Artesprix Sublimation Inks in this beginner-friendly tutorial. We will show you how to use Artesprix inks, plastic wrap, and heat-resistant transfer...

Iron-on-Ink sublimation makes it simple to turn blank surfaces into personalized, lasting projects. In this Creative Press, we’re sharing four approachable Iron-on-Ink project ideas designed to help makers build confidence,...
Iron-on-Ink sublimation makes it simple to turn blank surfaces into personalized, lasting projects. In this Creative Press, we’re sharing four approachable Iron-on-Ink project ideas designed to help makers build confidence,...

Make your holidays more meaningful and more sustainable with Artesprix Iron-on-Ink! This season, turn your gift wrap into a creative moment all its own with custom sublimation tags that can...
Make your holidays more meaningful and more sustainable with Artesprix Iron-on-Ink! This season, turn your gift wrap into a creative moment all its own with custom sublimation tags that can...
Subscribe to be the first to know about new products, ideas, and special coupon codes at Artesprix!


