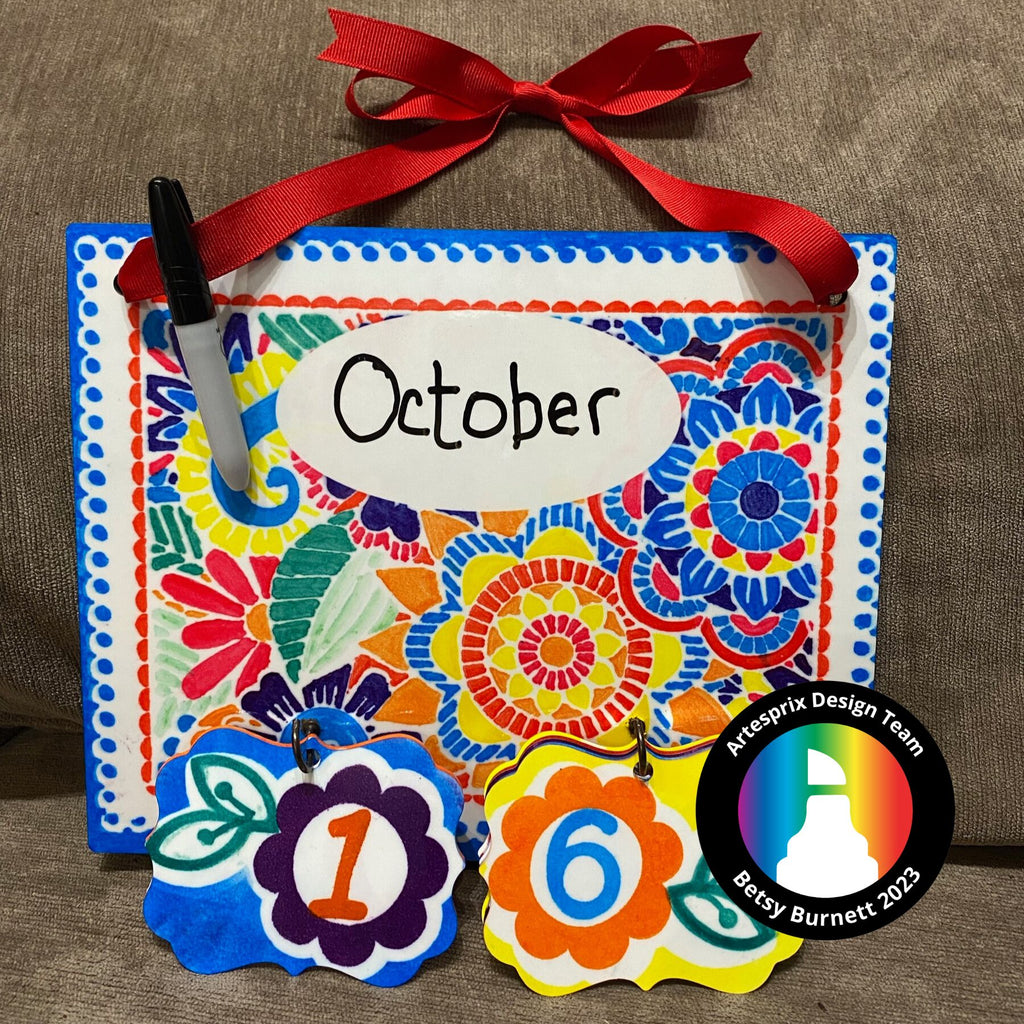
Perpetual Calendar Sign using Artesprix Ornaments
Artesprix Design TeamInk Pads, Markers, Ornament
Products in this post


Hi everyone, Designer Betsy Burnett here. I’m always up for a challenge. This time I was challenged to create something “non-Christmas” with the Artesprix Metal Ornament Blanks. So I decided to create some TIME! Always needing a bright spot to my day, I set out to create a bright and cheery perpetual calendar using Artesprix Iron-on-Inks and Markers and some metal ornament blanks and a decorative sign blank.
What is Artesprix Iron-On-Ink? (Sublimation Ink)
Artesprix Sublimation Inks are specially formulated heat transferred ink. These inks allow you to create personalized designs on polyester coated surfaces and polyester fabrics. Using plain copy paper, you create your design,, you then transfer the finished design onto your compatible blank using a heat source and pressure. The results are vibrant, colorful, and best of all permanent! Before Artesprix you needed a fancy printer to experience this level of personalization, but not anymore!
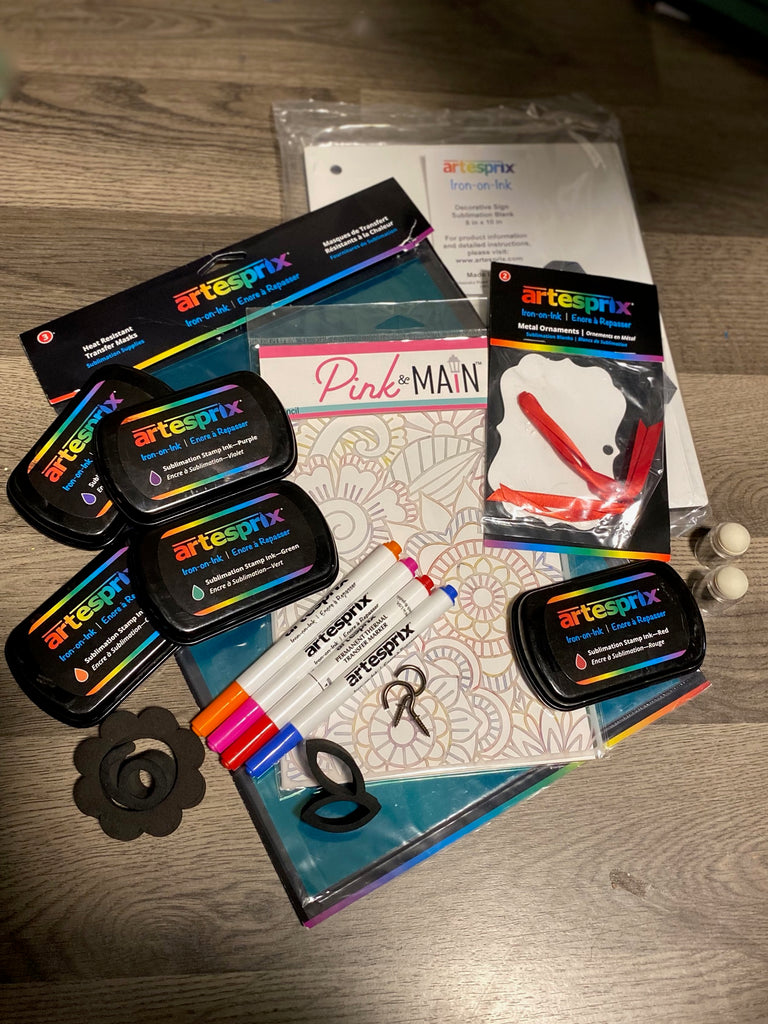
Supplies:
Decorative Sign Sublimation Blank
(7) Metal Ornaments 2ct (14 total)
Sublimation Markers
Sublimation Stamp Pad
Heat Resistant Transfer Mask
Pink and Main Flora Stencil
Pebbles Ink Foam Stamps (Shape-a-roonies, and Bon Bon font)
Sponge daubers
Low-tack masking tape
2-“mug hooks” (I used 7/8”)
Protective Paper Roll
Heat Tape
Scissors
Copy Paper
Pencil
Ruler
Dry Erase Marker
May need:
Tin snips
Hot Glue Gun
Step-by-Step Tutorial:
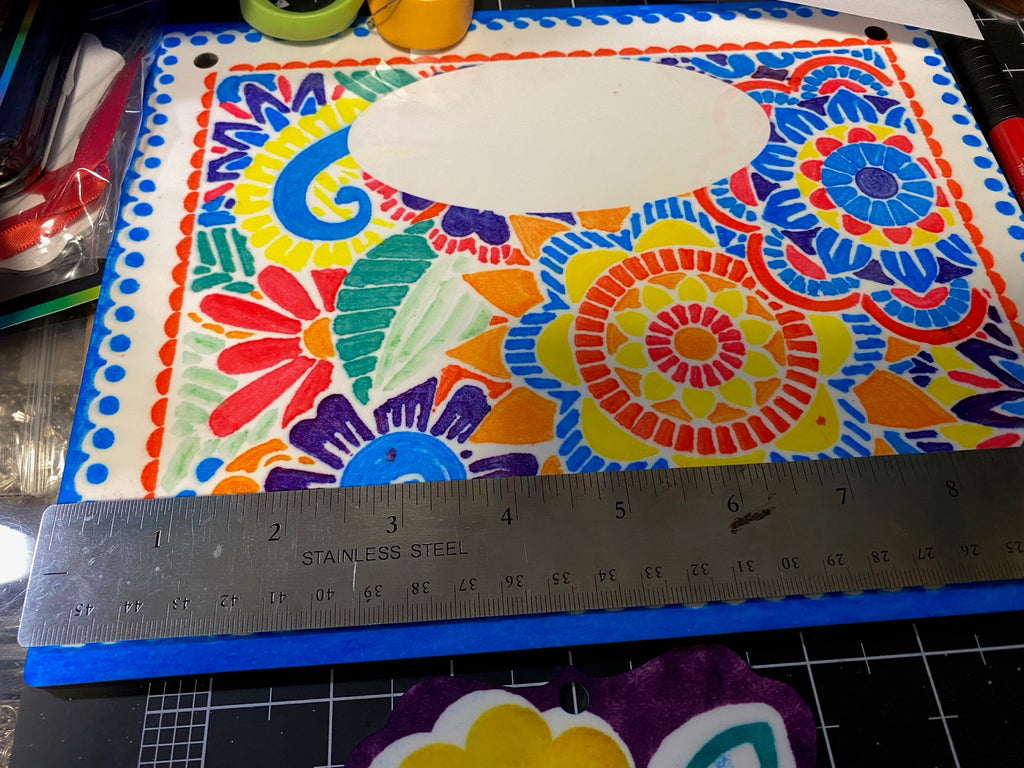
Step 1: Trace around your Decorative Sign onto some copy paper.
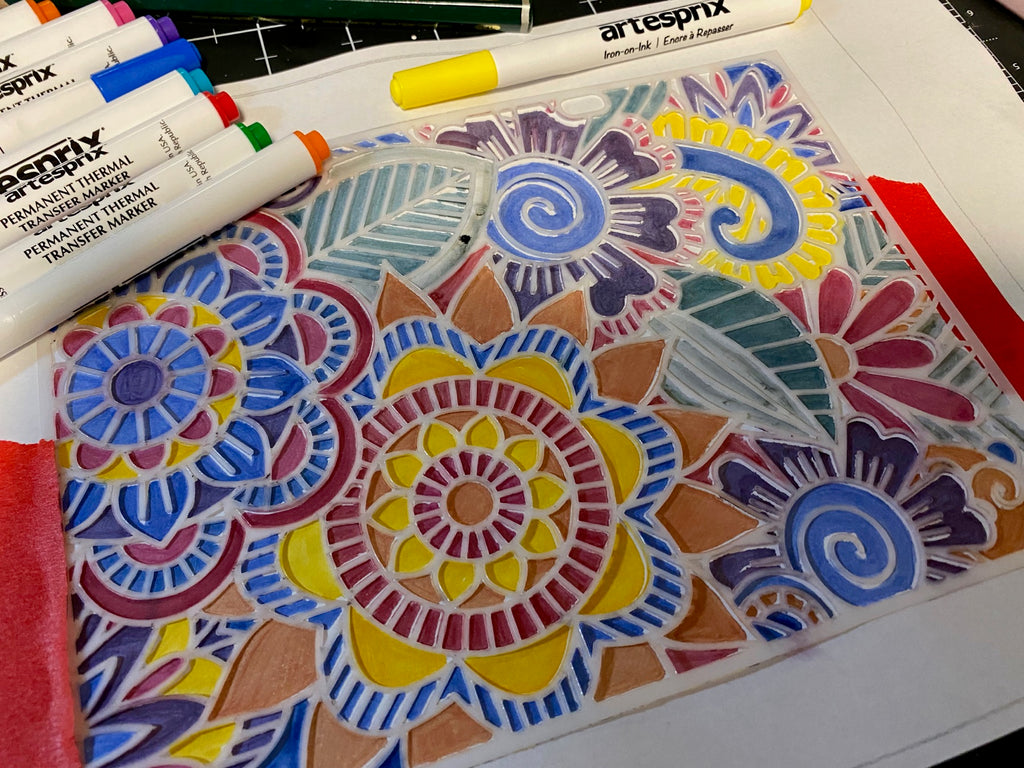
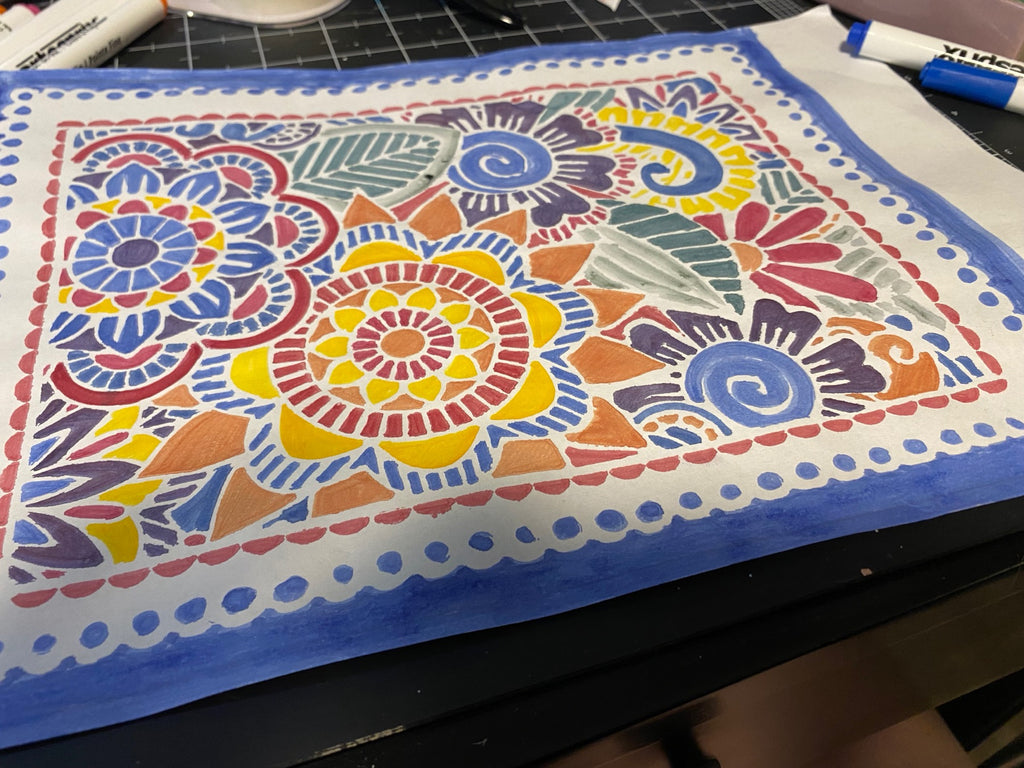
Step 2: Fill in your space using the Flora Stencil and Artesprix’s Iron-on-Ink Markers. The stencil was smaller than my design space, so I added some fun borders to fill up the space.
Pro Tip: It helps to use some low-tack masking tape to hold the stencil into place.
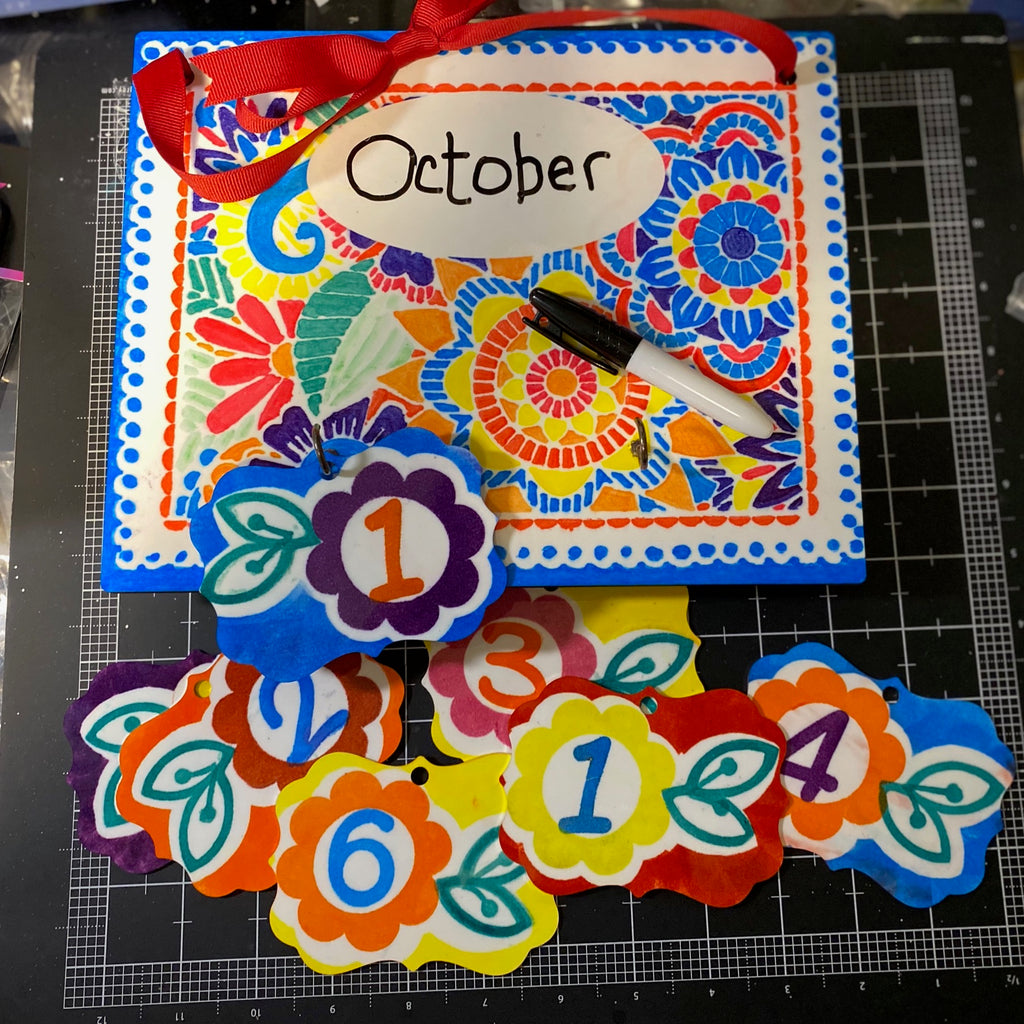
Step 3: Trace around your Ornament Blank 14 times on a new pieces copy paper. Make two 0’s, two 1’s, two 2’s, and two 3’s. Additionally, you will need one each of the numbers 4 through 9.
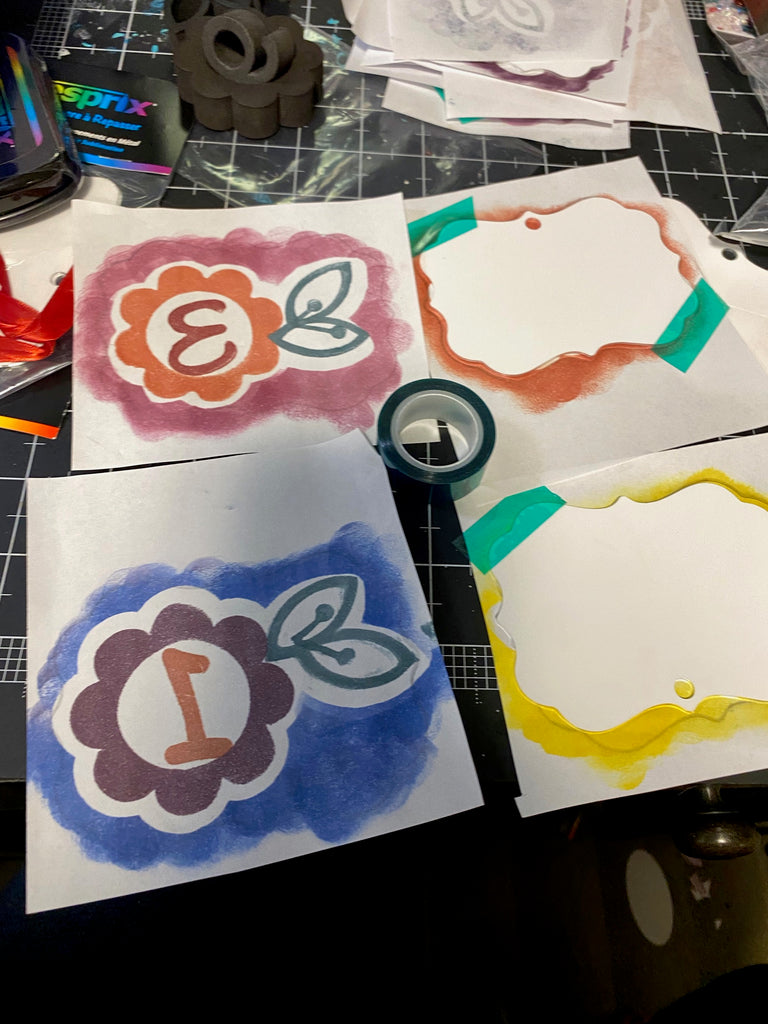
Step 4: Using the Pebbles ink Foam Stamps create your number images. I wanted my numbers to resemble the stencil design, so I used similar colors, and shaped flowers and leaves. I used sponge daubers to fill in the space around the design.
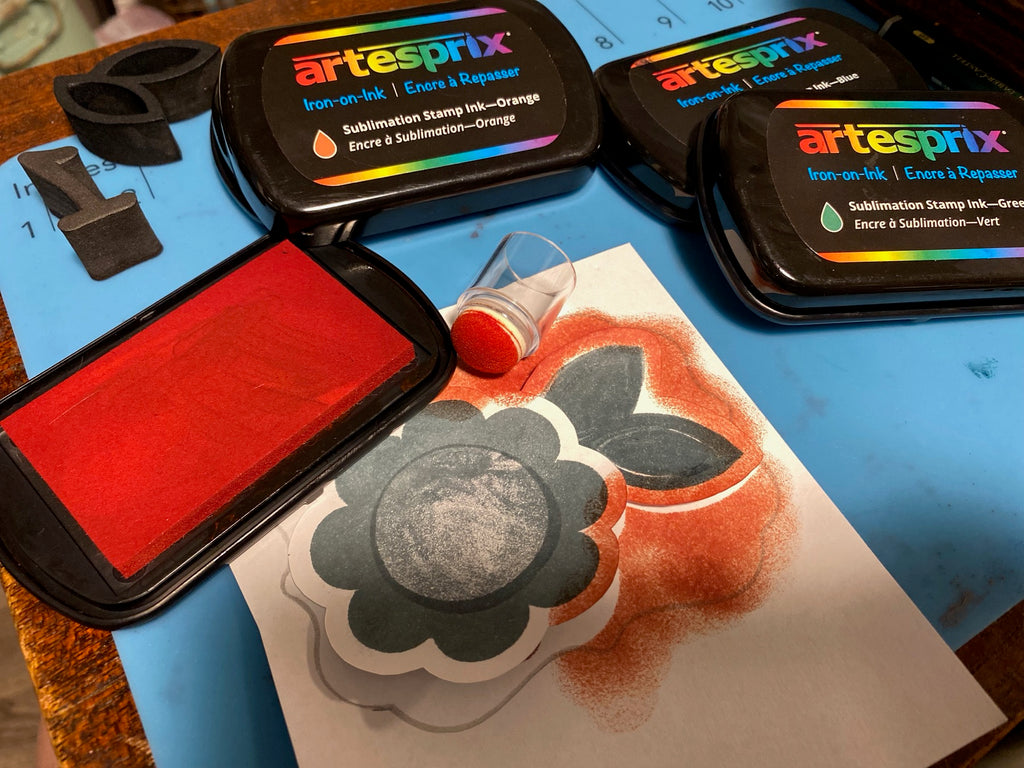
Pro Tip #2: I didn’t want the area around my flowers/numbers to be completely filled in so I created a mask with some extra copy paper. Stamp your image onto the copy paper and then cut outside of the image. Place your mask over your stamped image and then fill in with color around it. When you remove the mask, you will have a clean white border around your image.
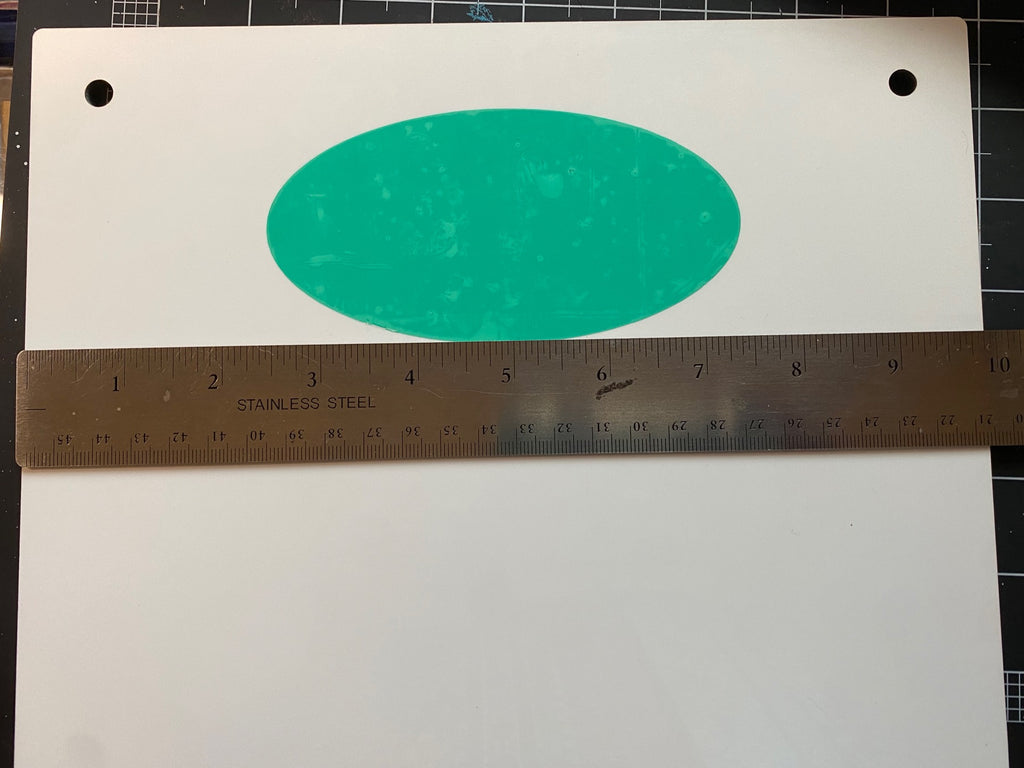
Step 5: Fun fact about the Artesprix Decorative Sign... Did you know it works as a dry erase board? We are going to purposely leave a blank space on the sign to act as a fill in spot for the name of the month. Cut out an oval from your Heat Resistant Mask 5 inches wide and 2.4 inches tall. Place the mask onto the decorative sign (I centered it about 1 1/4 inches from the top of the piece.) The Sublimation Mask will resist the color of the sublimation ink on your blank when you heat set it.
Step 6: Tape your masked decorative sign onto your artwork using Heat Tape.
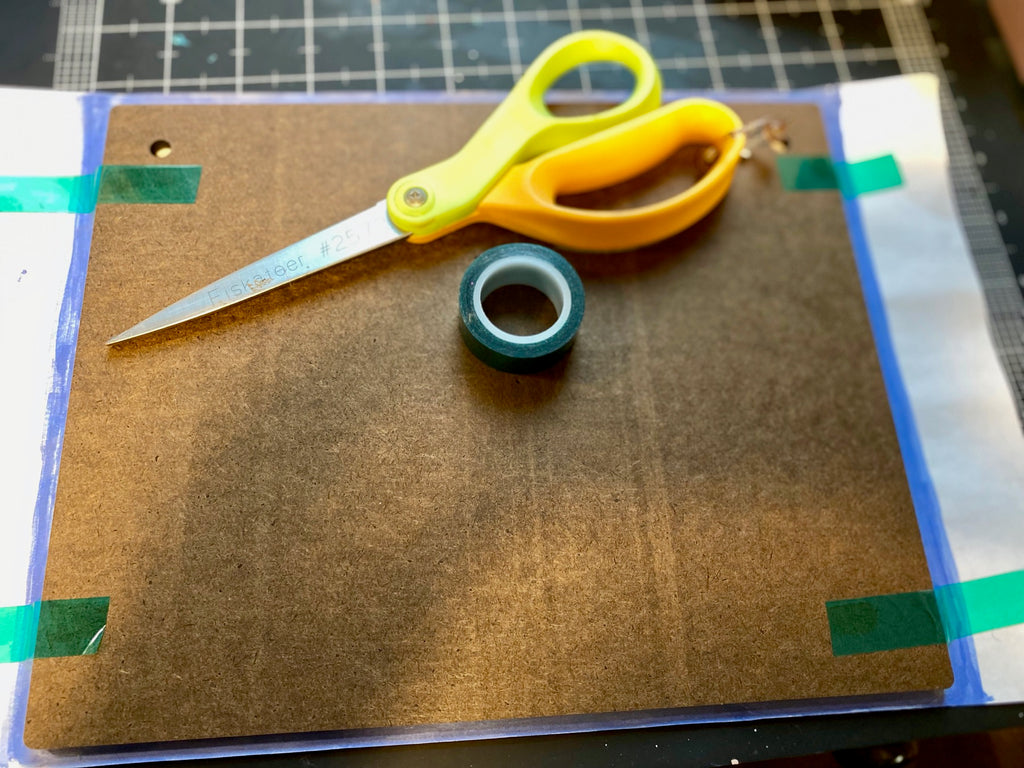
Step 7: Preheat your heat source to 400℉. Flip your project over so the artwork is on top. Place a layer of protective paper under and over your project to protect your work surfaces from ink.
Step 8: Time to make the magic! Press your sign for 110 seconds.
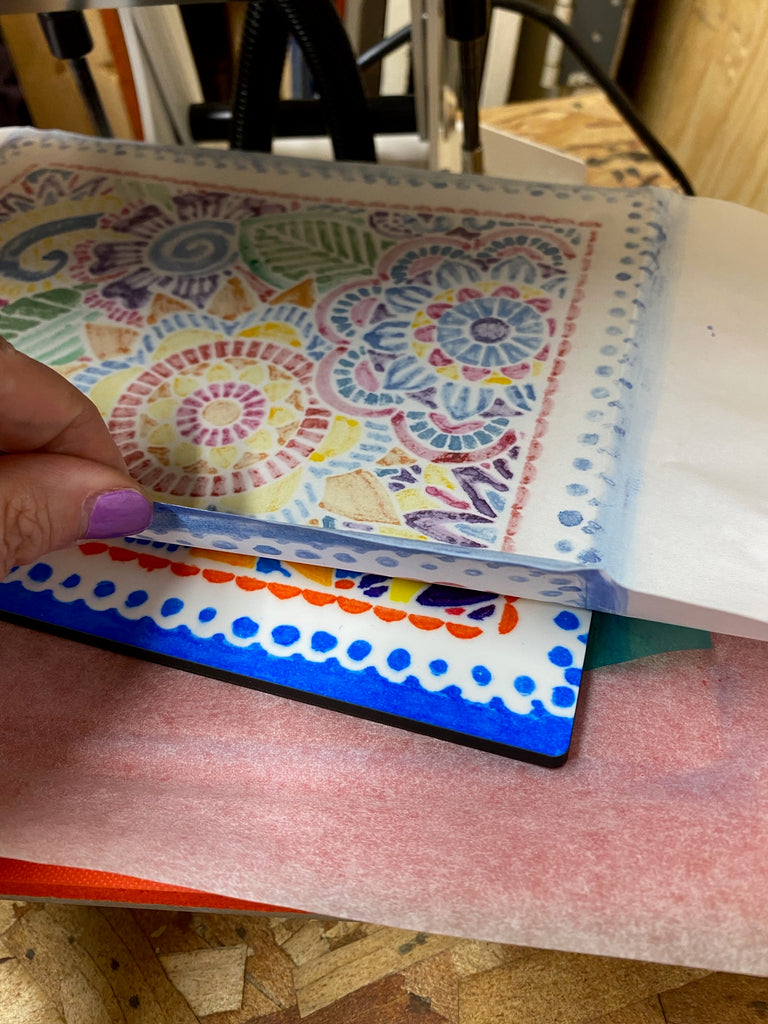
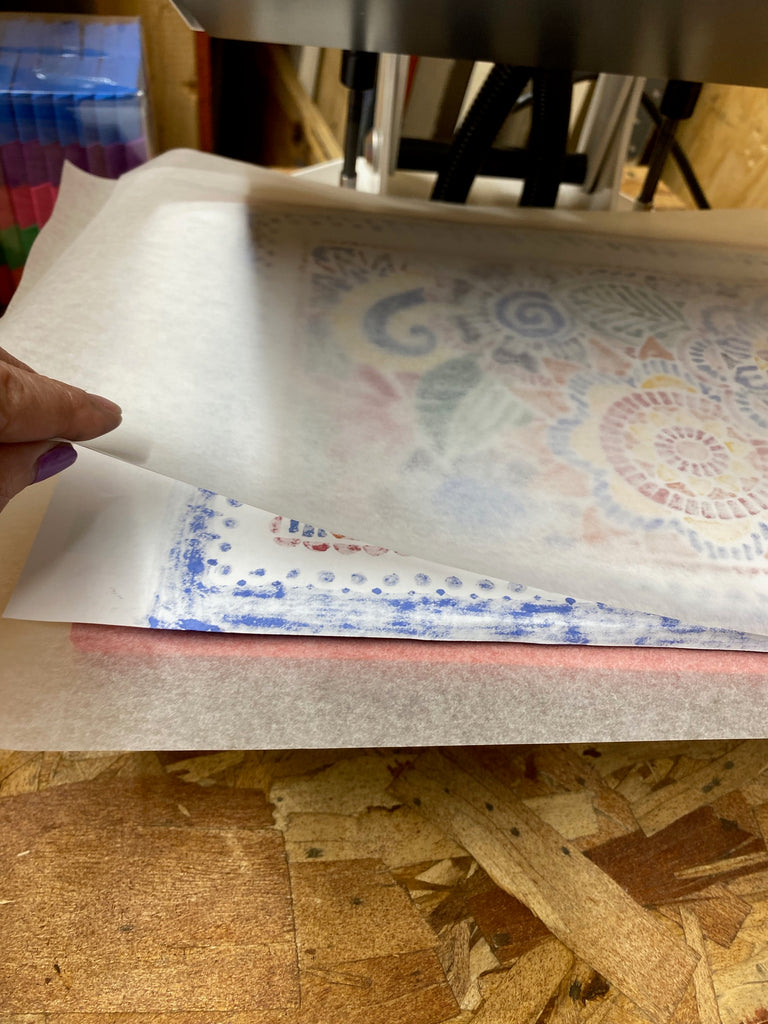
Step 9: Once the timer is finished, next is the "peek test". Before removing any tape, lift up a corner of the paper to ensure your transfer is vivid. Because we did not remove any tape or move our design, you can re-press if needed.
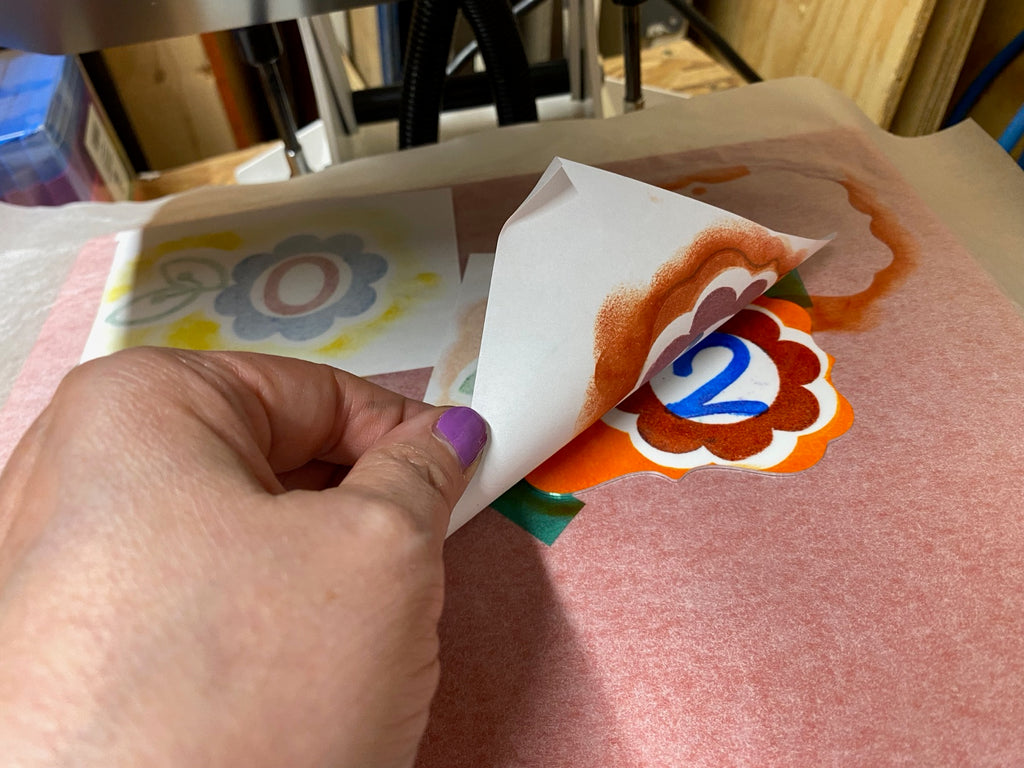
Step 10: While your sign cools, it is time to transfer our numbers to the ornaments. Repeat steps 6-9 adjusting your transfer time to 75 seconds and follow the details below as it is important to focus on creating it in two sets.
Front: Back
First Set:
0:1
2:3
Second Set:
0:1
2:3
4:5
6:7
8:9
You will heat set one side, allow to coo,l then secure the "back" numbers to the white side of the blank heat set again.
Step 11: Remove the mask from the sign.
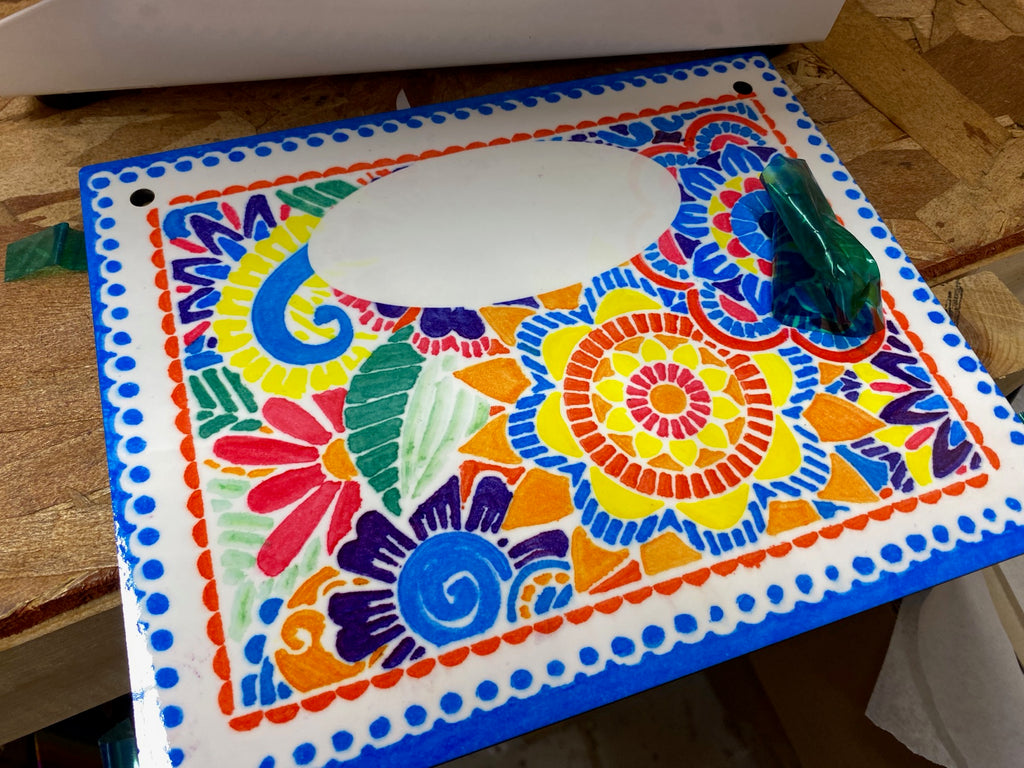
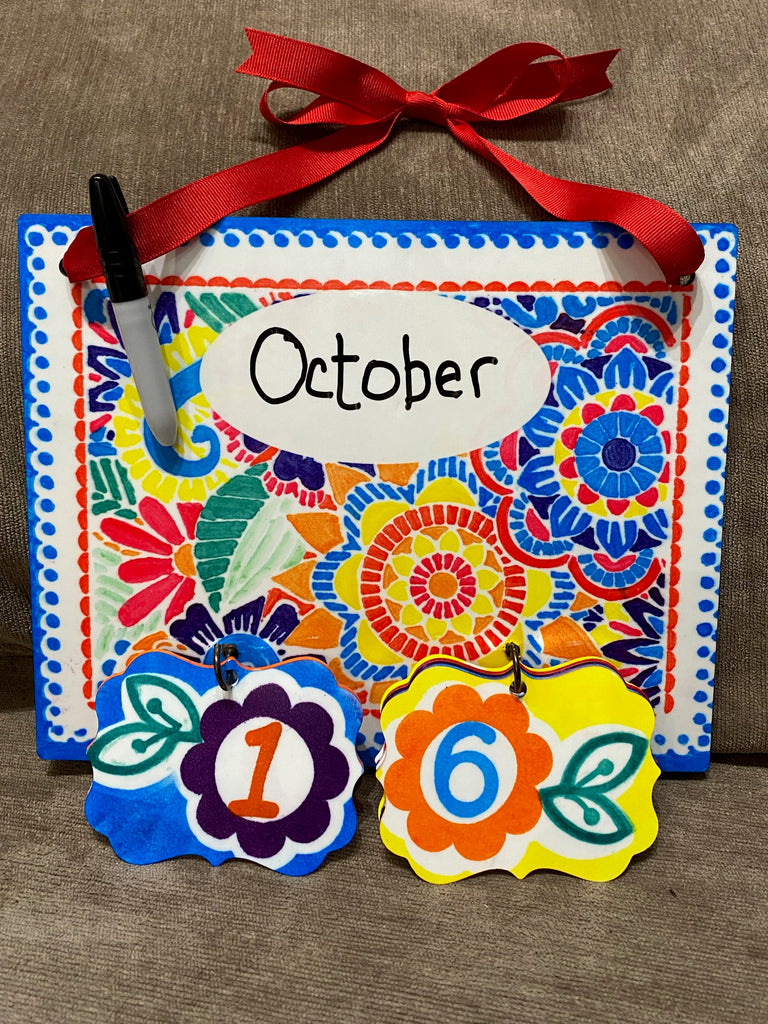
Step 12: Measure 2 inches from the bottom of the sign. Make a dot at the 3 inch and 7 inch mark. These will be where you screw in your mug hooks. With a bit of pressure, you should be able to just screw them into the sign. If the screw on the hook is a bit too long and pokes through the back of the sign. Cut off the extra portion with tin snips and then dab with a bit of hot glue for good measure (to protect the surface behind your calendar.
Step 13: Attach ribbon to the top of your sign and tie in a bow to act as a hanger. Hang your "first set" on the left side hook, and the remainders on the right hook. Use your dry erase marker to fill in the month and then change your numbers to match the day.
How fitting that this is my last blog for the Design Team Term and I could not be more in love with this Decorative Sign Project. It has been so fun sharing Iron-on-Ink Inspiration for the last 6 months. Some of my favorites were my Trips Tasseled Sewing Pocket Zip Case with Iron-on-Ink the Barbie Storage Bag with Artespirx Iron-on-Ink. If you ever want to see all my Artesprix Projects you can see them here, and if you wanted to stay connected with me, you can follow along on my personal blog here.
So what do you think? Are you going to try it? I would love to see what you create in our Artesprix Iron-on-Ink Inspirational Group!
Happy Crafting!
Betsy Burnett


3 comments
I really love this! What a great way to use this sign. I love how you created the ornaments and gave us a breakdown of exactly which numbers to repeat. Amazing project!
Wonderful project, Betsy!! I didn’t know the sign was a dry-erase whiteboard. What a great idea! Thanks for your inspiration for the last six months. I’ve learned a lot :) BTW, besides this project, the Barbie Storage Bag was a favorite too.
This project is so neat! I’m definitely going to give it a try. Thanks for sharing.