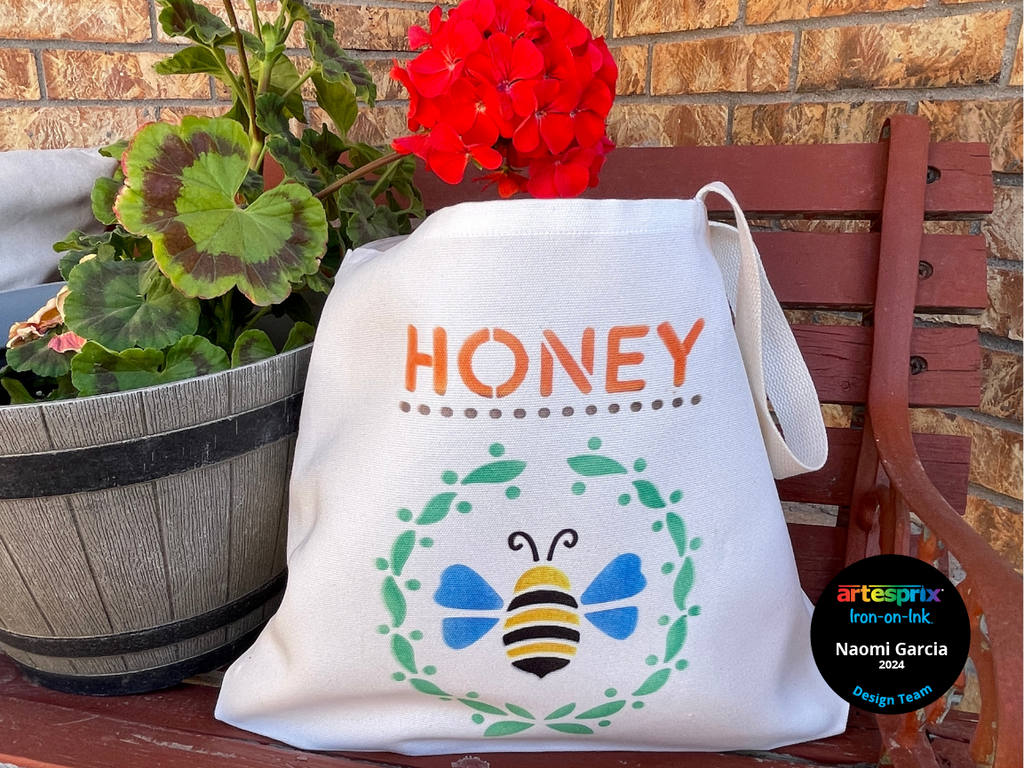
Who else loves a nice and sturdy tote bag? Look no further than the Artesprix Sublimation Tote Bag! I’m Design Team member Naomi and I can honestly say that I am "a bag lady". I thought that making a reusable tote bag using Sublimation Stamp Pads and Markers would make the perfect Earth Day project for April. This is my last project for the term with Artesprix so I'm very glad you're here to follow along.
**This post may contain affiliate links. That means that I may receive compensation if you purchase through the links I have provided. The price you pay for the product or service is not higher, but I may get compensated.**
What is Artesprix Iron-on-Ink?
Artesprix Sublimation Markers, Ink, and Paint are specially formulated to allow you to use basic copy paper to: color, stamp, stencil, and monoprint anything you wish and turn it into a heat-transferable design. Anyone can make amazing designs, regardless of your artistic skill level. You can then use heat (either a heat press or a home iron) and pressure to apply these designs to a polyester or polyester coated substrate. Your designs will then be permanently printed onto your substrate.
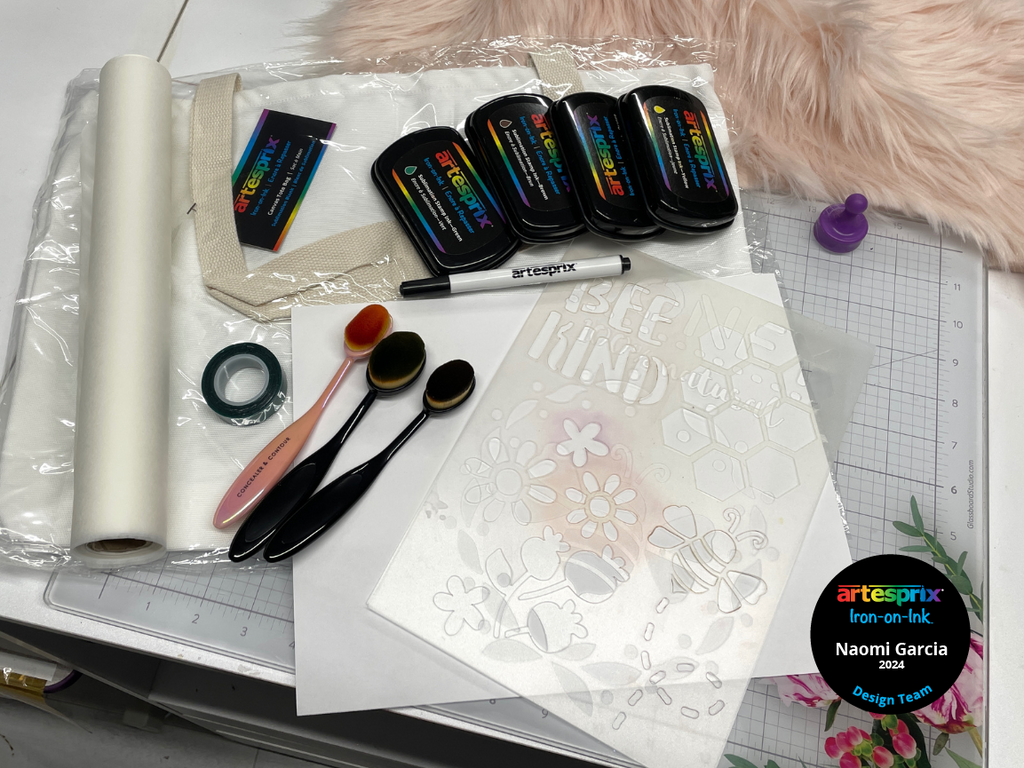
Supplies:
Sublimation Canvas Tote Bag
Sublimation Stamp Pads
Sublimation Markers
Blending brushes or ink daubers
Heat press
Protective Paper
Heat Tape
Copy Paper
Stencil of your choice
Washi tape
Lint Roller
Pressing Pillow
Step-by-Step Tutorial:
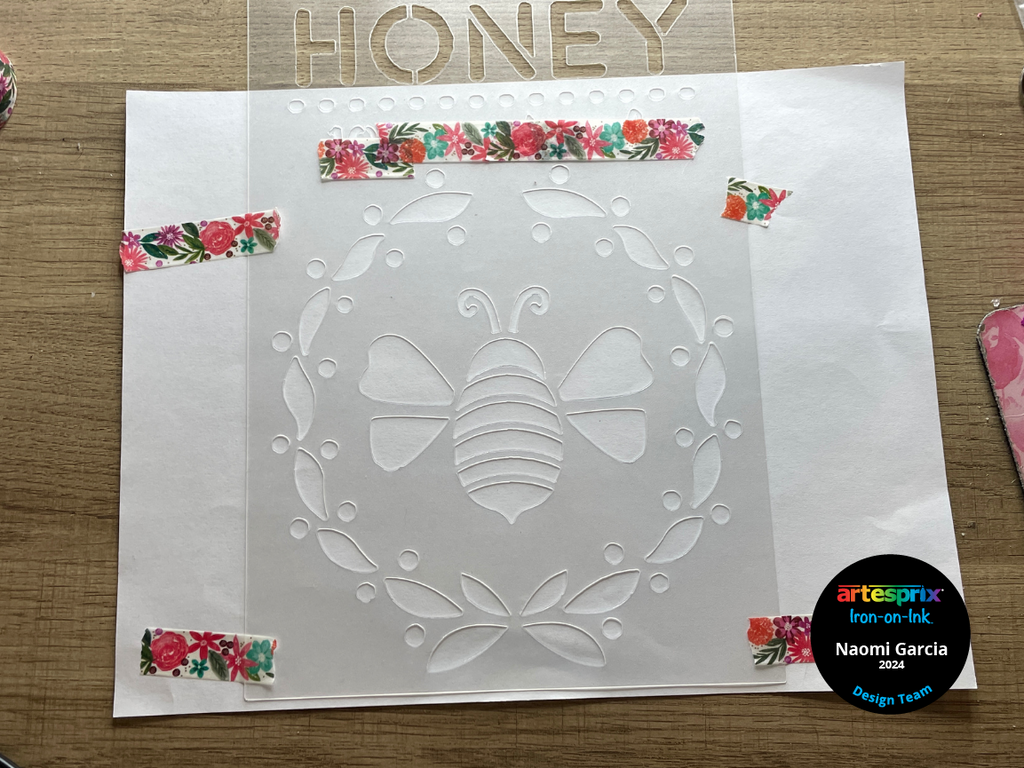
Step 1: Tape a stencil onto a sheet of copy paper using washi tape or low tack tape.
Step 2: Use blending brushes, sponges, or ink daubers to apply sublimation stamp pad ink to the paper over the stencil.
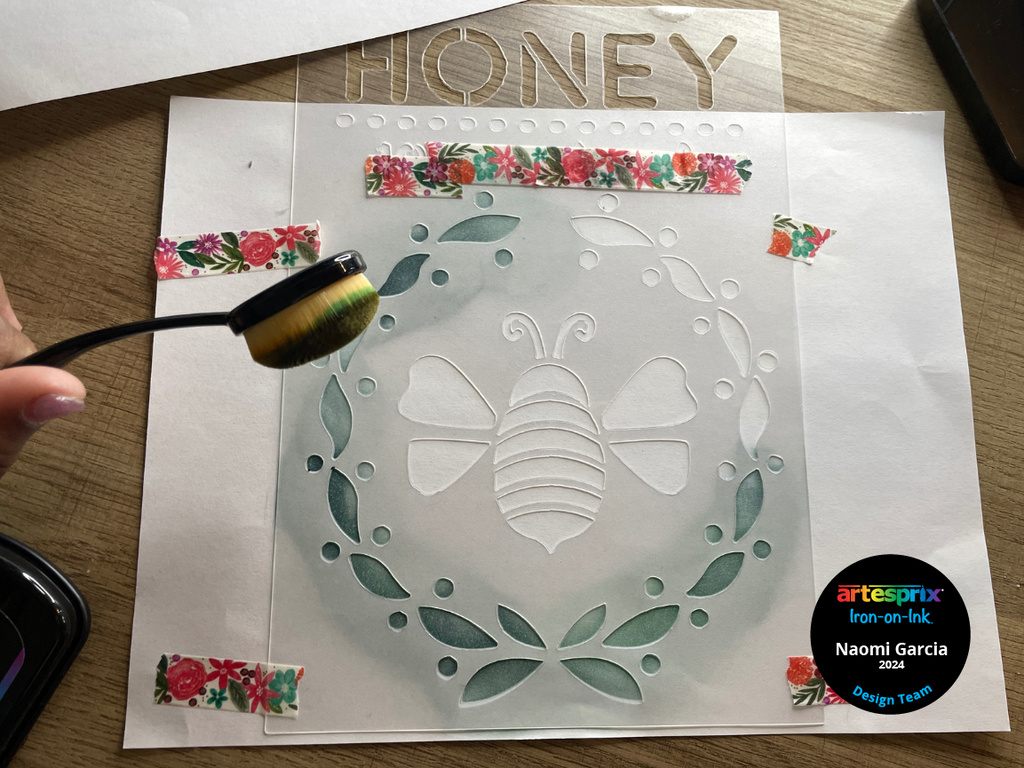
Pro Tip: You can use tape or a sheet of paper to cover exposed areas of the stencil that you do not want to get ink into.
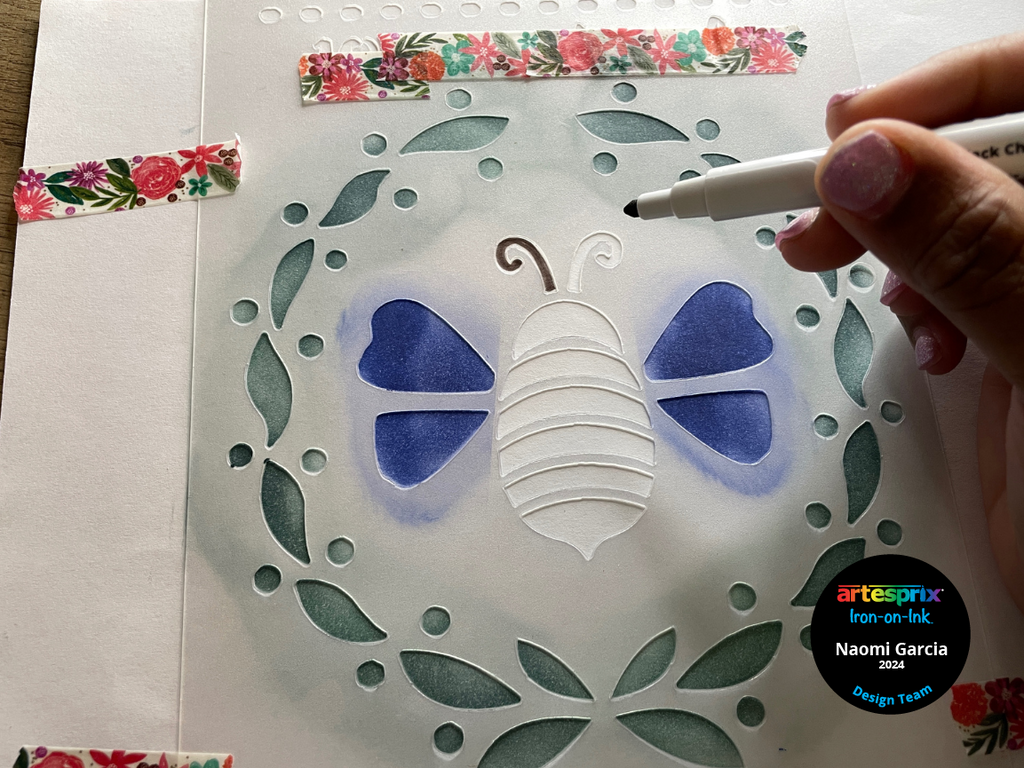
Step 3: Add smaller details in the stencil using Artesprix Sublimation Markers.
Pro Tip #2: If adding text with a stencil, flip it over to create mirrored text for sublimation.
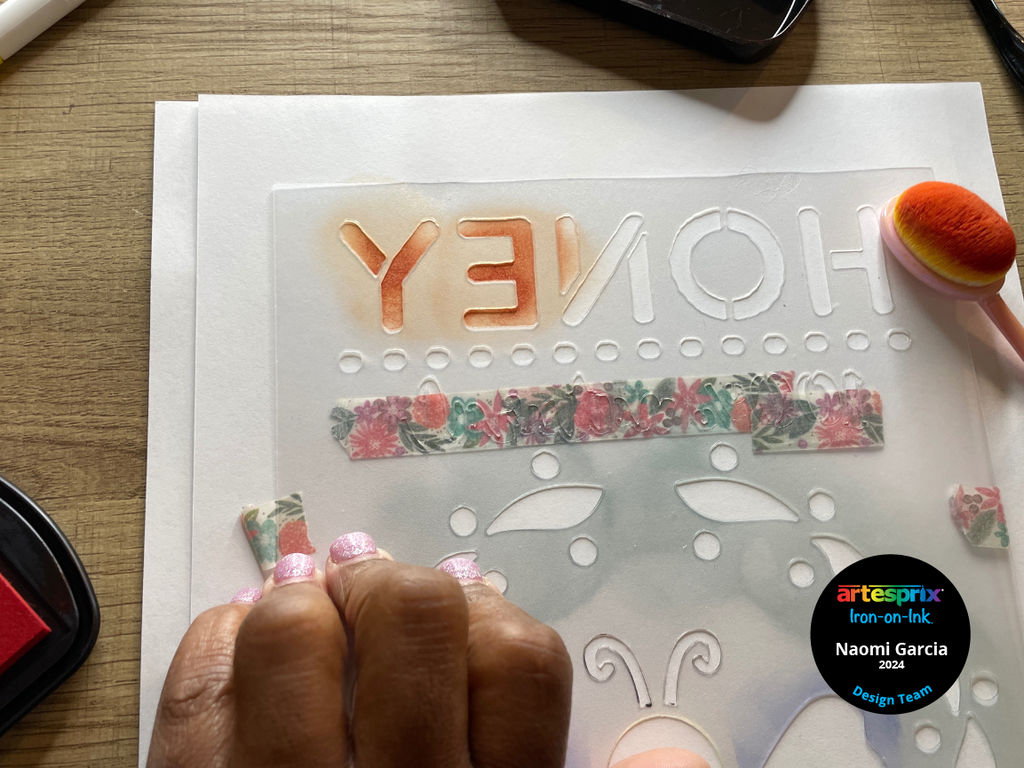
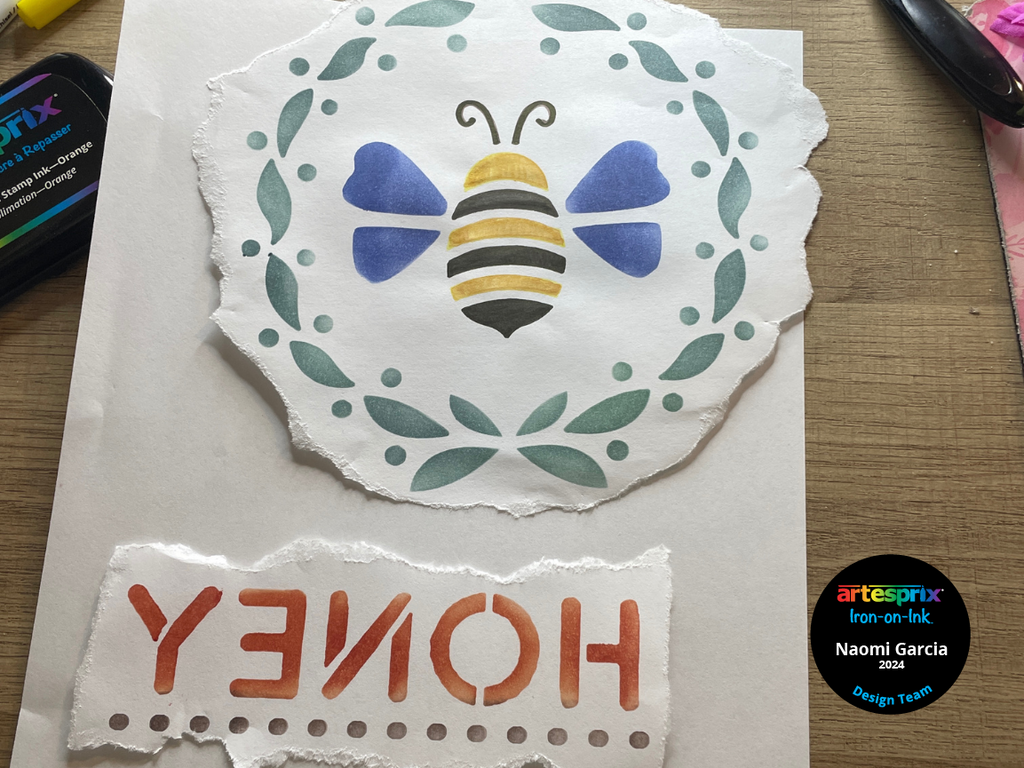
Step 4: Once finished, tear around the outside of your design instead of cutting with scissors. This will help reduce harsh press lines.
Step 5: Clean the tote bag using a lint roller.
Step 6: Use heat tape to secure the design to the tote bag face down.
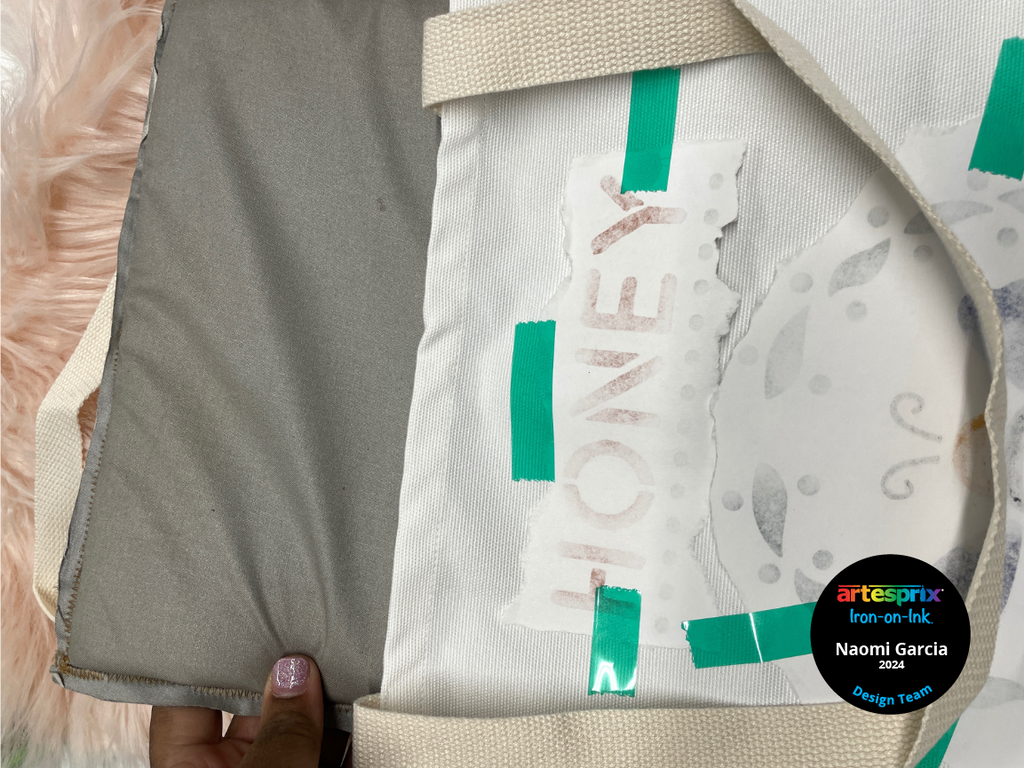
Step 7: Place a pressing pillow inside of the tote to help prevent press lines and to raise the pressing surface above any seams.
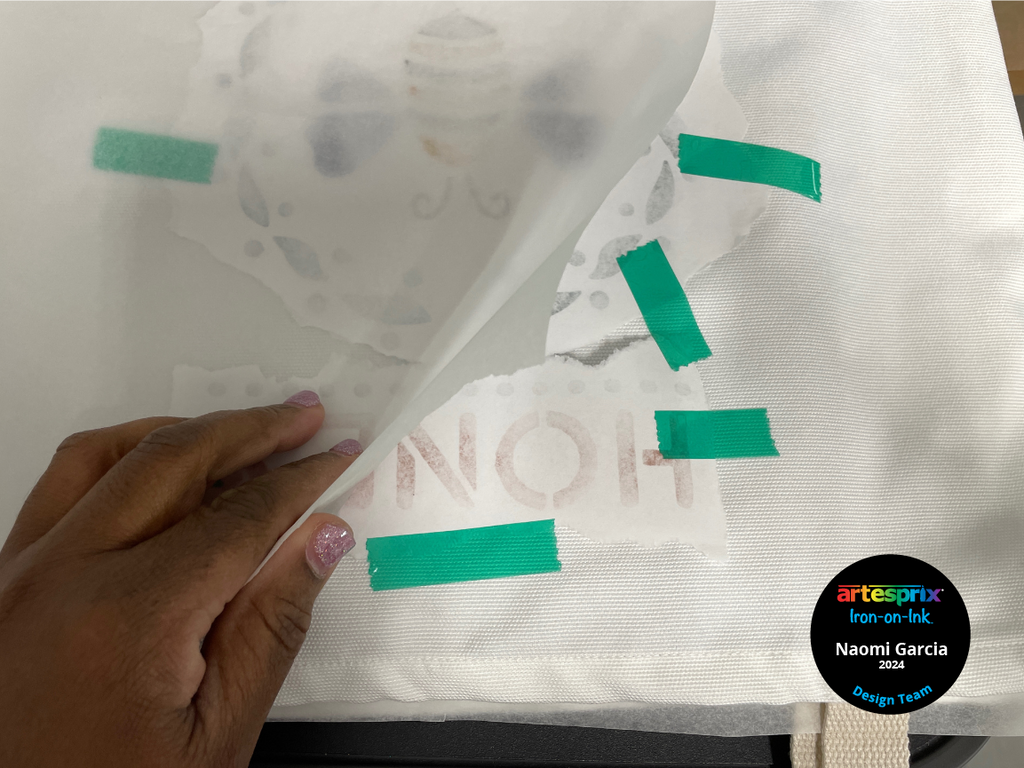
Step 8: Make a "sublimation sandwich" to protect your heat press. Put a sheet of protective paper inside of the tote bag, on top of the pressing pad. Add another sheet of protective paper on top of the design.
Step 9: Press your design at 400 degrees for 45 seconds using medium pressure.
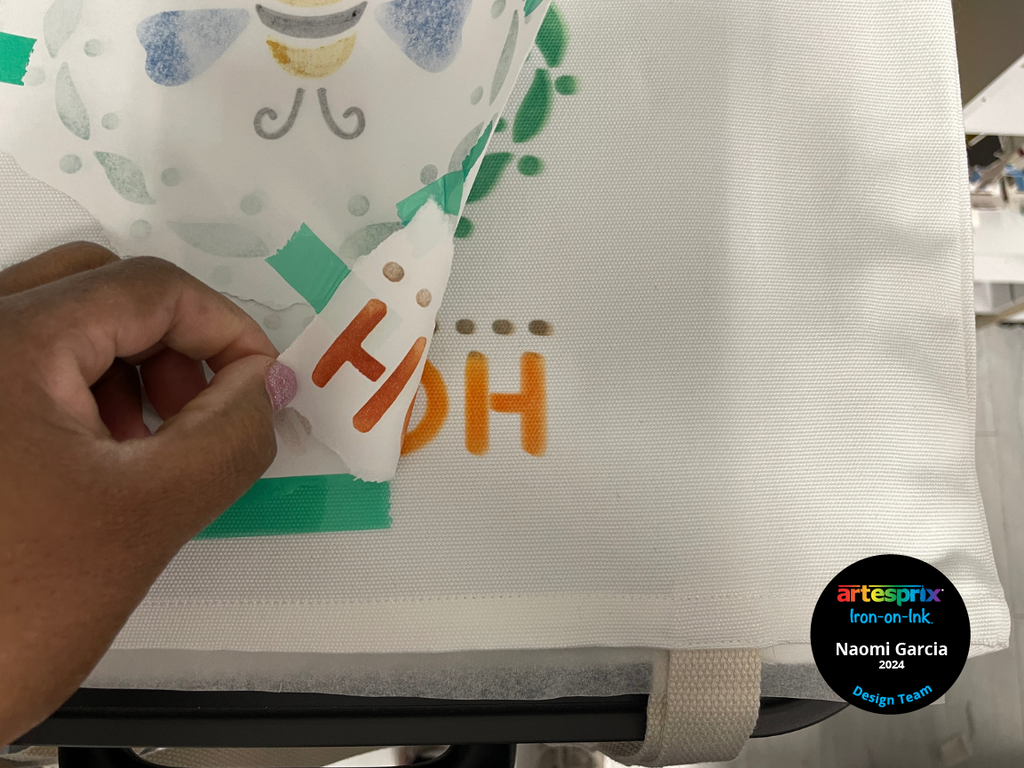
Step 10: Do a "peek test" by lifting a small corner to confirm your transfer is bright.
If the design is transferred well, you are done and you can remove the tape and paper. If it is not, replace the covering and press again.
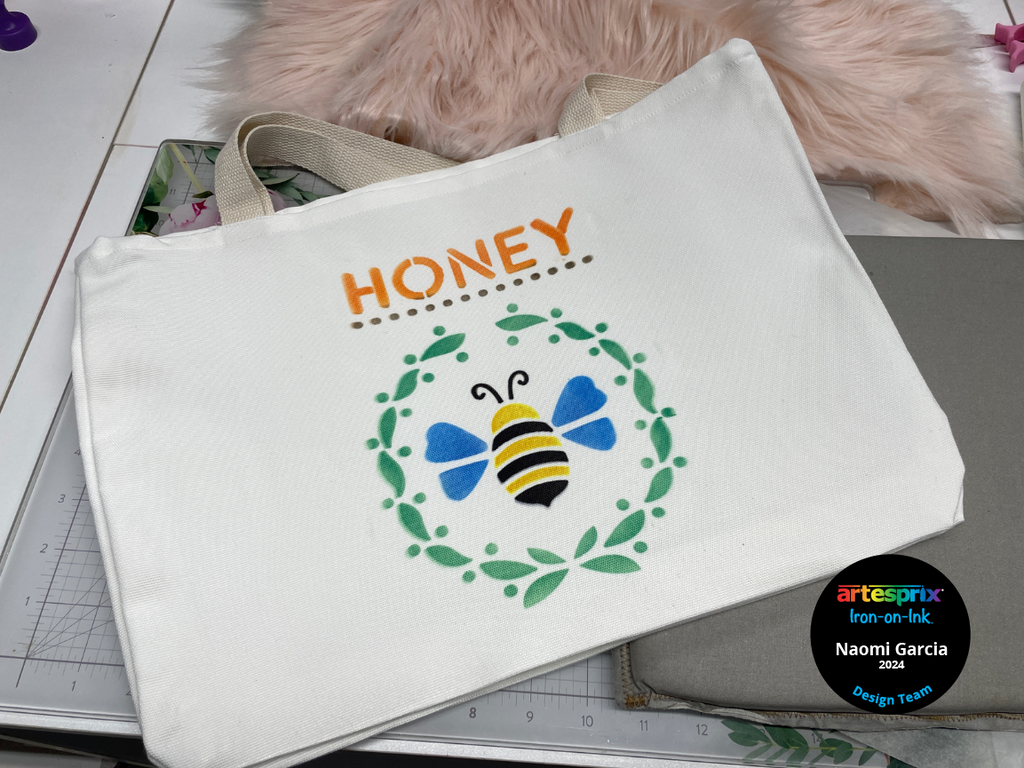
Step 11: Our "peek" test was successful so we can reveal our project. I’m totally in love with this tote bag design. The bee and just the idea of a reusable tote bag is a great reminder to take care of our Earth, not only during Earth Month, but everyday.

For more creative ideas for your next Iron-on-Ink project, check out the Artesprix Blog. Be sure to order your ombre pillow cases soon because they’re only here for March. Let us know if you try out this project by using the #Artesprix & #IrononInk or post your project to the Artesprix Facebook Group.
If you want to learn more about me, visit my About Me here.
Now, go make something sustainable!
Naomi Garcia
**This post may contain affiliate links. That means that I may receive compensation if you purchase through the links I have provided. The price you pay for the product or service is not higher, but I may get compensated.**