Spooky Mummy Sign with Artesprix Iron-on-Ink
Artesprix Design TeamHalloween Projects, Paints
Products in this post


Hello! I’m Alison Heikkila and I am happy you stopped by the Artesprix Blog. Today I’ll be sharing my October Blank of the Month project with you, which is a Decorative Sign. Using a large Blank (or substrate) like this is great, because you have got a ton of room to create a fabulous design. Or should I say…fa-BOO-lous? It IS October, so let’s make it a Halloween-themed mummy project! This uses minimal common supplies, so you can probably make this right away if you’ve got the Blank!
**This post may contain affiliate links. That means that I may receive compensation if you purchase through the links I have provided. The price you pay for the product or service is not higher, but I may get compensated.**
What is Artesprix Iron-on-Ink?
Artesprix Sublimation Markers, Ink, and Paint are specially formulated to allow you to use basic copy paper to: color, stamp, stencil, and monoprint anything you wish and turn it into a heat-transferable design. These designs are then applied to a polyester or polyester coated substrate with heat and pressure. You can use a heat press or a home iron! These designs, through this process of sublimation, will become permanent on your substrates.
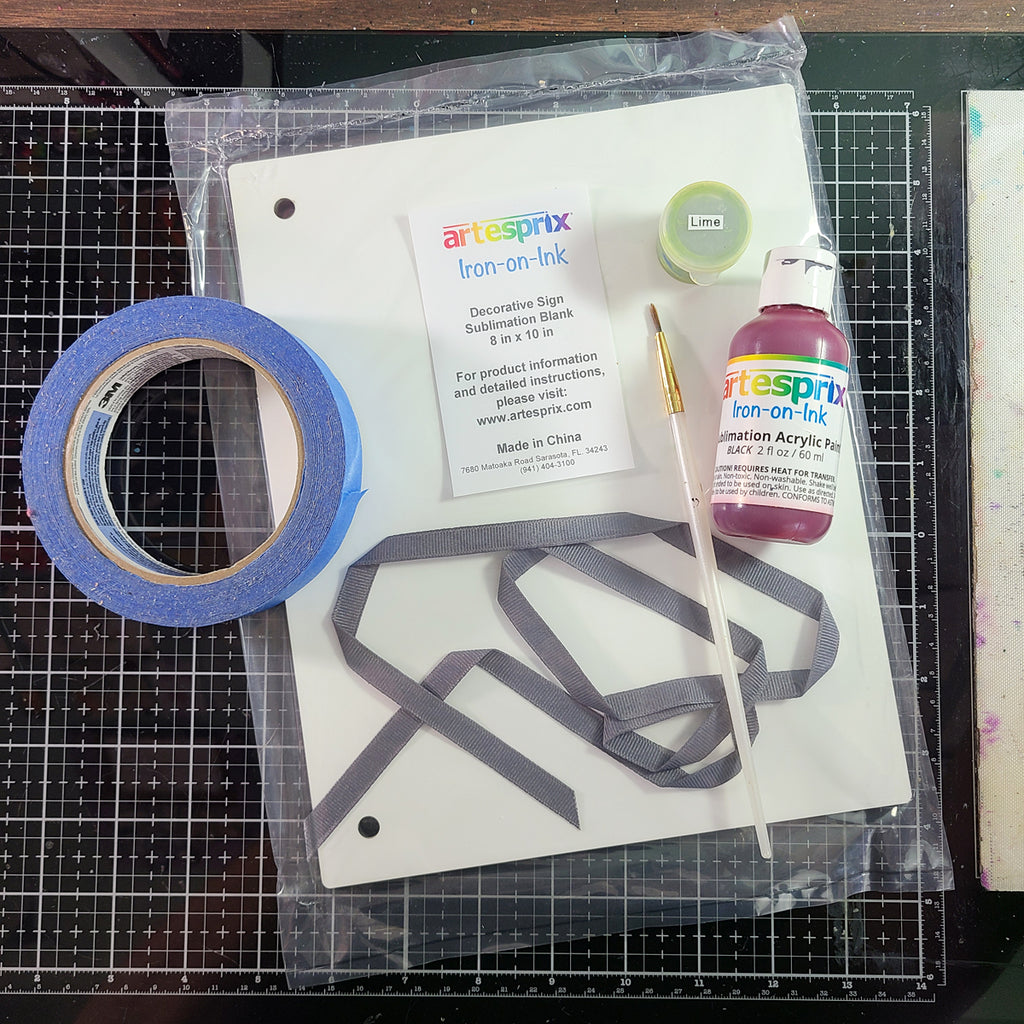
Supplies:
Artesprix:
Decorative Sign
Sublimation Acrylic Paint Set
*Free* Paint Color Mixing Chart
Heat Tape
Protective Paper
1” Painter’s Tape
Paint Brushes (I used a round and a filbert)
Optional: Plastic Storage Cups
110lb Cardstock or Mixed Media Paper
Step-by-Step Tutorial:
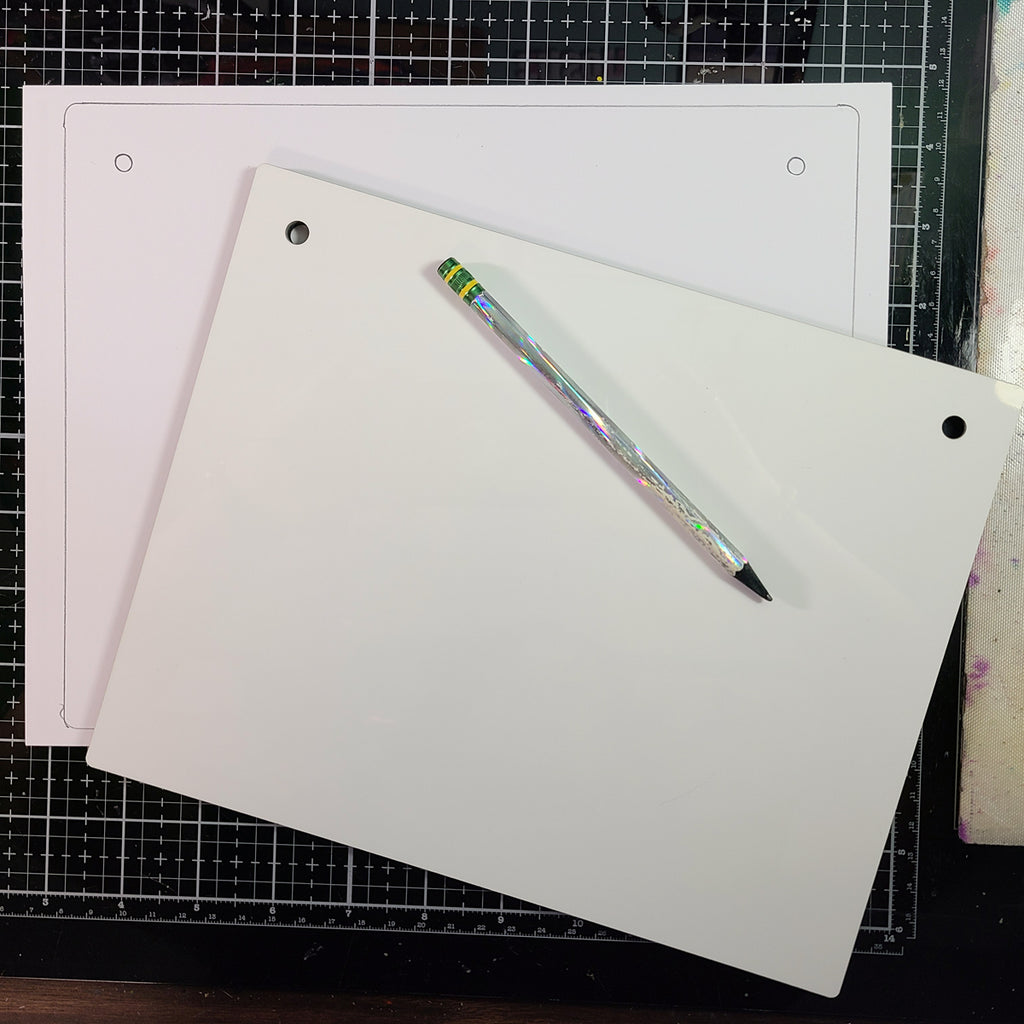
Step 1: Trace your Decorative Sign on to a piece of Mixed Media Paper with a pencil. The pencil marks will not transfer during the sublimation process.
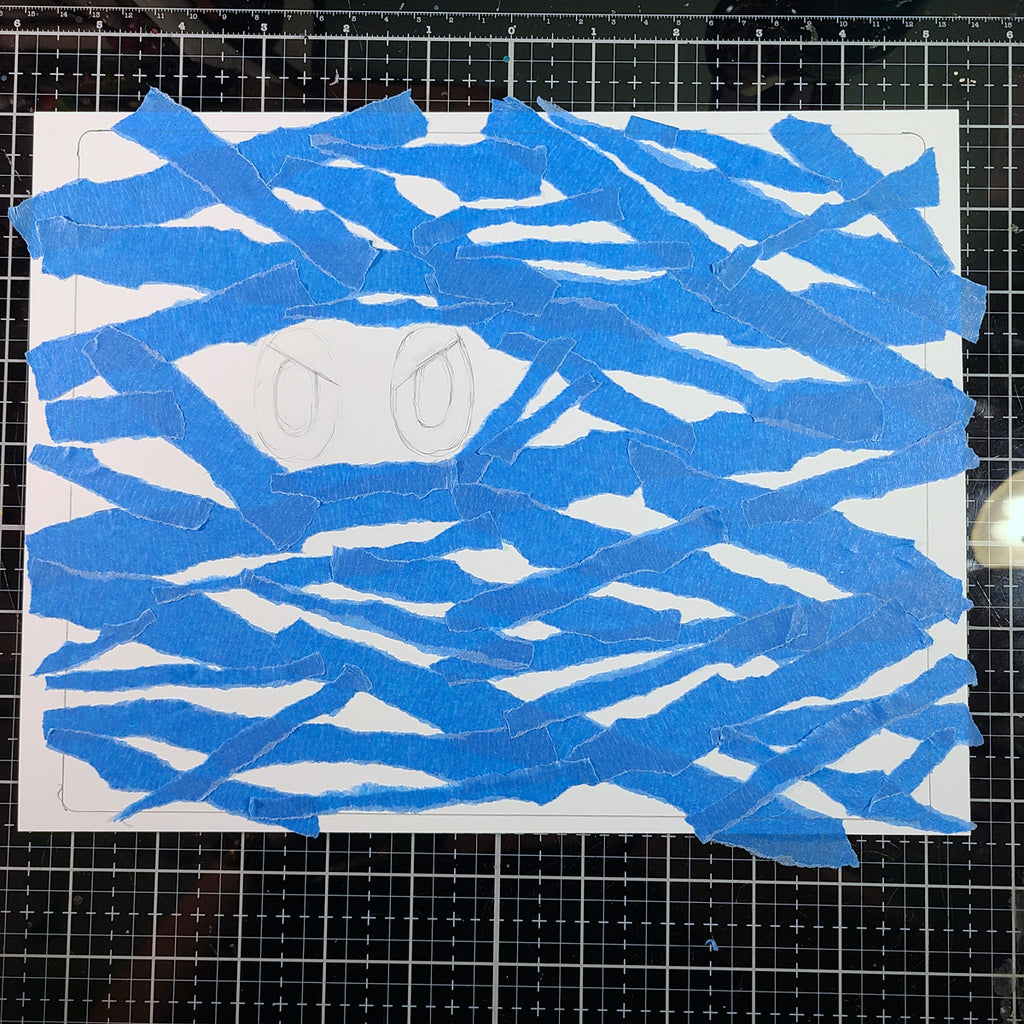
Step 2: Tear strips of painters tape on each side, to rough up the edge. You can even tear them in half to make them skinnier. Apply them to your cardstock.
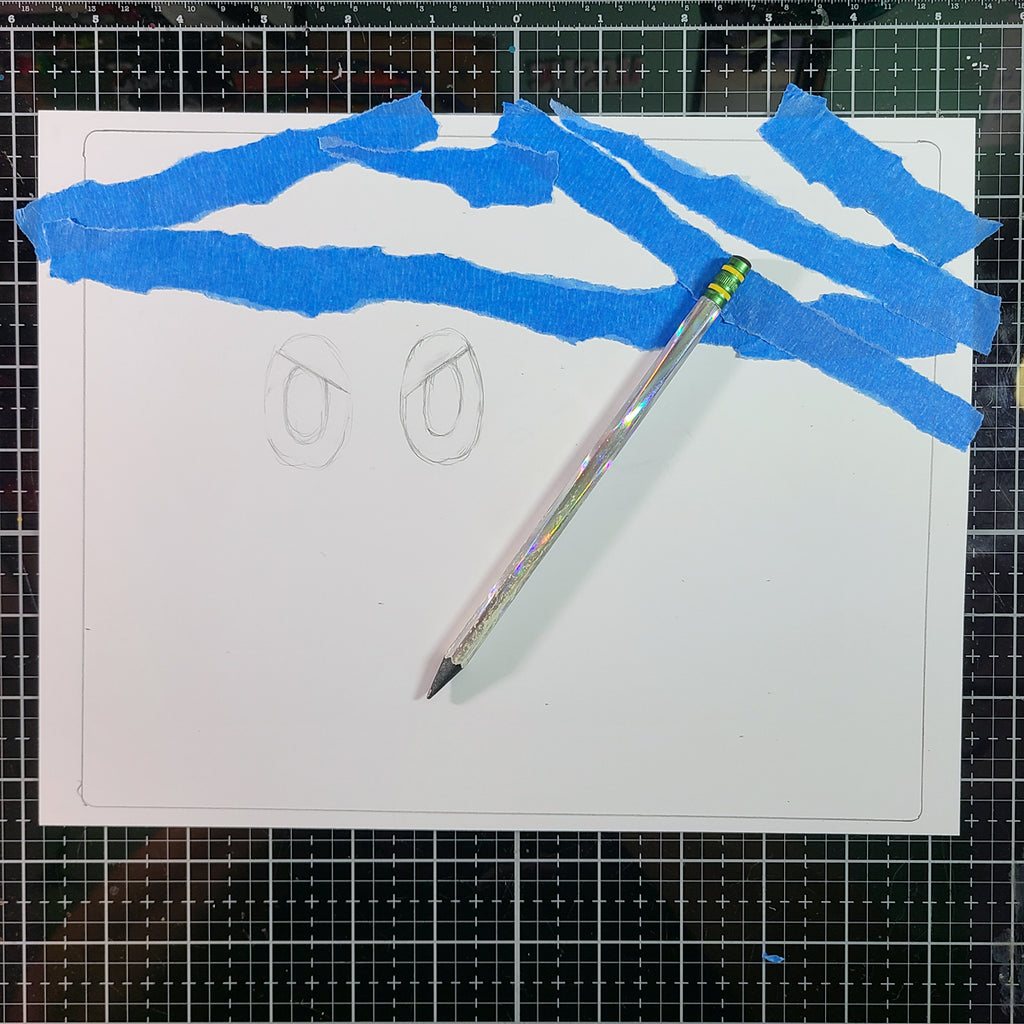
Step 3: After adding some strips to the top, draw in the eyes with a pencil.
Step 4: Finish taping the rest of the outlined area.
Step 5: Begin painting. I started with adding "Chartreuse" to the eyes (see Sublimation Paint Color Mixing Chart) and then painted all the negative space on the cardstock with Black paint from the bottle.

Step 6: Add details to the eyes with "Lime" paint and "Brown".
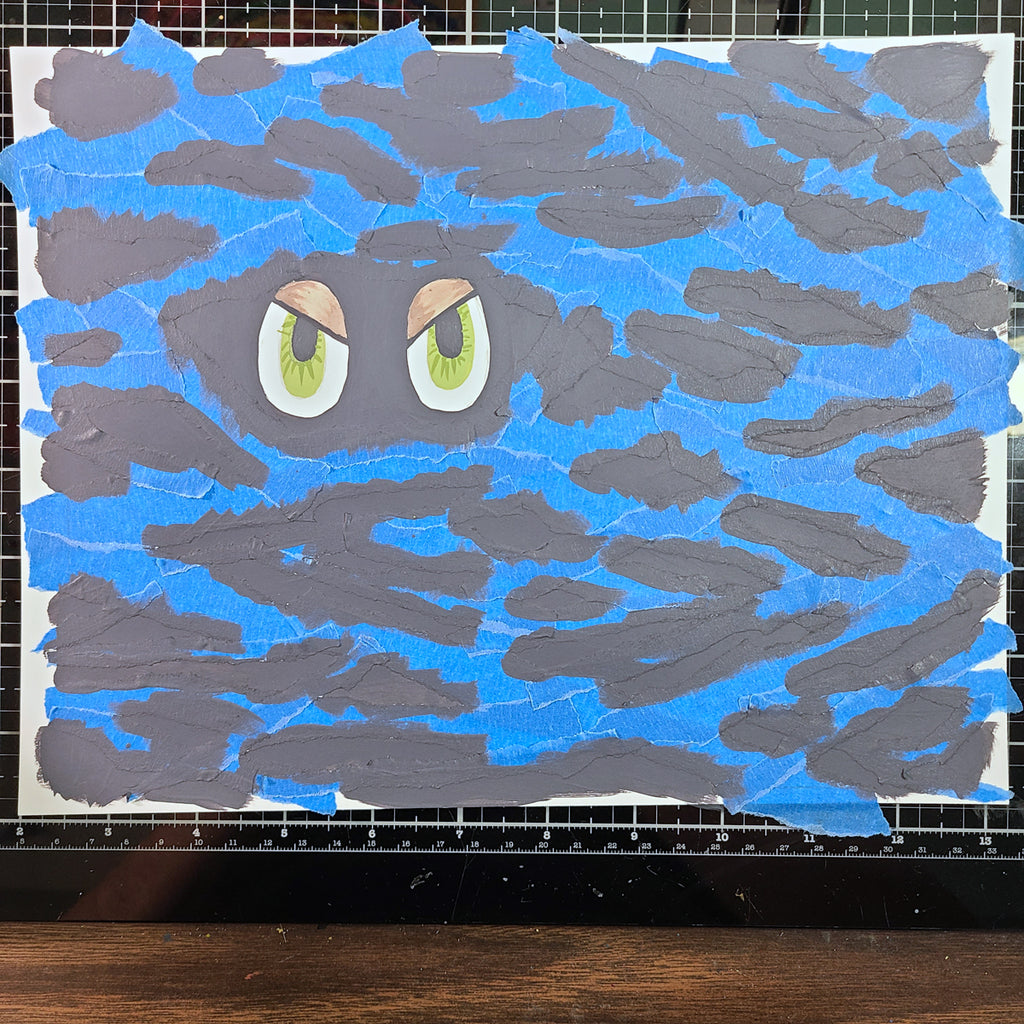
Step 7: Remove the Painter’s Tape once the paint has dried completely.
Maker's Note: I forgot to take a photo of what this looked like once I pulled all the tape away, but it was pretty….empty. It was lacking definition. If I didn’t overlap my tape so much, I would have had more defined lines.

Step 8: Use a pencil to add in defining lines of the mummy’s bandages. I intentionally made the lines wavy to mimic the torn edges of the tape.

Step 9: Using a liner brush, go over the pencil lines with Black Sublimation Paint to define the lines. Now our design is finished!
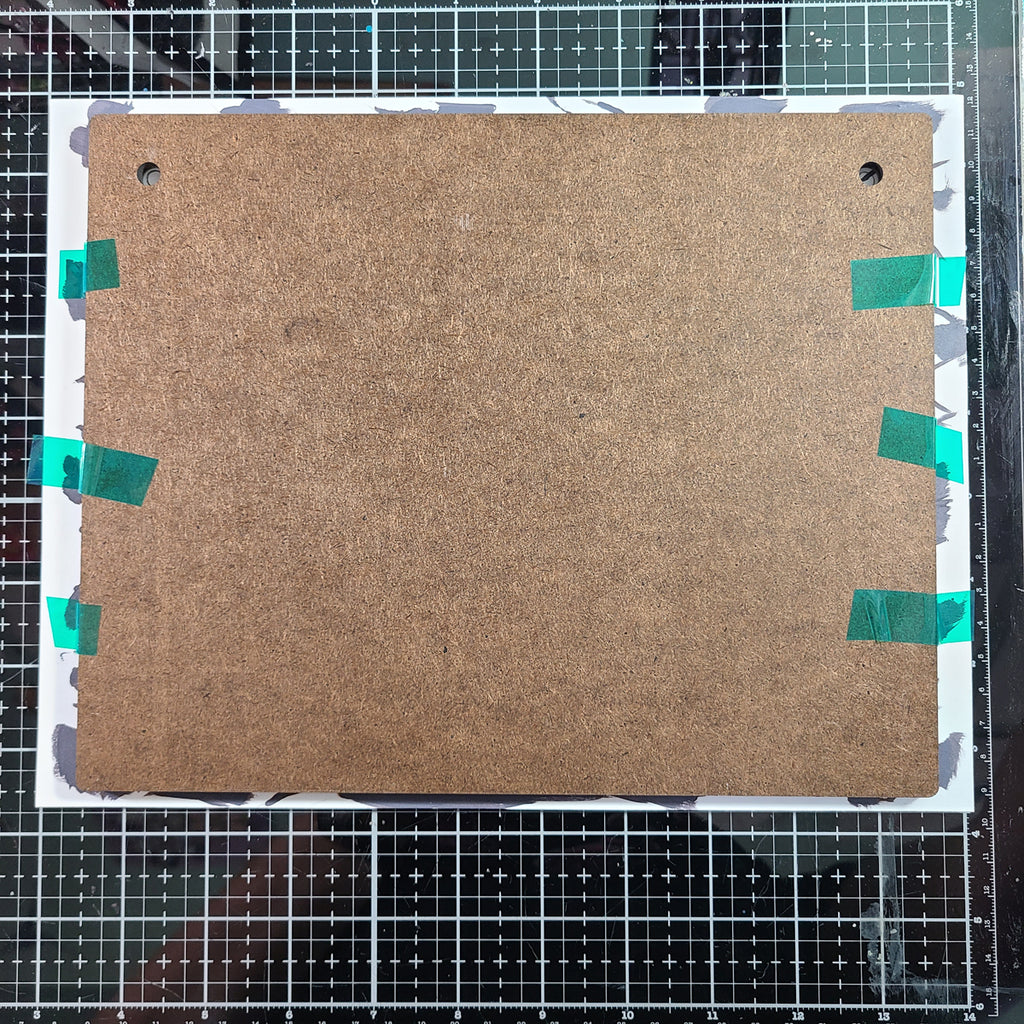
Step 10: Tape your design face down to the Decorative Sign. Be sure to use plenty of Heat Tape, as the sign is quite thick. You don’t want anything to shift.
Step 11: It’s time to make the "Sublimation Sandwich". This sandwich not only ensures a great transfer of your design, but it will protect your heat source as well. Your sandwich should be built as follows: Protective Paper, Design (face-down), Decorative Sign, Protective Paper.
Step 12: Let’s sublimate! Place the "Sublimation Sandwich" into your Heat Press and press at 400℉ for 105 seconds. You may have to adjust your pressure knob due to the thickness of the sign.
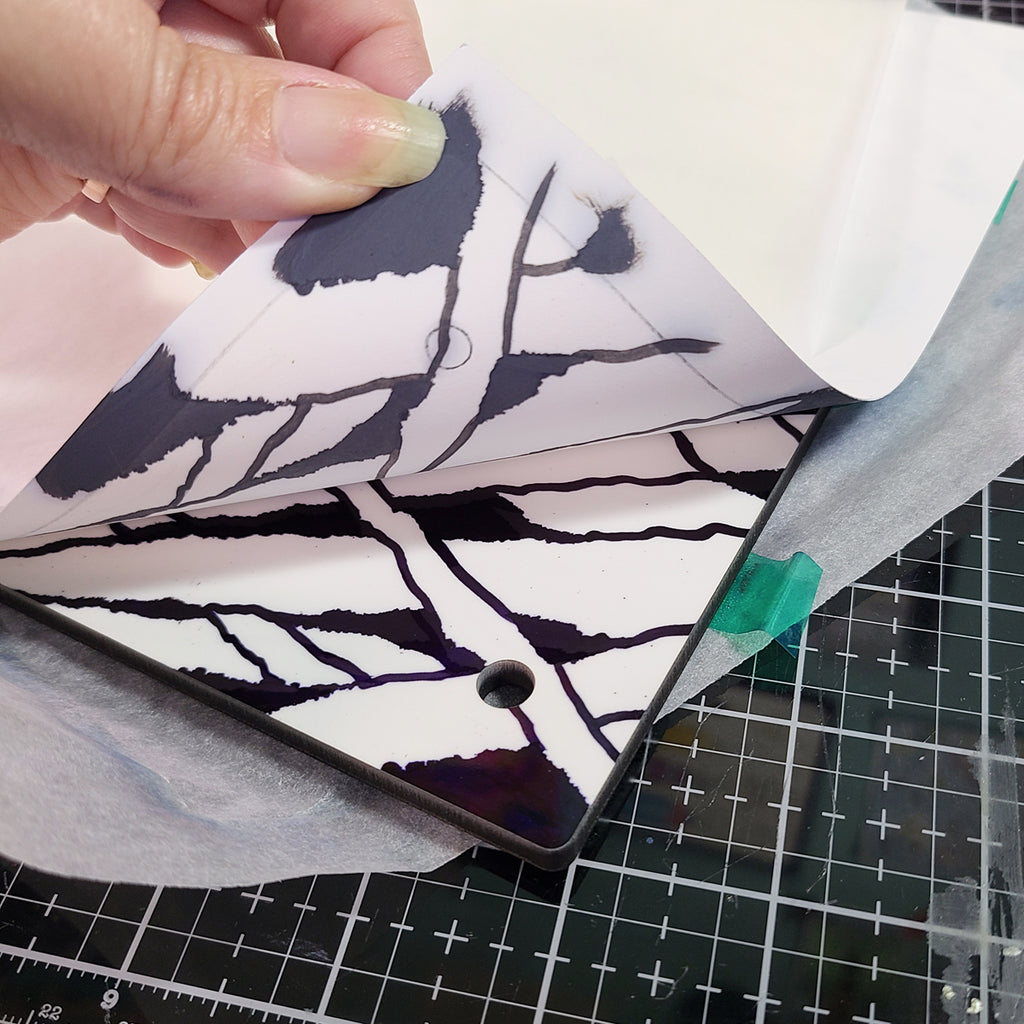
Step 13: It’s time for the "Peek Test"! Take a look at a corner of our project to make sure our design transferred well. If it didn’t, because we did not remove our tape, we can put it back into our heat press to sublimate again.
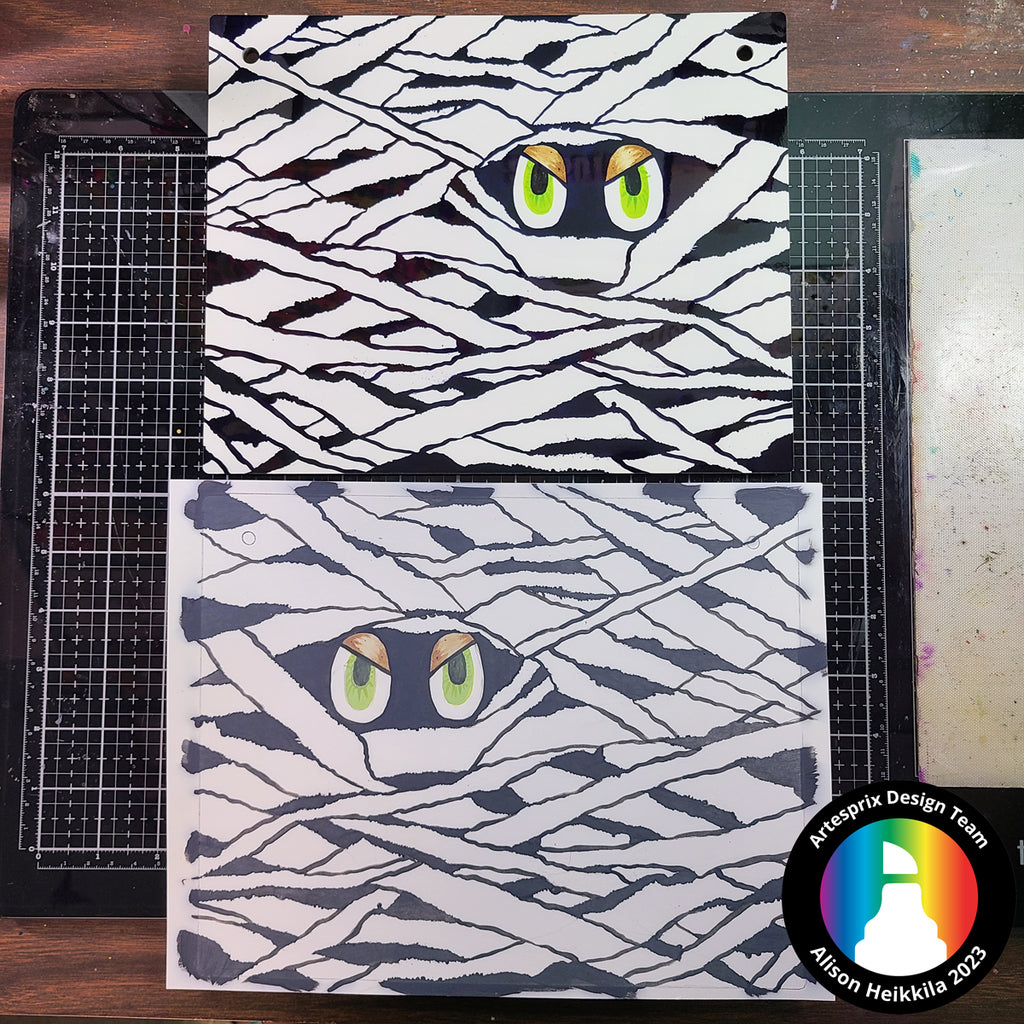
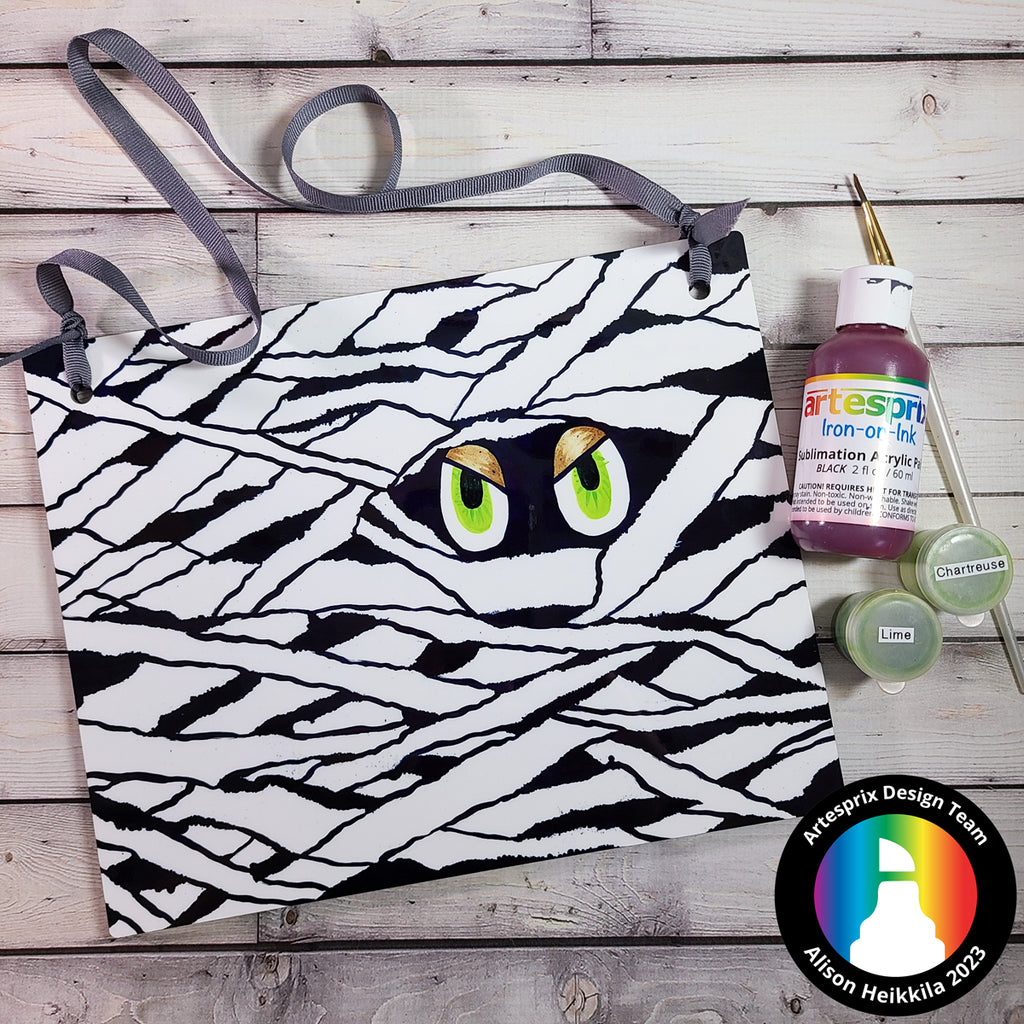
Here is our completed Decorative Sign with the original artwork. Look at how the eyes pop and the black is so rich now!
Step 14: Tie the included ribbon onto the sign and hang it up!
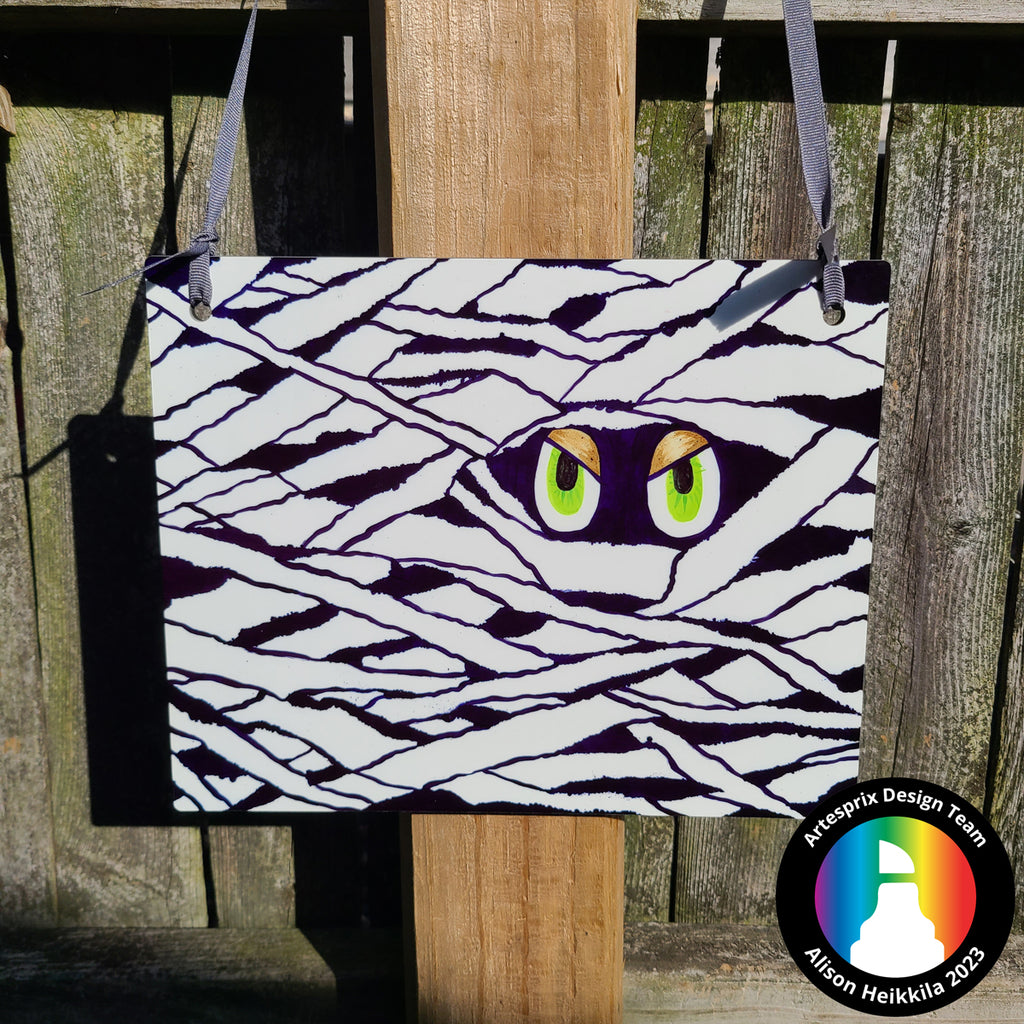
I love how this mummy turned out! I did not anticipate drawing in the extra lines, but it was simple to do and made a huge impact on the final design. Now my sign can be hung with the rest of my Halloween decorations.
The Artesprix collection of paints, inks, and markers make sublimation easy and limitless. How would you like to get more ideas on using Artesprix’s Sublimation Iron-On-Ink? There’s a Facebook Group that’s just for fans of Artesprix! You can click HERE to join. Also, don't forget to visit the Artesprix store to see all of the available blanks and bundles, so you can get started with sublimation.
Thanks so much for stopping by. Have an inspiring day!
Alison Heikkila
**This post may contain affiliate links. That means that I may receive compensation if you purchase through the links I have provided. The price you pay for the product or service is not higher, but I may get compensated.**


1 comment
Ok. You blew my mind! I love this technique.