Trick-or-Treat Bag with Sublimation Vinyl & Iron-on-Ink
Artesprix Design TeamHalloween Projects, Markers, Silhouette, Sublimation Vinyl, Tote Bag
This Trick Or Treat Bag Compatible with Iron-on-Ink is the perfect way for the kids to collect all their candy on Halloween! It’s an easy Halloween craft that’s both fun and practical!

It’s that time of year again! Halloween is on the way and my girls are getting super excited! We’ve been planning our costumes, Halloween treats and even got started with our Halloween movie nights.
The one thing we always forget to plan is what they’ll use to collect all the candy. They usually remember just as we’re walking out the door so we just grab whatever we have handy. In past years we’ve used everything from beach buckets to pillowcases (they usually just go for whatever can hold the most candy!).
This year we’re going to be prepared though! I’ve planned ahead and made cute DIY Trick Or Treat bags for each girl. It was also the perfect excuse to get crafty with my Artesprix Sublimation Markers!

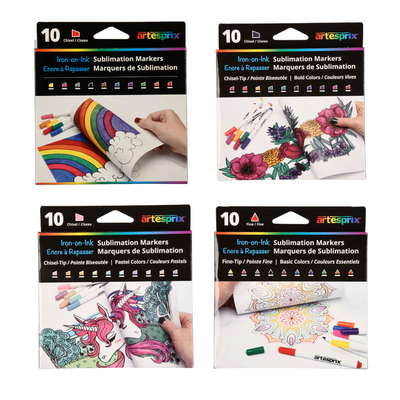
I’ve always loved crafting with Artesprix Markers because there are so many different things you can do with them. These markers allow you to transfer drawings from regular copy paper to a variety of surfaces just by using a heat source. They work with canvas zip bags, coasters, decorative panels and bookmarks and more. The possibilities are endless and with these markers, you can let your creativity run wild!
Artesprix Sublimation Markers even work on fabrics and I’ve used them to make everything from beach bags to pet bandannas. Polyester fabrics work best but there are ways of getting around that, as you’ll see with this trick or treat bag.
Materials:
Tools:
Step 1.
The first thing you’ll need to do is find a design. I love using the Silhouette Design Store because they have so many cute options to choose from. As soon as I saw this one, I knew it was perfect!

One of the great things about Artesprix markers is that they work so well with the Silhouette Cameo. All you need is a simple adapter. Take the lid off the pen and slip it into the adapter.

Step 2.
Take the cutter out of the Cameo and replace it with the pen and adapter.

You’ll want to be sure to mirror your image first. Send it to the Cameo and watch as the marker sketches your design.

Step 3.
Now take your markers and start coloring (this is my favorite part)! The original Artesprix 10 pack has a great selection of colors but since this was a Trick Or Treat bag, I used purple, green, orange, and black, with yellow for the background.

At this point, you could transfer your image directly to a polyester fabric. However, since this tote bag was cotton, you’ll need one extra step. When transferring to non-polyester materials like cotton, you’ll need to include a layer of heat transfer vinyl. For these projects, I use Siser Easy Subli.

Step 4.
Set the Cameo cut just the outline of your design. Once it’s finished cutting, peel away the extra vinyl.

Step 5.
Place your vinyl on a hard, flat surface and lay a piece of Siser Easy Subli Mask over the top. Be sure to only use the Siser brand because others may not work as well. Use a scraper to be sure the vinyl is firmly attached, then peel the mask back with the vinyl attached.

Step 6.
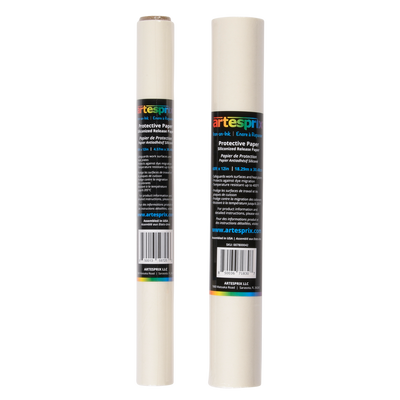
Place the mask, with vinyl, face down on the tote bag. Use Artesprix heat tape to keep it from moving when you place the tote in the heat press.. Now make a sublimation sandwich by placing the tote bag in between two pieces of Artesprix Protective Paper. Just think of the bag as the meat and the protective paper as two pieces of bread.

Step 7.
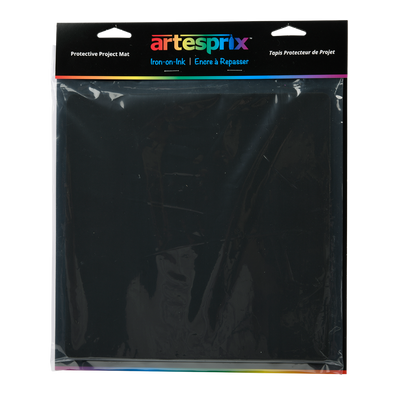
Heat for 15 seconds at 310°. When you remove it from the heat press, place the trick or treat bag on an Artesprix Protective Mat to protect your work surface while it cools.

Step 8.
While you wait for the tote bag to cool, trim your design. This will make it easier to keep the image aligned with the Easy Subli. Just don’t trim too much because you’ll want to have room to tape it down without tape covering any of the images.
Step 9.
Align the image with the vinyl and use Artesprix Heat Tape around the edges.

Step 10.
Set your heat press to 400° (if using an iron, set it to the highest setting). Once it hits 400°, make another sublimation sandwich. Place a sheet of Artesprix Protective Paper on the bottom, carefully lay the trick or treat bag on top, then add another sheet of protective paper.

Step 11.
Heat for 60 seconds, then place on the protective mat to cool.

Step 12.
Once you let it cool for a minute or two, it’s time for the big reveal. Drumroll please…

Step 13.
I love peeling back the paper and seeing just how much the colors pop! Once you add the heat, they become so bright and vivid!

Step 14.
The vibrant colors really stand out against the white and would look amazing on a black or purple tote bag too. My girls are going to be so excited when they see these bags. They’re definitely a big step up from pillowcases.

You could even decorate these to match specific costumes. For example, if your child is dressing up as a Disney character or a favorite movie character, you could design a DIY trick or treat bag with the same theme. Either way, your kids will have a super cute bags for holding all that candy!

The possibilities are endless and Artesprix Sublimation Markers make getting crafty so much fun! What will you make with your markers?
If you LOVED this Iron-on-Ink Trick Or Treat Bag as much as I did, be sure to check out Maria’s Halloween Maple Bag Tag projects. It would even make a great accessory to this Iron-on-Ink project!
The post Trick Or Treat Bag Compatible with Iron-on-Ink! appeared first on Artesprix.

Learn how to make a custom sublimation tumbler using Artesprix Sublimation Inks in this beginner-friendly tutorial. We will show you how to use Artesprix inks, plastic wrap, and heat-resistant transfer...
Learn how to make a custom sublimation tumbler using Artesprix Sublimation Inks in this beginner-friendly tutorial. We will show you how to use Artesprix inks, plastic wrap, and heat-resistant transfer...

Iron-on-Ink sublimation makes it simple to turn blank surfaces into personalized, lasting projects. In this Creative Press, we’re sharing four approachable Iron-on-Ink project ideas designed to help makers build confidence,...
Iron-on-Ink sublimation makes it simple to turn blank surfaces into personalized, lasting projects. In this Creative Press, we’re sharing four approachable Iron-on-Ink project ideas designed to help makers build confidence,...

Make your holidays more meaningful and more sustainable with Artesprix Iron-on-Ink! This season, turn your gift wrap into a creative moment all its own with custom sublimation tags that can...
Make your holidays more meaningful and more sustainable with Artesprix Iron-on-Ink! This season, turn your gift wrap into a creative moment all its own with custom sublimation tags that can...
Subscribe to be the first to know about new products, ideas, and special coupon codes at Artesprix!


