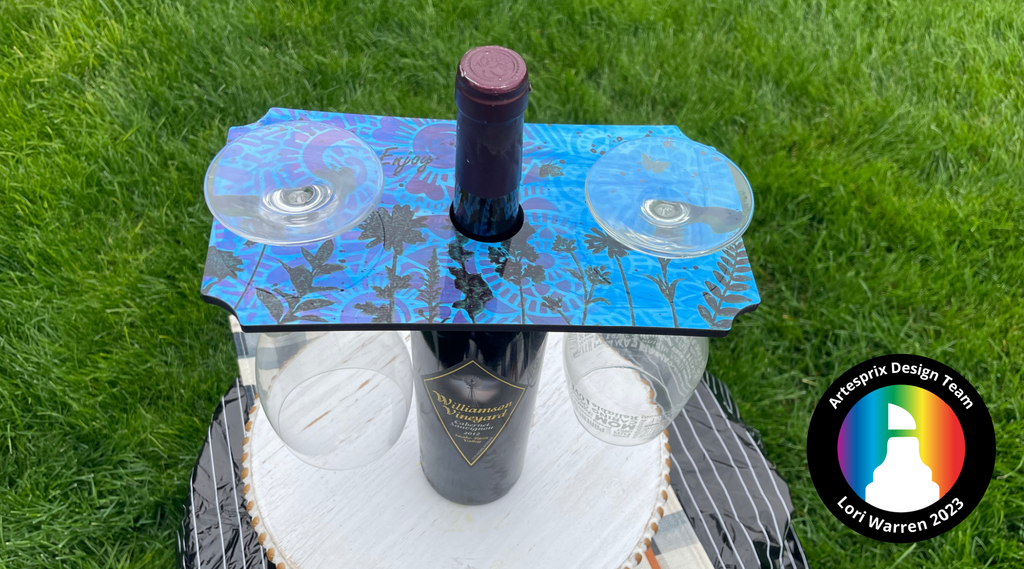
Wildflower Artesprix Beverage Caddy with Iron-on-Ink
Artesprix Design TeamInk Pads, Paints
Products in this post


Hello all, Design Team Member Lori here with a new project featuring Artexprix Stamp Ink and Sublimation. This tutorial features a Sublimation Beverage Caddy which is great for any Fall outdoor activity like sports, or if you're just enjoying the foliage. This blank is a fun way to leave a lasting impression whether for your personal weekly happy hour, or a truly personalized hostess gift. Follow the step-by-step tutorial below as we mix different Iron-on-Ink mediums.
**This post may contain affiliate links. That means that I may receive compensation if you purchase through the links I have provided. The price you pay for the product or service is not higher, but I may get compensated.**
What is Sublimation Iron-on-Ink?
It is an interesting and fun product that allows you to create a design on standard copy paper that can then be heat transferred onto surfaces (must have polyester in it or have a polyester coating). Once the project is transferred to the blank, it is lifetime permanent. Before Artesprix, you would need a fancy printer to experience this level of personalization, but not anymore!
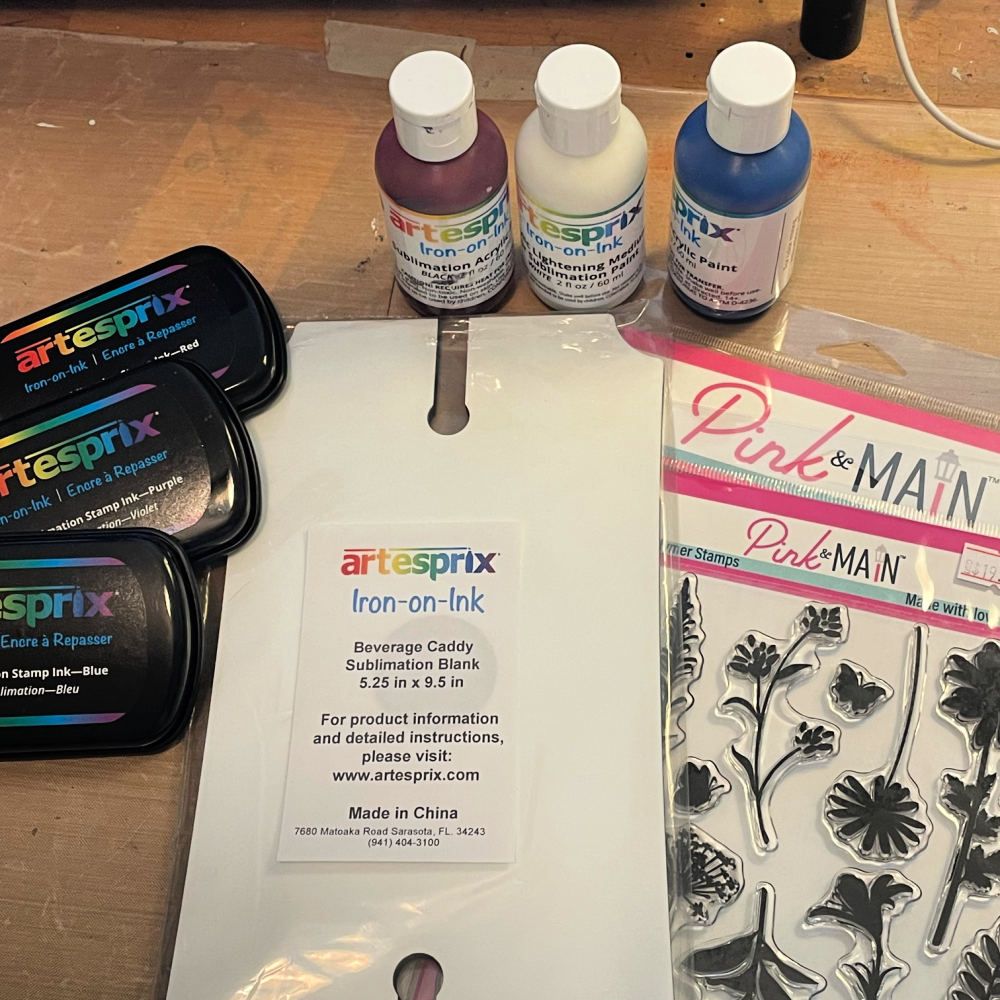
Supplies:
Pink and Main Wildflower Stamp Set
Emerald Creek Sublimation Stamp Set
Stamp Positioning Tool
Plain Copy Paper
Heat Press or Handheld Craft Press
Step-by-Step Tutorial:
Step 1: Mix Blue Sublimation Acrylic Paint with Acrylic Lightening Medium until you achieve the desired color.

Step 2: Paint the majority of the surface of a piece of plain copy paper. Allow to dry.
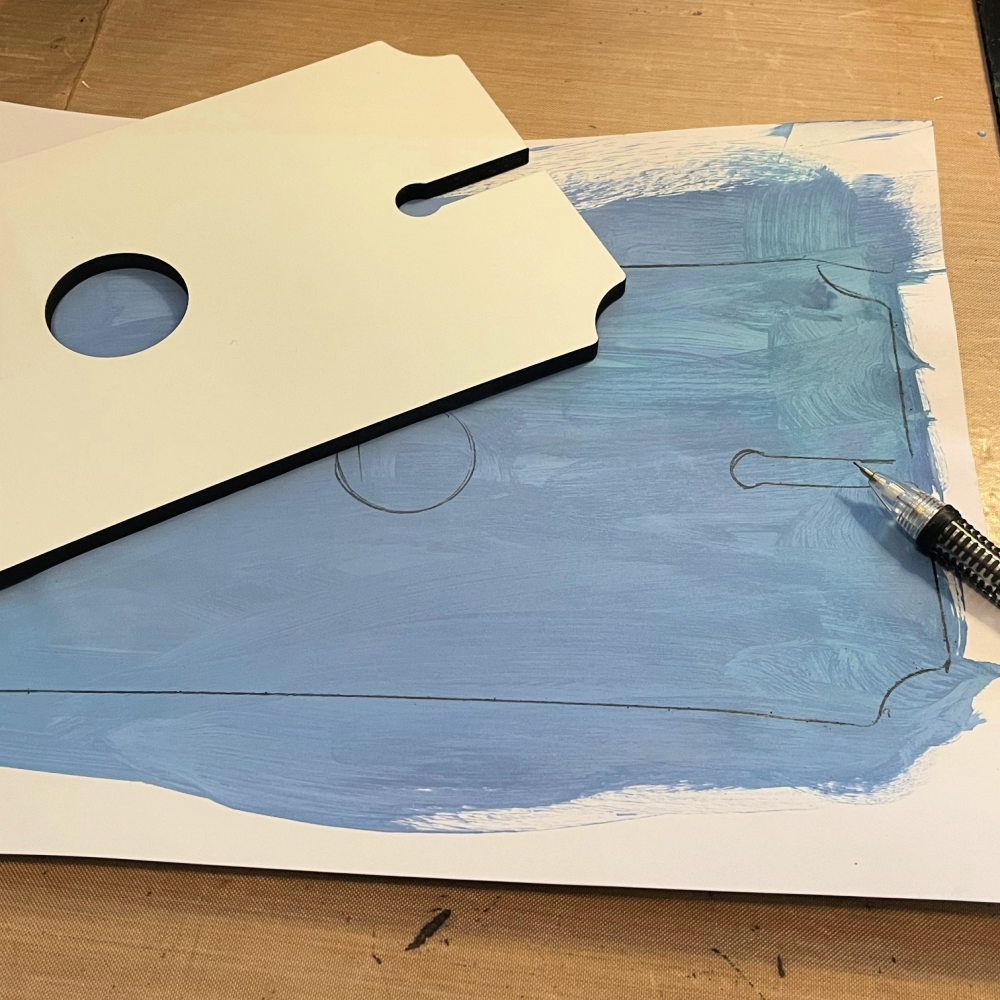
Step 3: Trace the outline of the Beverage Caddy over the painted surface with a pencil, the pencil will not transfer.
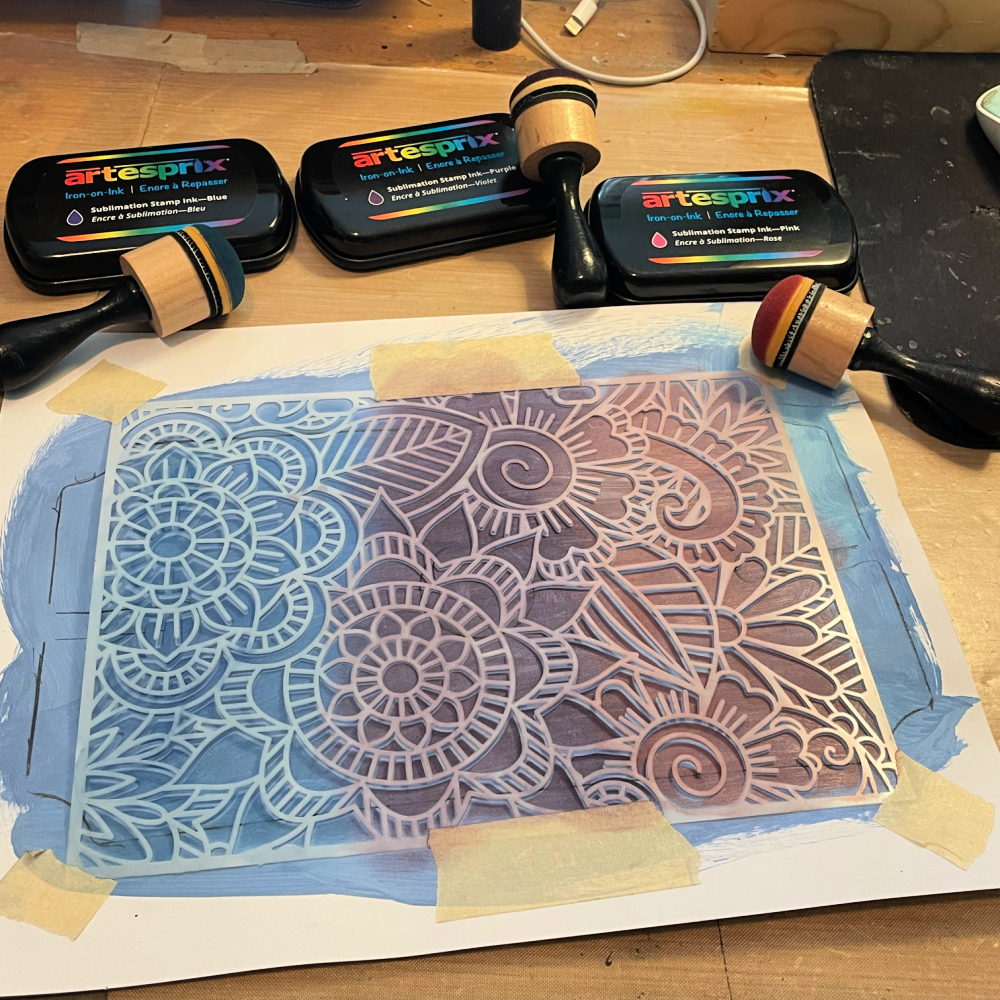
Step 4: Tape Pink and Main stencil over the painted surface and use a blending tool to apply Sublimation Stamp Ink.
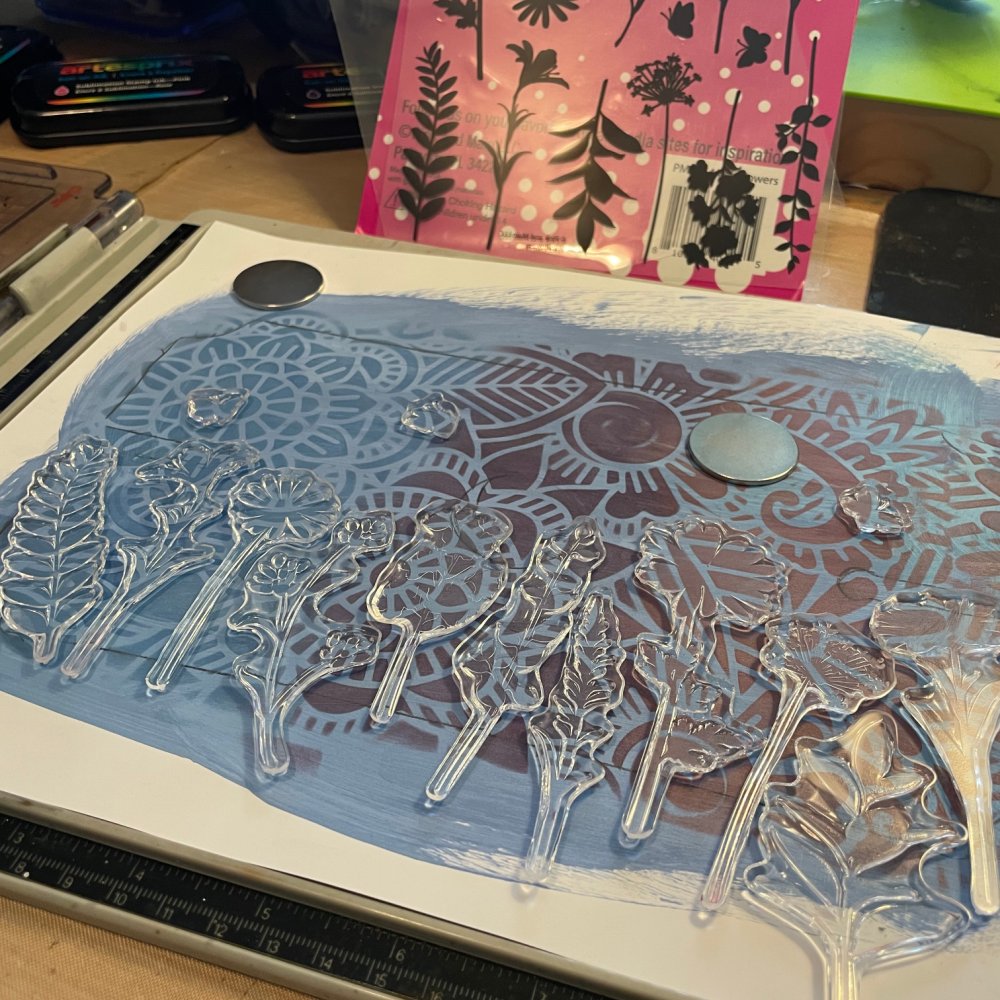
Step 5: Place painted paper to stamp press. Align floral stamps across paper.
Ink stamps with Black Sublimation Stamp ink and press.
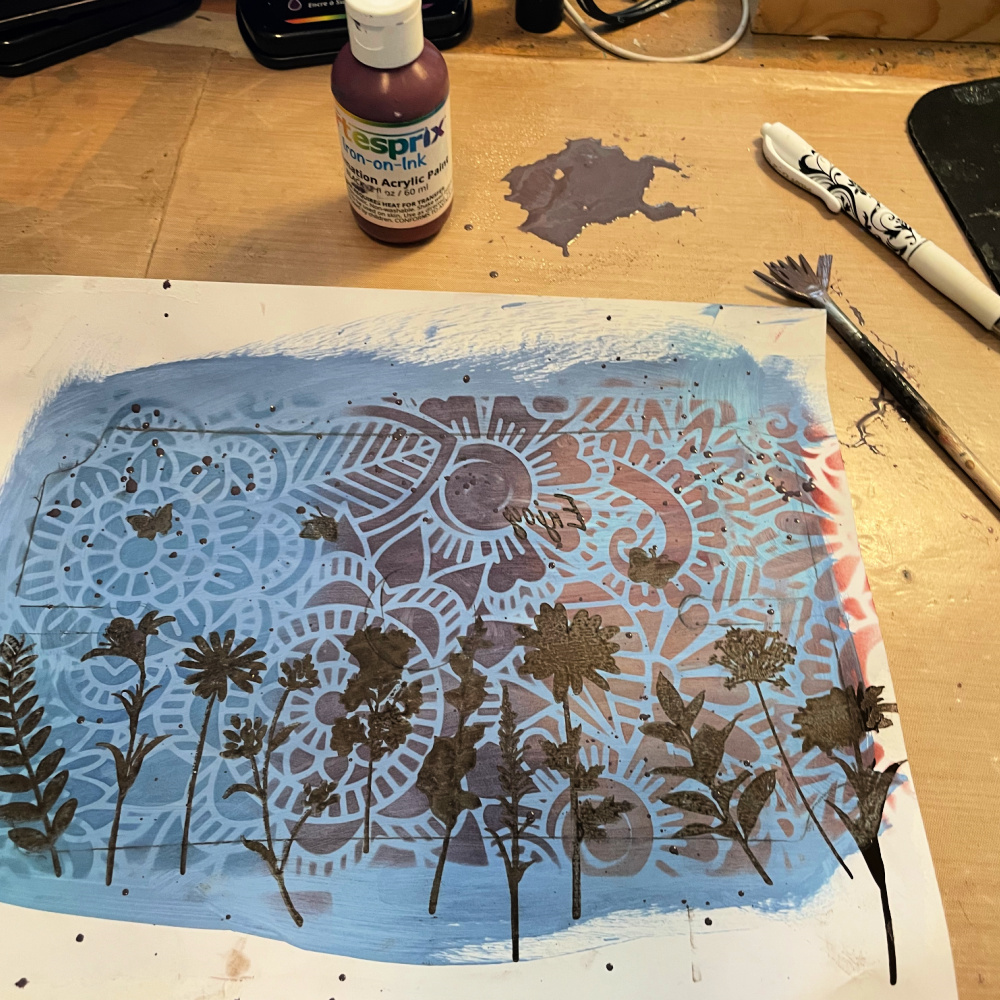
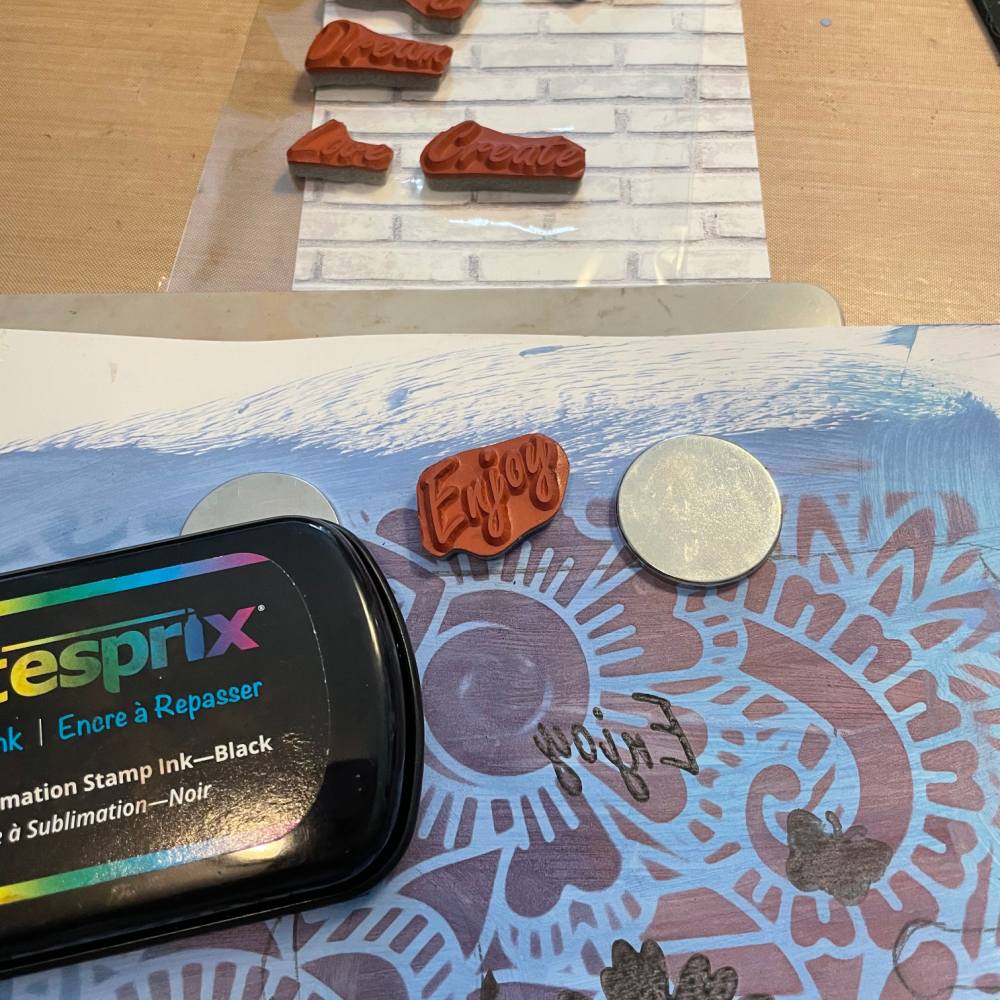
Optional: Stamp a word or saying with Black Sublimation Stamp ink and press. I used a Sublimation Stamp set from Emerald Creek with the sentiment "Enjoy".
Step 6: On a craft mat or non-porous surface, dilute Black Sublimation Acrylic paint by adding a few drops of water. Use a fan brush to add paint splatters.
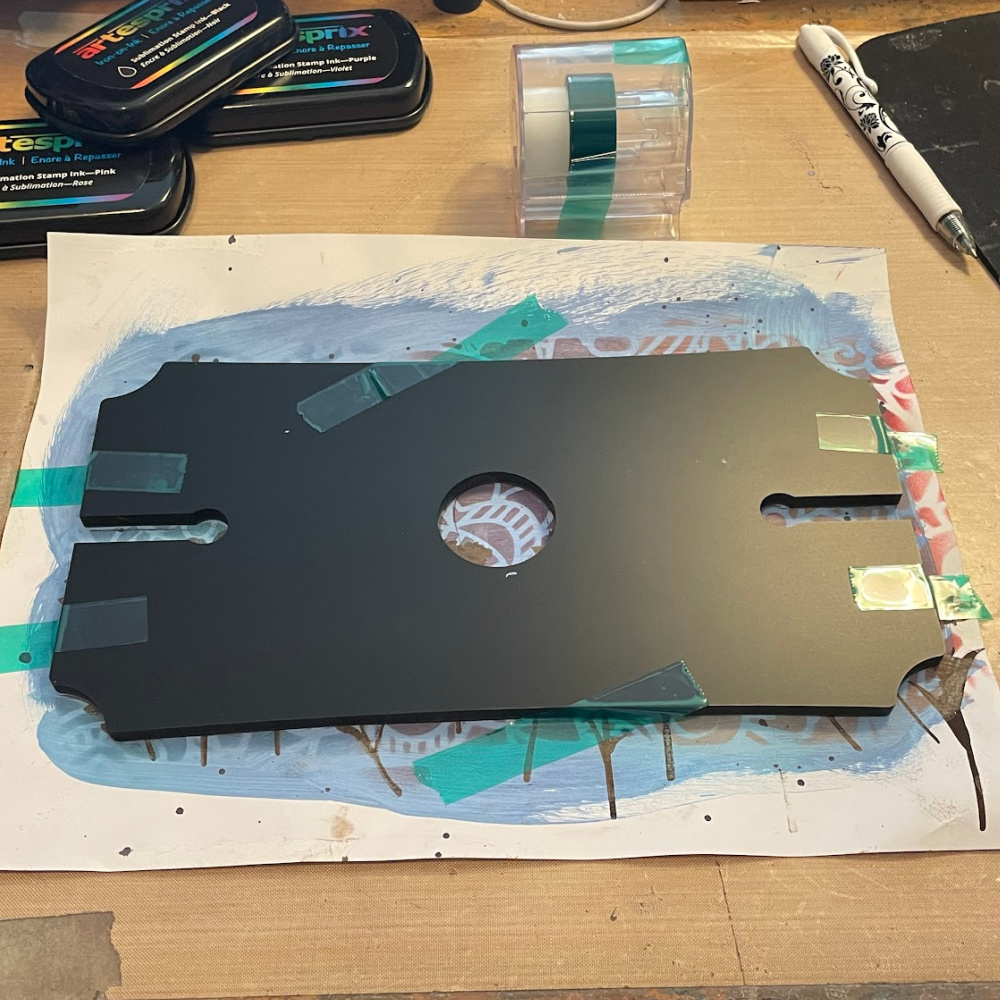
Step 7: Place Beverage Caddy onto the design, so the white side is touching the design, and secure with heat tape.
Step 8: Make a "Sublimation Sandwich" by placing the secured project between two pieces of protective paper.
Step 9: Heat set using appropriate settings for the blank. The Beverage Caddy calls for 400℉ with a transfer time of 105 seconds.
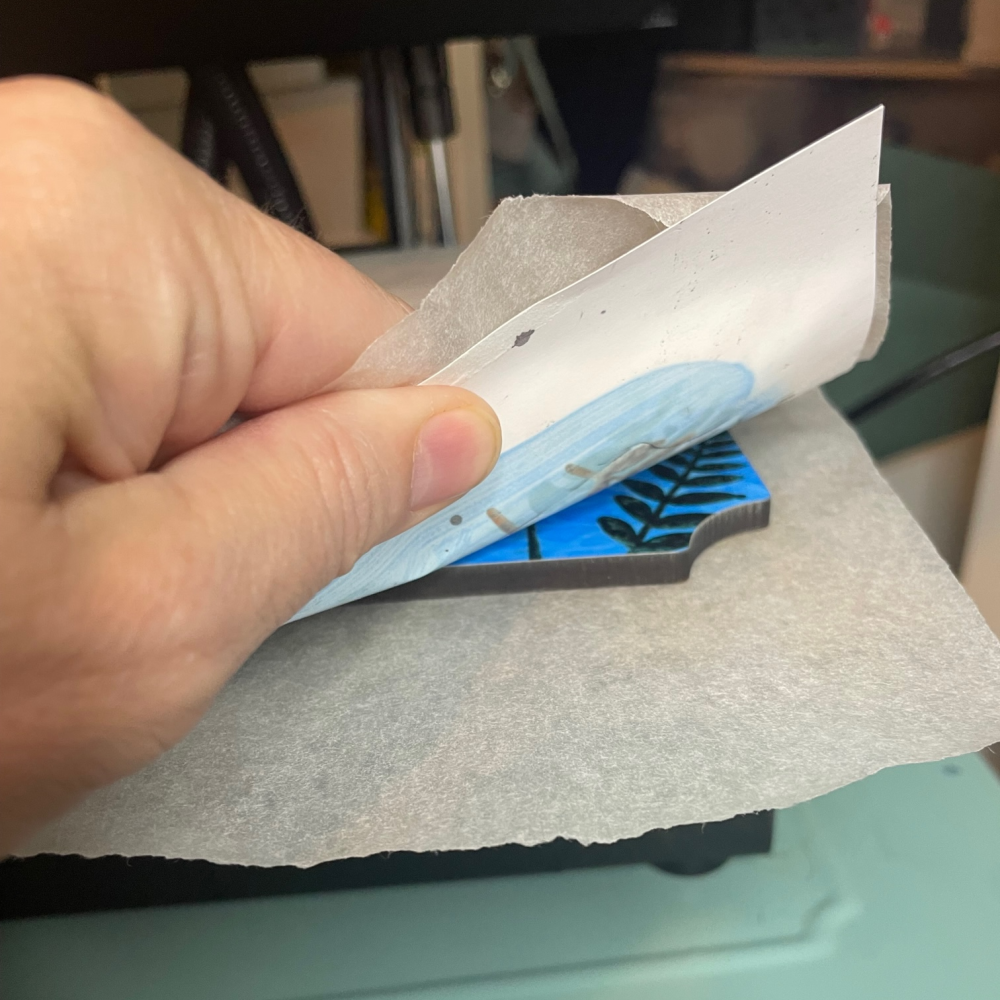
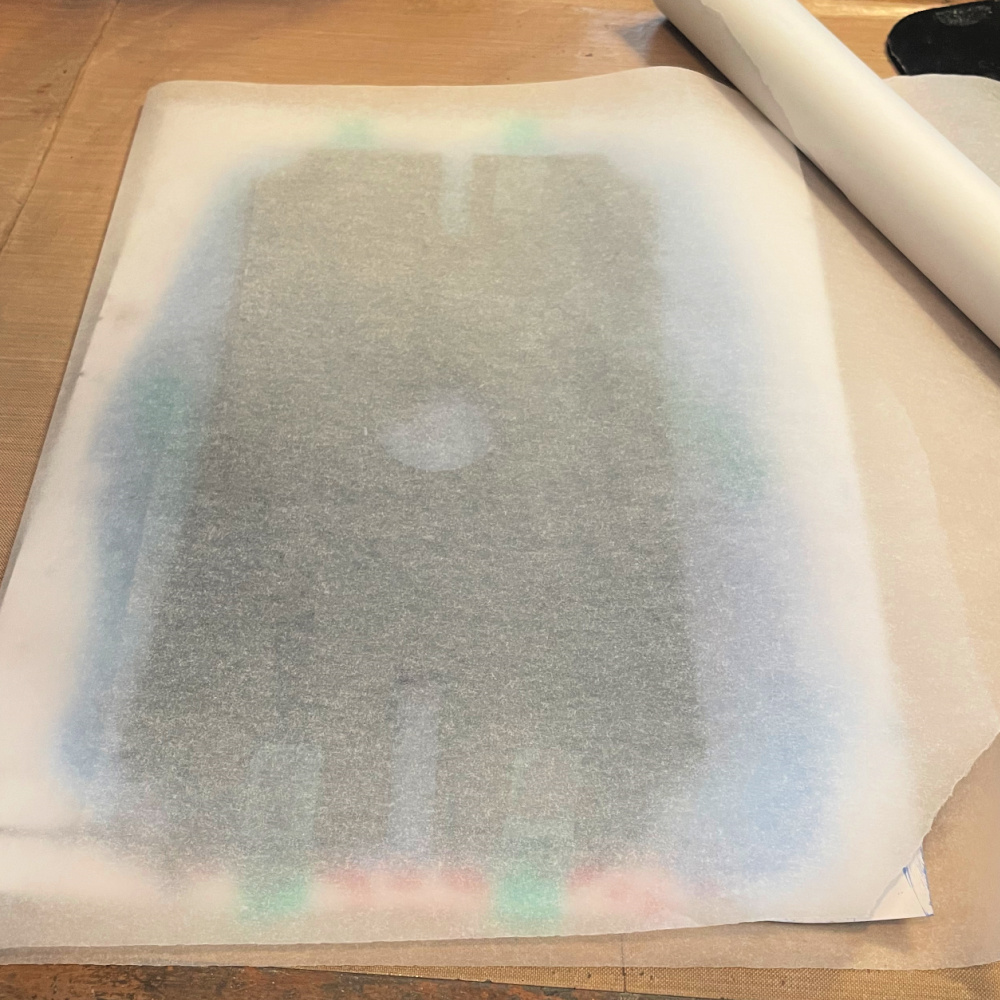
Step 10: After heat set, conduct a "peek test" by pulling back a small portion of the paper to ensure transfer was successful. It is essential to leave the tape in place until you confirm, so you can re-heat if needed.
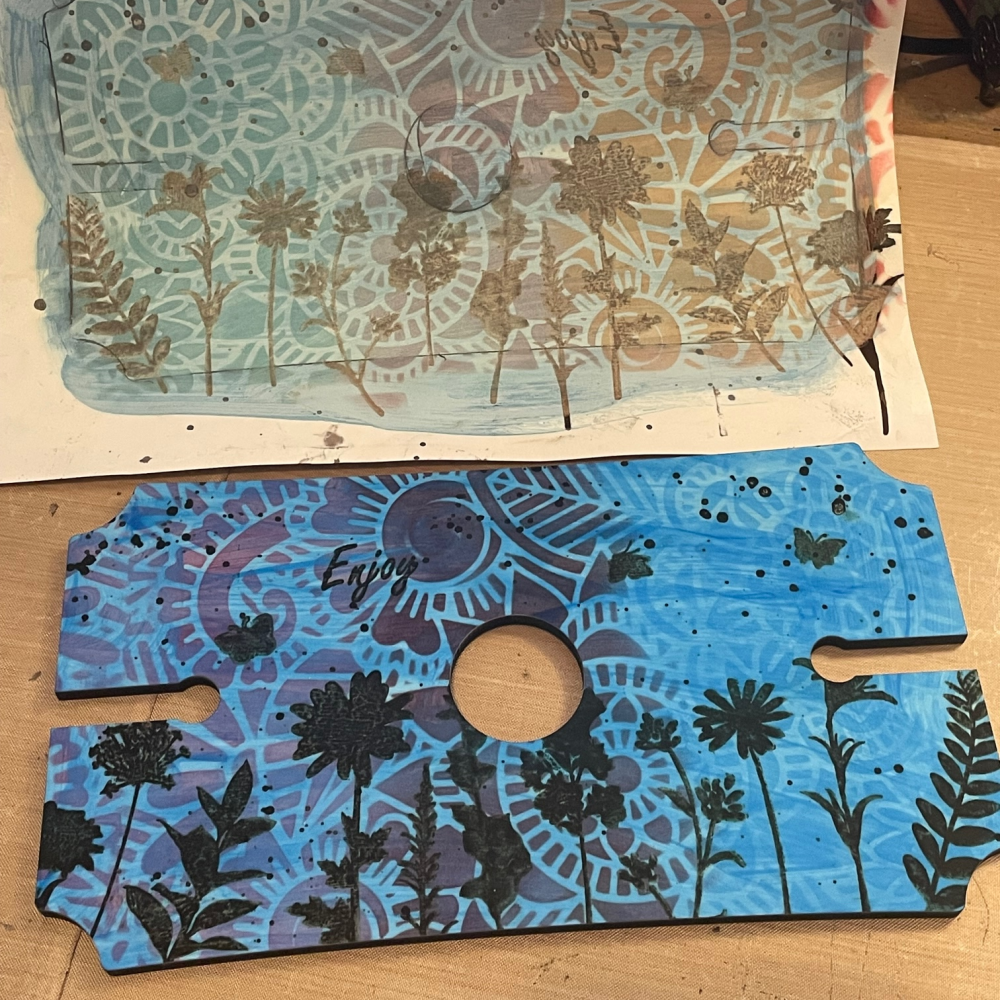
Step 11: Pull back the paper to reveal your unique design.
This blank is too fun! After you pour 2 glasses of your favorite bottled beverage you can insert the glasses up-right to keep your drink off the ground. I hope you found inspiration to try this project for yourself. Don't show up to Thanksgiving empty handed, bring a bottle of wine and a personalized Beverage Caddy. If you do decide to give this project a try, post your Beverage Caddy to the Artesprix Iron-on-Ink Inspirational Group, we would love to see it!
Happy Day,
Lori Warren
**This post may contain affiliate links. That means that I may receive compensation if you purchase through the links I have provided. The price you pay for the product or service is not higher, but I may get compensated.**


