Christmas In July Top Hat Snowman Artesprix Sublimation Ornament
Artesprix Design TeamChristmas Projects, Ink Pads, Markers, Ornament, Wine Bag
Products in this post


Hello all, Christmas in July is all about getting a jump start on Holidays. I thought what better way than with this cute Artesprix Sublimation Metal Ornament. This transfer can be accomplished with stamps and Artesprix Stamp Ink and Markers. The glossy finish of the ornaments makes the transferred design pop! Plus, you can sublimate on both sides of this blank so it will look great at any angle on the Christmas tree. Check out the instructions and Mixed Media Quick Tips Video below for the step by steps.
**This post may contain affiliate links. That means that I may receive compensation if you purchase through the links I have provided. The price you pay for the product or service is not higher, but I may get compensated.**

What is Sublimation Iron-on-Ink?
It is an interesting and fun product that allows you to create a design on standard copy paper that can then be heat transferred onto surfaces (must have polyester in it or have a polyester coating). Once the project is transferred to the blank, it is lifetime permanent. Before Artesprix, you would need a fancy printer to experience this level of personalization, but not anymore!

Supplies:
Sublimation Stamp Pad –Blue,Black
Sublimation Markers
Protective Project Mat
Metal Ornament - Blank
Heat tape
Protective paper
Emerald Creek – Lori’s Cards and Creations, Top Hat Snowman, Sublimation Holiday Words
Ribbon
Craft Mat
Blending tool
Computer Paper
Heat Press
Step-by-Step Tutorial:
Step 1: Using plain copy paper trace the outline of the Metal Ornament with a pencil (the pencil will not transfer).

Step 2: Use a blending tool to blend Sublimation Stamp ink over the edges of the ornament template.

Step 3: Stamp a swirl pattern with Blue Sublimation Stamp Ink.

Step 4: Stamp the Top Hat Snowman image with Black Sublimation Ink.

Step 5: Add color to the Snowman with Sublimation Markers.
Step 6: Stamp a coordinating phrase using a Sublimation designed stamp.

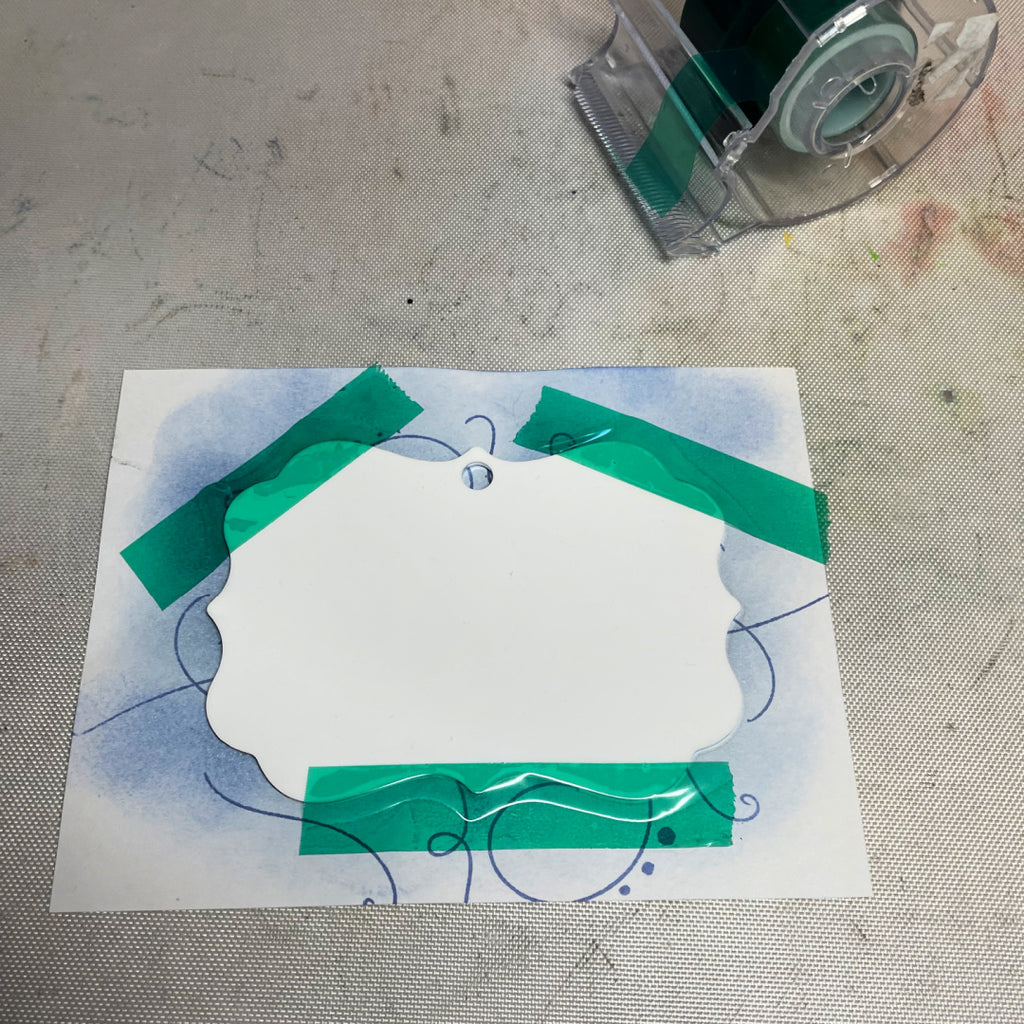
Step 7: Place the Metal Ornament onto the finished design and secure with heat tape.
Step 8: Make a "Sublimation Sandwich" by placing the secured project between two pieces of protective paper.

Step 9: Heat set using appropriate settings for the blank to transfer. The Artesprix Metal Ornaments call for 400℉ with a transfer time of 45 seconds.

Step 10: After 45 seconds has transpired, conduct a "peek test" to ensure transfer was successful (do not remove tape until transfer is confirmed). Re-heat if needed.

Step 11: Remove paper to reveal the transferred design.
Step 12: Tie a bow to the top of the Metal Ornament with the coordinating ribbon.
Thank you for following along for my Christmas in July Metal Ornament Blog. These ornaments are great to have on hand before the holidays start because they can be hard to find come October, so grab a set now before the holiday season! If you have not tried Artesprix Sublimation Iron-on-Ink, what are you waiting for? These products are truly great to work with and offer so many creative options, especially for paper crafters like me!
Happy Day!
Lori Warren
**This post may contain affiliate links. That means that I may receive compensation if you purchase through the links I have provided. The price you pay for the product or service is not higher, but I may get compensated.**


