Custom Watercolor Jewelry Pendants with Iron-on-Ink
Artesprix Design TeamInks, Jewelry, Markers
Products in this post


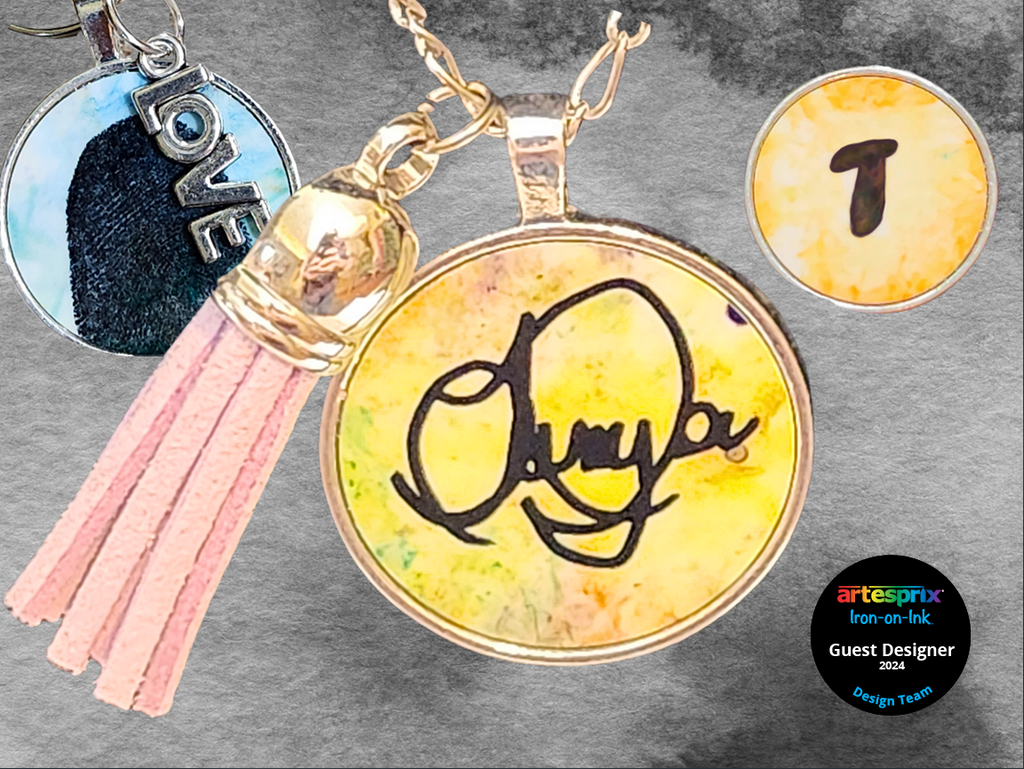
Hello creators! My name is Tanya and I am thrilled to be the Guest Designer for February! These Jewelry Pendants were not available in the Artesprix Shop yet when I was a full-time Team Member, so it is even more exciting that I get to work with these new sublimation blanks. This tutorial kicks off with a watercolor effect background, implemented across multiple versions. The application of this technique gives a painterly feel to the sublimation process, resulting in a delicate blend of colors for a fine art esthetic. This blog post provides instructions for crafting the background design and presents three alternative foreground design options.
**This post may contain affiliate links. That means that I may receive compensation if you purchase through the links I have provided. The price you pay for the product or service is not higher, but I may get compensated.**
What are Artesprix Sublimation Arts & Crafts Supplies?
Sublimation is a process where heat and pressure are used to transfer ink onto compatible materials, creating vibrant and permanent transferred designs. Before Artesprix, you needed a special printer to experience this level of personalization, not anymore! Artesprix Iron-on-Ink is a line of high-quality sublimation supplies in craft form so anyone can try it!
Supplies:
Sublimation Stamp Ink Refills- I used yellow, orange, red, purple, blue, green
Sublimation Markers - Basic Fine 10ct
Heat Resistant Transfer Masks (Optional)
Printer
Heat Press
Copy Paper
Glossy Paper
Alphabet Paper Punches
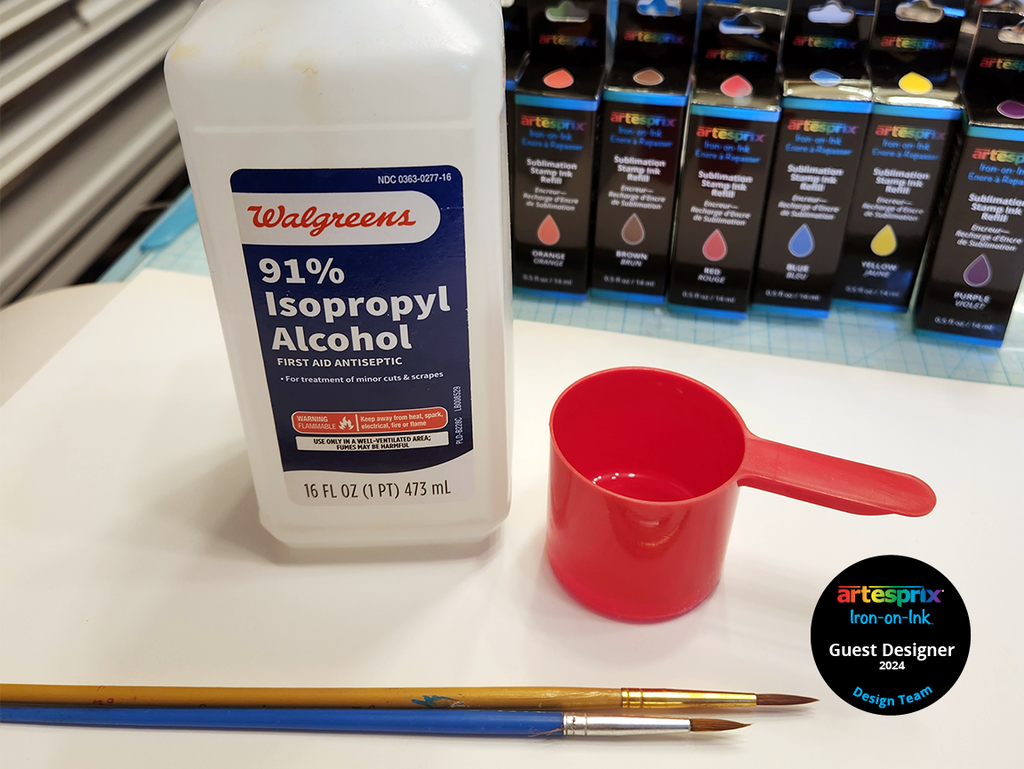
Isopropyl Alcohol
Paint Brushes
Step-by-Step Tutorial:
Step 1: Pour a small amount of isopropyl alcohol into a small cup.
Pro Tip: The specific brand of paper I used may no longer be available, as it was purchased during my art studies in Italy a long, long time ago. However, any glossy paper should suffice, it is always a good idea to test a small area first.
Step 2: Apply drops of the Sublimation Stamp Ink Refills onto glossy paper.

Step 3: Saturate your brush with isopropyl alcohol, then gently pull it through the ink. Repeat this process until you achieve the desired results.
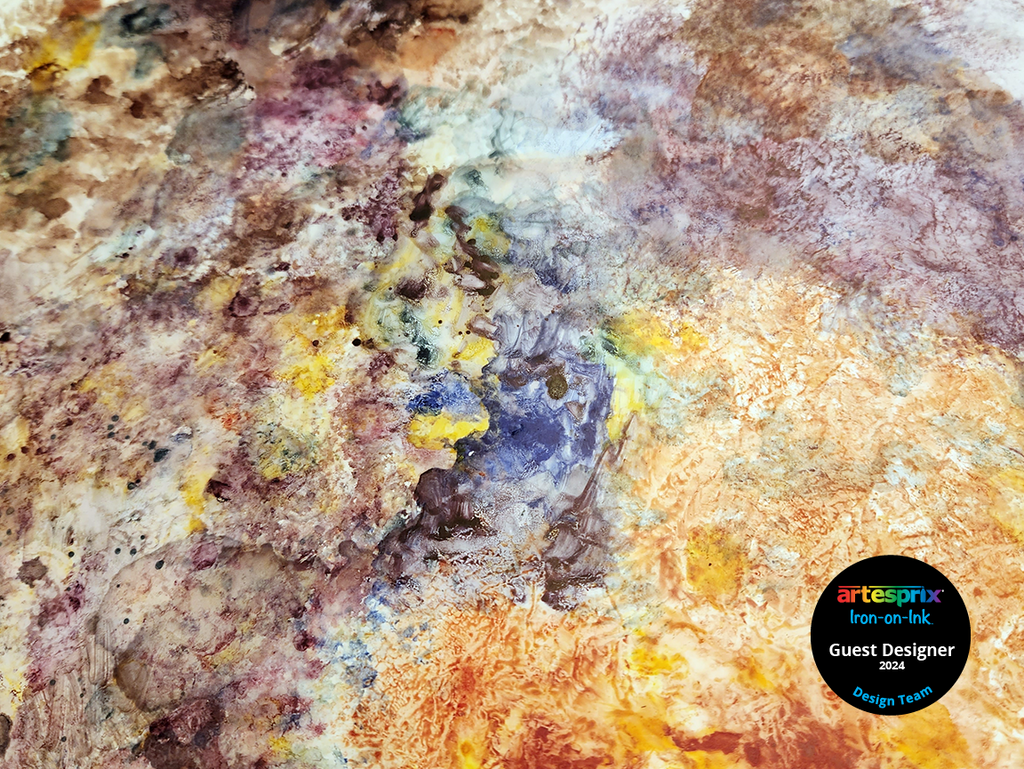
Additionally, you have the option to revive dried ink by simply adding a bit of isopropyl alcohol to it. Feel free to create splatters or drips on the paper using the isopropyl alcohol. Explore different techniques with the ink and alcohol; one approach is to dampen your paper with alcohol before applying the ink. There's no specific right or wrong method to follow. The outcome will give you a pleasing watercolor-like background for your project. Remember the colors will be muted until sublimated.
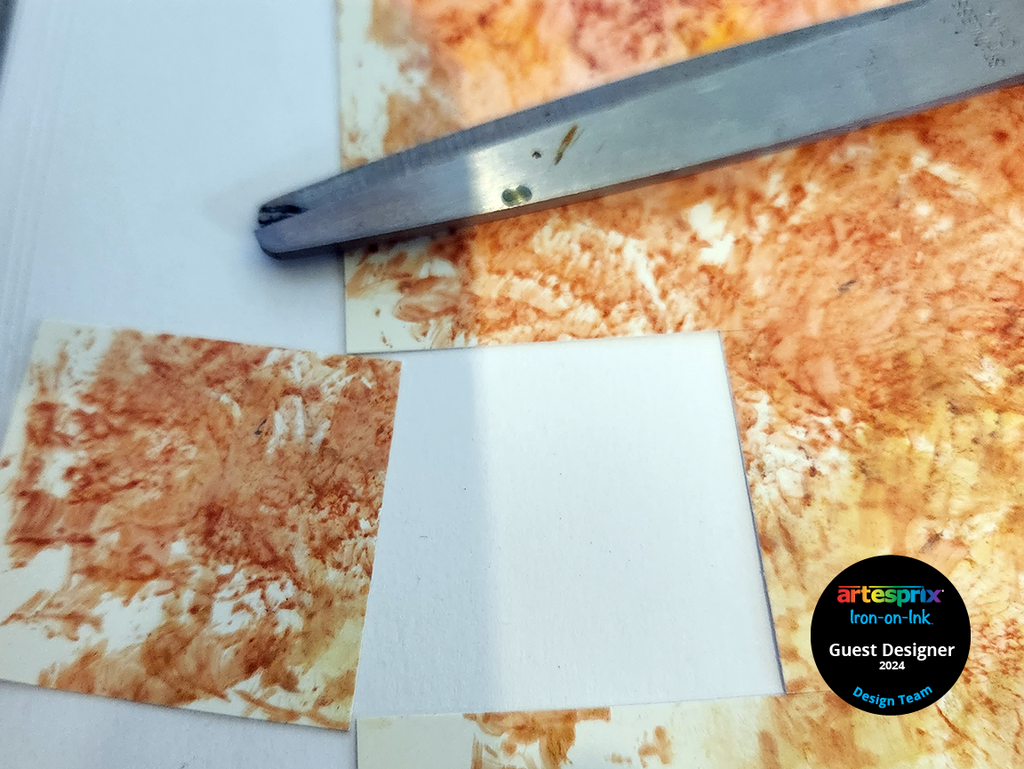
Step 4: Once the ink has dried completely, trace the metal circle sublimation blank insert with a pencil where desired.
Pro Tip #2: This is the perfect time to use your Heat Resistant Transfer Mask to add a personal touch to your transfer. Find easy to follow directions here.

Step 5: Prepare your blank by using a lint roller to remove any fuzz or debris hiding to the naked eye.

Step 6: Position your metal blank insert face-down to the design and secure in place with Heat Tape.
Step 7: Create a "Sublimation Sandwich" by placing your secured project between two pieces of Protective Paper. I fold a piece of paper in half so it is more like a "quesadilla" but you get the idea!
Step 8: Transfer according to the specifications for each individual blank. These Jewelry Pendant inserts call for 400℉ for 45 seconds.
Step 9: After pressing, while wearing heat gloves, move the project to the Artesprix Project Mat to cool. As soon as it is cool enough to touch, conduct a "peek test". Before removing any tape out of place, remove the copy paper to ensure the transfer was successful.
Step 10: Remove the paper to reveal your permanent transfer! You can stop here, or you can add personal touches by doing a second transfer. Keep following along for more inspiration!
Pro Tip #3: With "traditional sublimation" (with a printer), it is not recommended to press twice, however with sublimation crafting, the rules are meant to be broken.
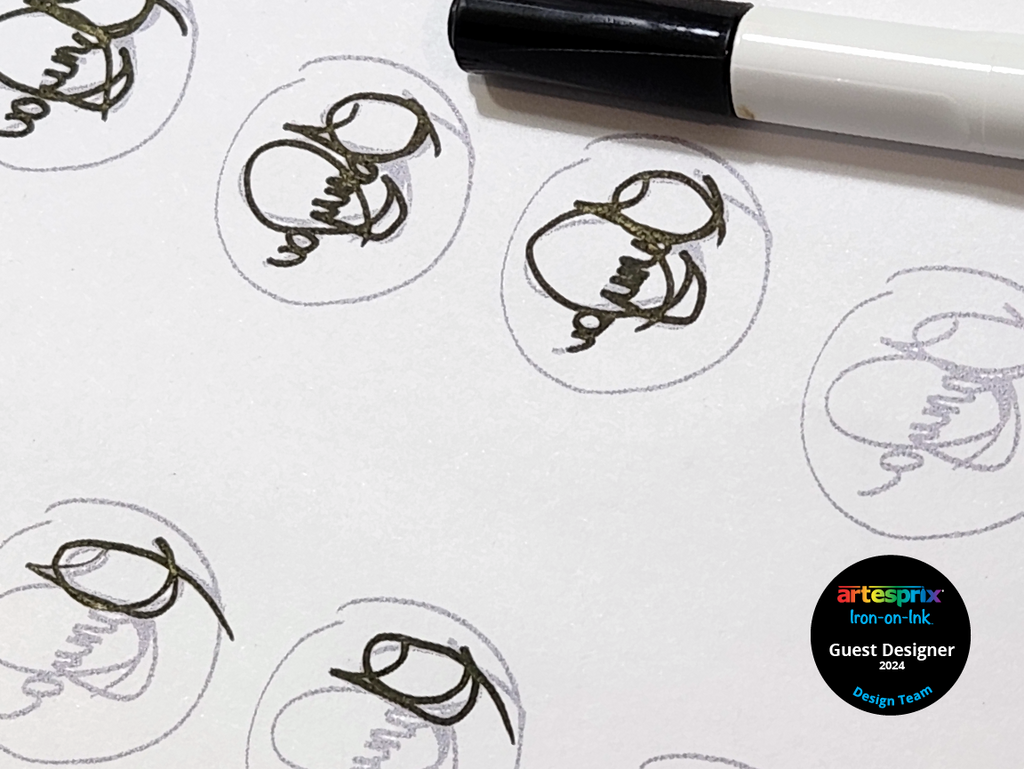
Step 11A (Optional): Trace the metal insert on plain paper with a pencil. Write desired text normally with a Thin Sharpie. Flip over and trace with a Black Sublimation Marker. Repeat Steps 6-10 above.
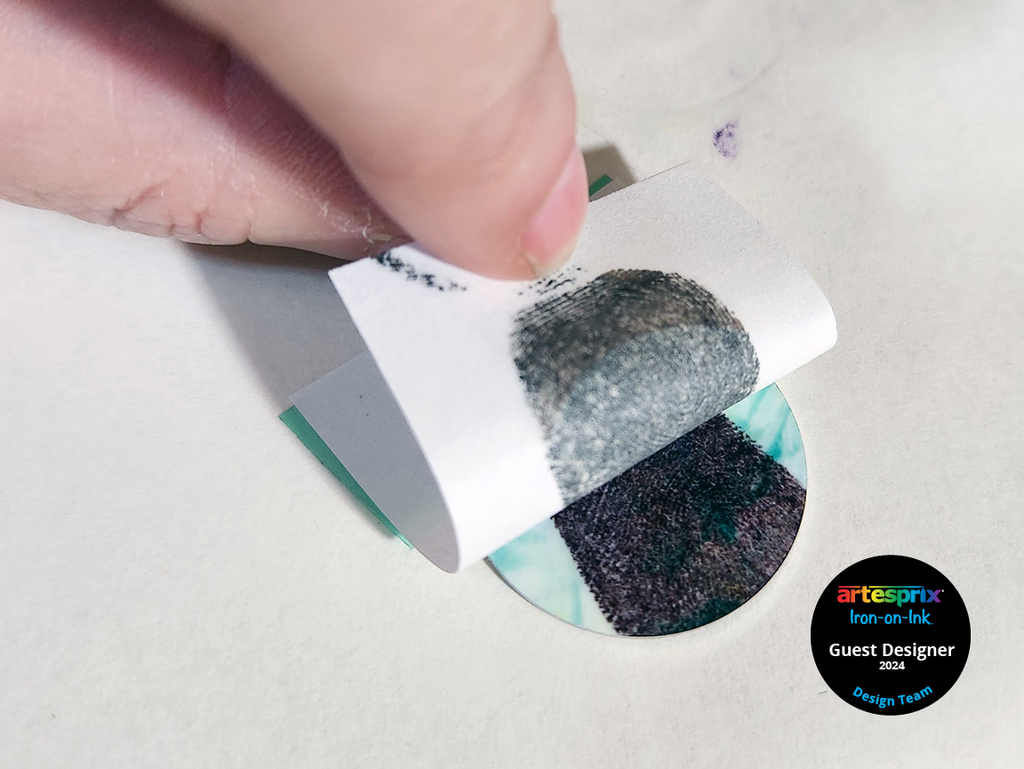
Step 11B (Optional): Press your thumb, or "thumb-body special", into the Black Sublimation Stamp Pad Ink and press onto plain copy paper. Repeat Steps 6-10 above.
Step 12: Remove the adhesive from silver pendant and place decorated metal insert as desired.
I hope these techniques spark your Iron-on-Ink creativity! Watercolor techniques can also be achieved by using markers or paint too! Artesprix removes the typical entry barriers into sublimation, allowing you to explore and experiment effortlessly. Give it a try today and experience the same love and excitement I have found with every project.
Thank you for following along! If you try this project be sure to share it in the Artesprix Facebook Group! Happy crafting!
Tanya Ruffin
**This post may contain affiliate links. That means that I may receive compensation if you purchase through the links I have provided. The price you pay for the product or service is not higher, but I may get compensated.**


