DIY Iron-on-Ink Paint Key Chain with your Home Iron
Artesprix Design TeamHome Iron, Key Chain, Markers, Paints
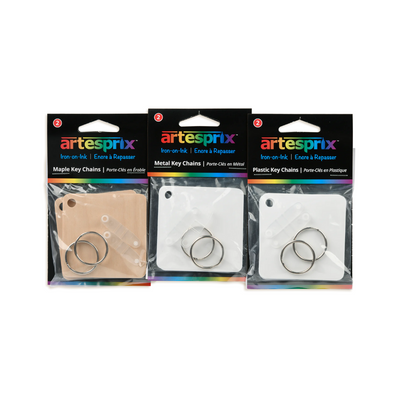
Products in this post


Artesprix Heat Tape
$8.49


Hello! This is Rekha of Divine NY & Co. I’m an artist, illustrator, crafter and educator and I am excited to be part of the Artesprix Term 6 Design Team as a Guest Designer! Have you ever dreamed about having your own designs printed on a product- something you could actually do from the comfort of your own home without having to invest in large-scale printing equipment? Well read on because in this tutorial, I’m going to show you how can transfer your own design onto a metal key chain using Artesprix Sublimation Arts & Crafts Supplies.
**This post may contain affiliate links. That means that I may receive compensation if you purchase through the links I have provided. The price you pay for the product or service is not higher, but I may get compensated.**

I will show you how to draw a design onto copy paper, paint it using the acrylic paints or markers and heat transfer it onto a metal key chain. You will need to create two designs, one for the front and back of the key chain.
What are Artesprix Sublimation Arts and Craft Supplies?
What’s really cool about the Artesprix line of products is that it allows you to create designs on ordinary copy paper and use a home iron to transfer the design onto a sublimation blank! Once a design is transferred onto a blank, it is permanent. No extra glazing or finishing required. How cool is that?In a nutshell, Artestprix introduced a line of Sublimation Acrylic Paint, Markers, and Stamp Pads that allow you to personalize a polyester-coated substrate with your own unique designs.

Supplies:
Artestprix Protective Project Mat
Sublimation Acrylic Paint in Red, Yellow, Black and White (or get the Sublimation Acrylic Paint Set)
Original Sublimation Markers 10ct
Craft paint brush
Paint tray
Scissors
Pencil (regular HB pencil)
Copy paper
Home iron
Lightbox (optional)
Step-by-Step Tutorial:
Step 1: Using a regular pencil, trace the outline of the metal key chain onto a sheet of copy paper. The template should be slightly larger than the key chain size, so add ½ inch border around the key chain outline. This will be the cutting line. Cut two templates.
Pro Tip: Fold the copy paper in half and do the above step so it creates two templates in one step, one for each side of the key chain.

Step 2: I used doodles from my sketchbook as my design inspiration. Using a light-box and a regular pencil, I transferred the design from my sketchbook onto the copy paper. You can freehand draw a design on the template or if you do not have a lightbox, you can also hold up the sketch and copy paper to a window allowing natural light to show through and trace your design that way.
Step 3: Once the design is sketched onto the template in pencil, next comes the fun part which is adding color! You can use markers, acrylic paint, or stamp pads. I chose to use the Sublimation Acrylic Paint.
Add the paint to your paint tray. Dip your craft brush into the paint and then apply it to your design.
The Sublimation Acrylic paints come in red, blue, yellow, black and white. You can mix these colors to create secondary colors. Follow this handy color mixing chart on the Artesprix website to help you.

Step 4: Once you have finished painting your design, let it dry. Repeat the design process to create a design for the opposite side of the key chain.
For the other side of the key chain, I decided to paint an abstract tie-dye design on the template. The colors I used were red, yellow and white. To allow the colors to blend into each other, I used white and very little water. Remember you are painting on copy paper, so don’t use too much water!
Pro Tip #2: I tried both, adding color to my design using the markers and the acrylic paint. I prefer the acrylic paint as I feel once it is heat transferred onto the key chain the colors are bolder. The markers are fun but give the finished design a less intense, subtle look.

Step 5: After your designs are complete (and dry) it is time to transfer. Place the key chain face-down to the design and secure the sides to the template with Heat Tape. Since I am using a Home Iron, I was generous with the tape, this will prevent any shifting during the transfer process.
Step 6: Cut the two pieces of Protective Paper, slightly larger than the template. Place the first sheet on the Protective Project Mat. Place the key chain with the design on top. Place the second sheet of Protective Paper on top of the key chain.

Step 7: For Home Iron use, turn the steam off and set your iron to the highest setting (cotton or linen). Once the iron is hot, apply it to the "Sublimation Sandwich". Hold stationary, add pressure, and transfer and iron for 2-3 minutes.
Step 8: Place the iron to the side and let the key chain cool, before you do a quick “peek test” to make sure the design has transferred. Lift a corner of your design without removing the tape. If you see it has not transferred properly, apply heat to it again. Once satisfied, remove the Heat Tape.
Step 9: After the key chain has cooled, repeat steps 5-8 for the opposite side.

Step 10: Once both sides are cool, attach the key rings with the key tabs.
There you have it, your very own key chains featuring your personalized custom designs. I hope you enjoyed this key chain project and are inspired to give Artesprix Iron-on-Ink products a try. With your creative imagination, the possibilities are endless! If you would like to watch the above steps and see how I created personalized key chains using the maple key chain blanks, hop on over to my YouTube channel and watch my latest video tutorial! And if you are looking for more inspiration, check out the Artesprix Facebook Group or more projects on the Artesprix Blog!
Keep Creating!
Rekha Krishnamurthi
**This post may contain affiliate links. That means that I may receive compensation if you purchase through the links I have provided. The price you pay for the product or service is not higher, but I may get compensated.**
Products in this post
Artesprix Heat Tape
$8.49


