Family Monogram Sign with Artesprix Blank of the Month
Artesprix Design TeamCricut, Ink Pads, Markers
Products in this post


Artesprix Heat Tape
$8.49


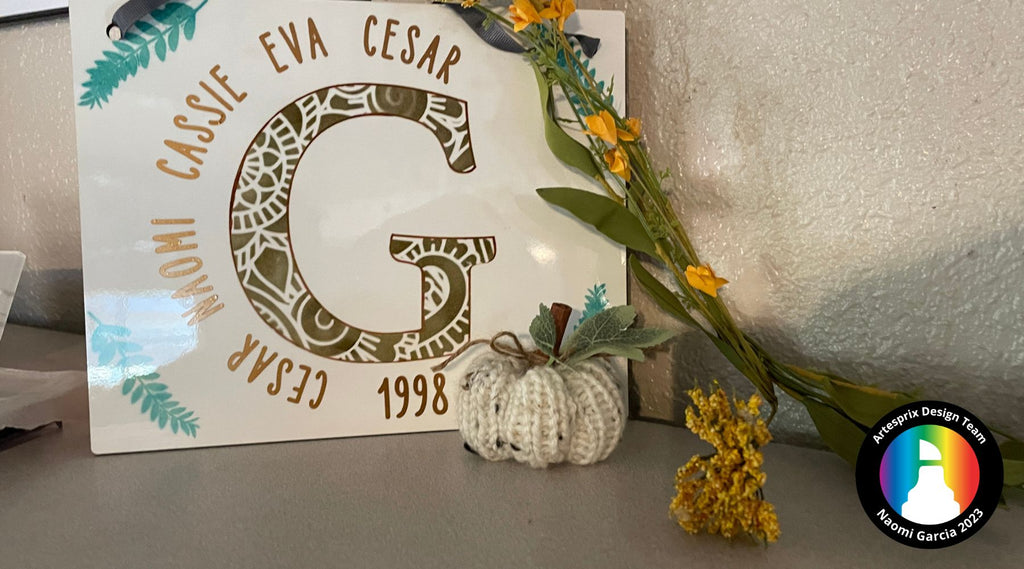
Hi crafty friends. I’m Designer Naomi here with a fun project featuring the October Blank of the Month from Artesprix. The blank is a versatile 8” x 10” Decorative Sign. I’ll show you how I created a Monogram Family Sign using Iron-on-Ink stamp pads, markers, and my Cricut machine. Don't forget this Blank is only available in the Artesprix Shop for October 2023.
**This post may contain affiliate links. That means that I may receive compensation if you purchase through the links I have provided. The price you pay for the product or service is not higher, but I may get compensated.**
What is Artesprix Iron-on-Ink?
Artesprix Sublimation Markers, Ink, and Paint are specially formulated to allow you to use basic copy paper (something we all have) to: color, stamp, stencil, and monoprint anything you wish and turn it into a heat-transferable design. Even the most non-artistic person, like me, can make amazing designs. You can then use heat and pressure to apply these designs to a polyester or polyester coated substrate.You can use a heat press or a home iron! Your designs will then be permanently printed onto your substrate.

Supplies:
Decorative Sign
Sublimation Markers
Sublimation Stamp Pad: Brown & Green
Pink and Main Flora Stencil
Pink and Main Stamps
Heat Press
Blending Brushes or Sponges
Protective Paper
Heat Tape
Copy Paper
Lint Roller
Washi Tape
Cricut or other cutting machine
Adhesive Vinyl
Transfer Tape
Step-by-Step Tutorial:
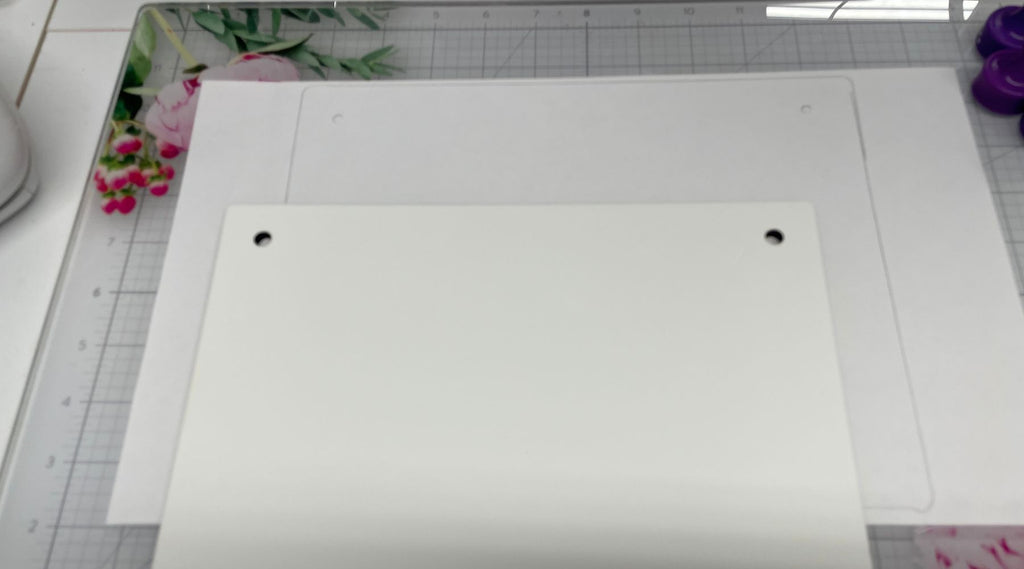
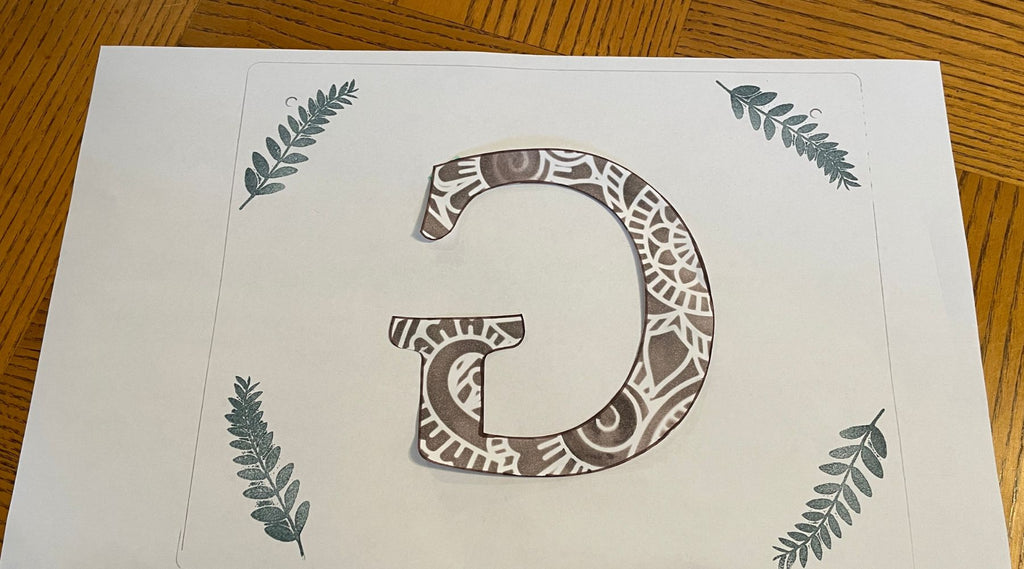
Step 1: Use a pencil to trace around the outside of your decorative sign. Trace the holes as well.
Step 2: Apply washi tape to tape the stencil to a second sheet of copy paper. I used Pink & Main “Flora” stencil, but you can use any style stencil.
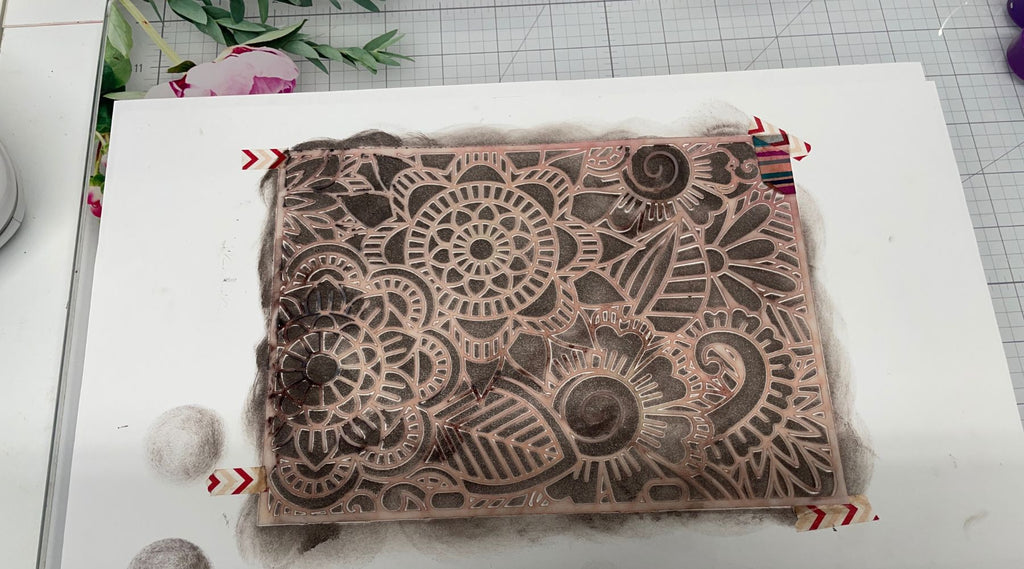
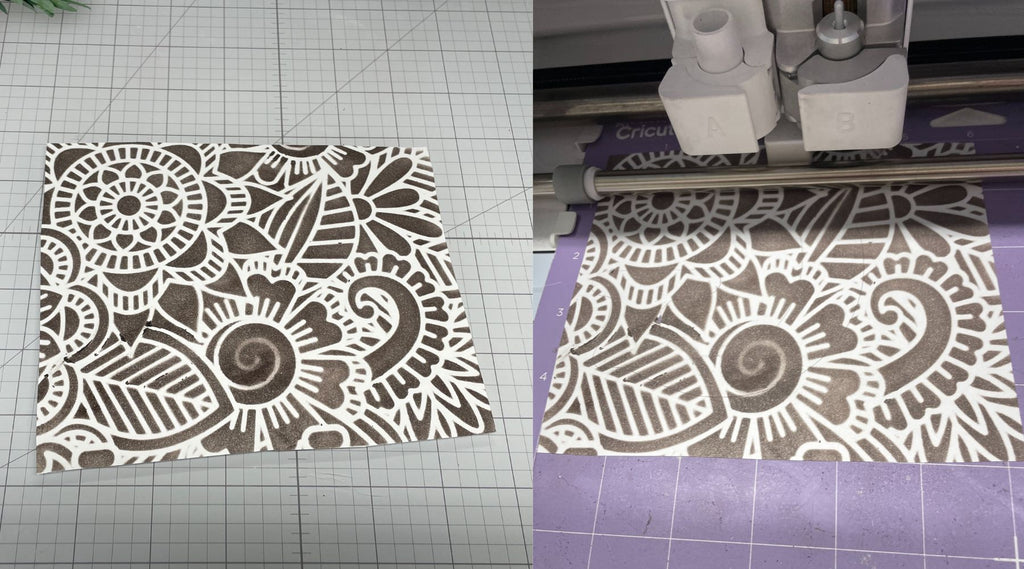
Step 3: Add Brown Sublimation Stamp Pad Ink to the stencil using a dauber or blending brush.
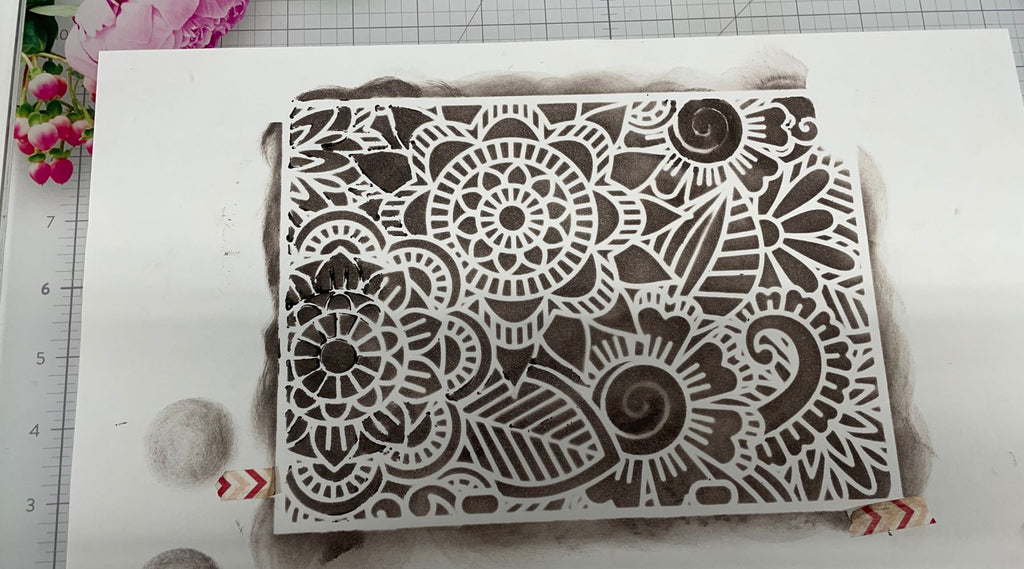
Step 4: Once finished, remove the stencil and tape from the copy paper.
Step 5: Trim the printed design down to make it easier to cut your monogram.
Step 6: Use a Cricut or other cutting machine to cut out the monogram.
Pro Tip: Add an offset and set it to “draw” around the outline of your letter. I used Artesprix Sublimation Fine Tip Marker in brown to match my design. Be sure to mirror your design before cutting.
Note: All 9 Sublimation Stamp Pad colors match the same 9 colors in Sublimation Marker Basic Color sets.
Step 7: Tape your monogram to the middle of the paper where you traced the outline of the decorative sign. The monogram should be placed with the inked side up.
Step 8: Use the other design stamps with Sublimation Stamp Pads to add other elements to the transfer. I chose to add green leaves.
Step 9: With your finished design on your work surface face up, lay your sign white side down, onto the Design and secure using heat tape.
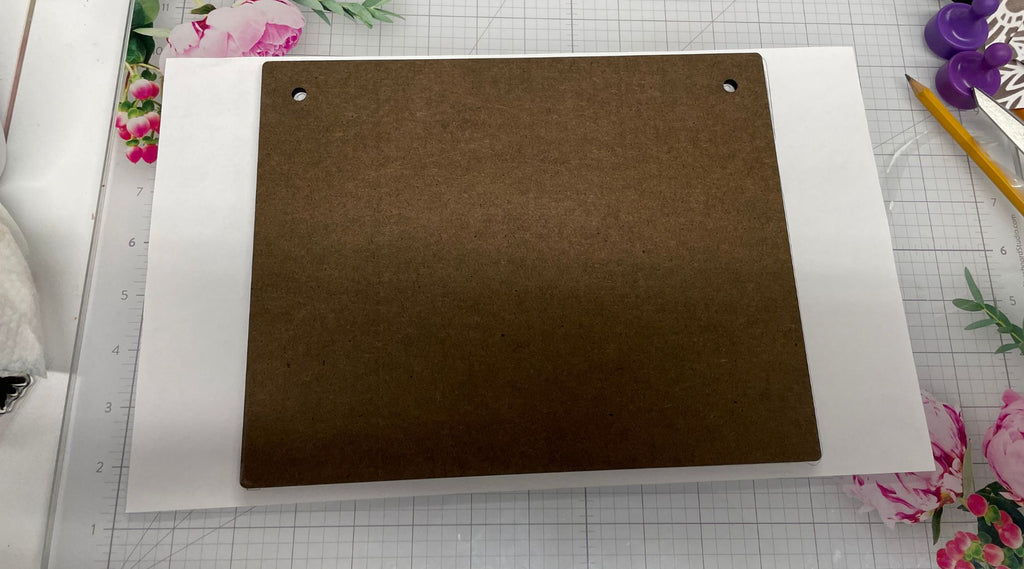
Pro Tip #2: Use a lint roller to clean blanks before Step 9.
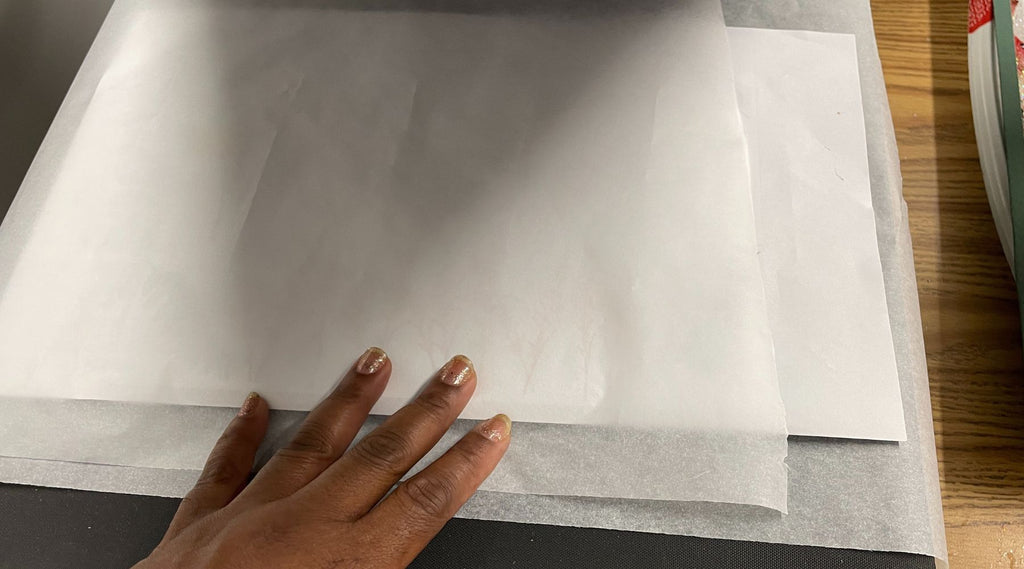
Step 9: Make a "sublimation sandwich" by flipping your project over and placing between two pieces of protective paper. The key here is to ensure your design is facedown on top of your blank.
Step 10: Press the panel at 400℉ for 105 seconds using medium pressure.
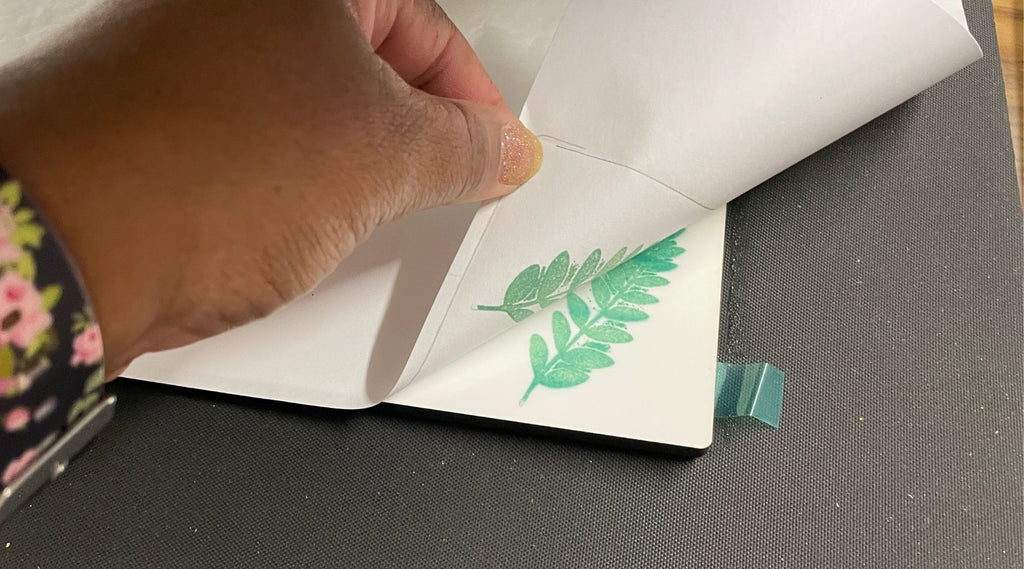
Step 11: Before removing the sign from the heat press, lift a corner of the design to make sure the design transferred correctly. AKA, doing a "peek test".
If the design is transferred well, you are finished and you can remove the tape and paper from the sign. If it is not, carefully realign, and press again.
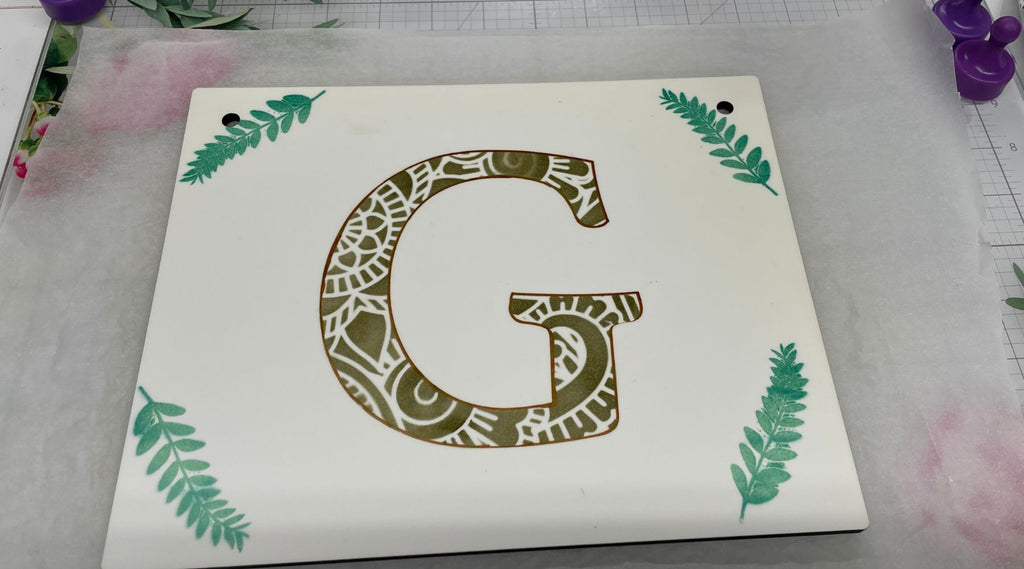
Step 12: (Optional) Cut any additional elements you want to add to your sign using vinyl. I used Oracal 651 vinyl in copper to cut my family’s names and our EST date. Weed your design and use transfer tape to apply it to the printed decorative sign.
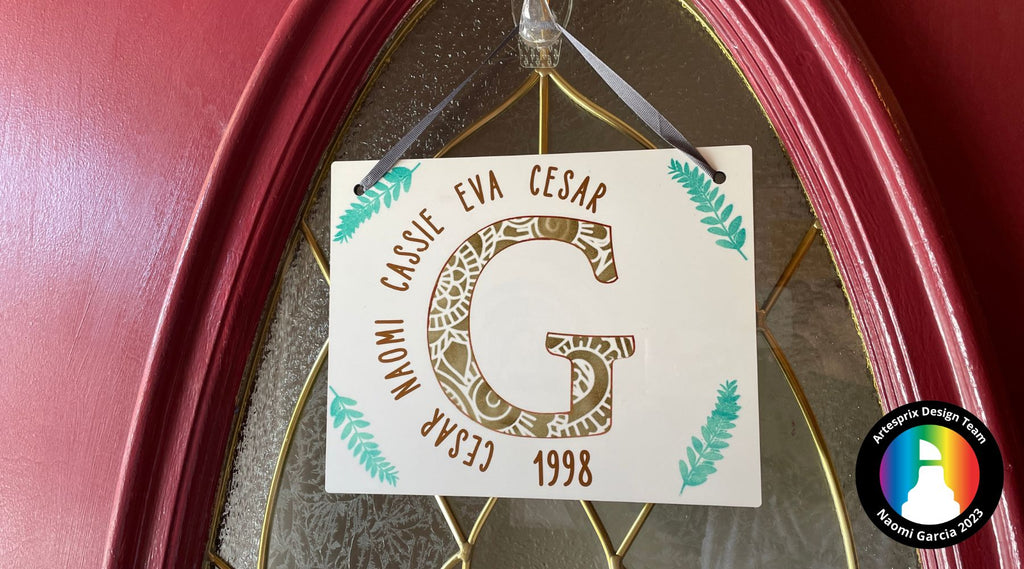
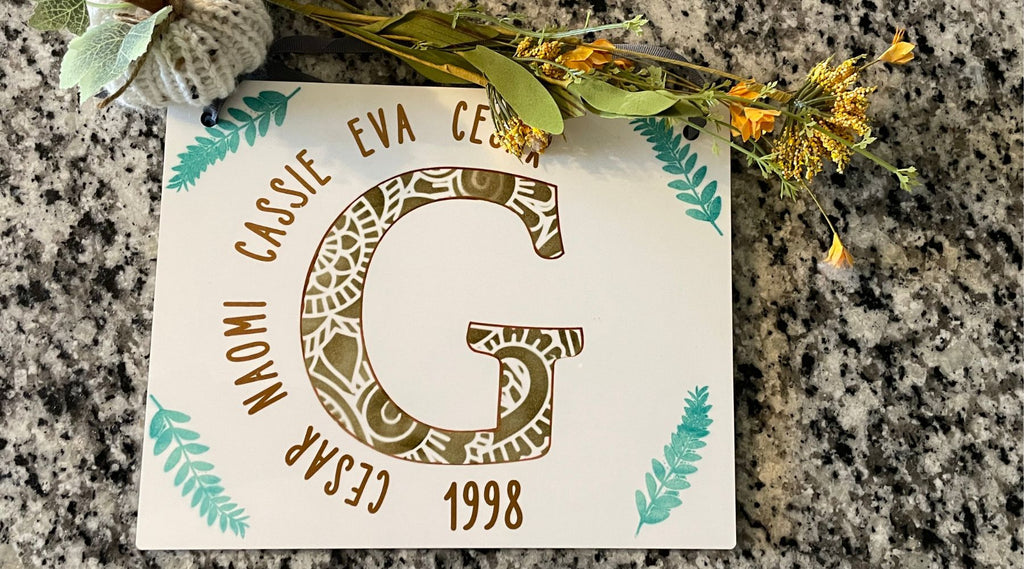
I love the look of the different shades of brown I was able to create on this sign. Try this outside on your front door, or keep it indoors like me. It is a great addition to my family room paired with some fall flowers and handmade pumpkins.
For more seasonal ideas for your next Iron-on-Ink project, check out the Artesprix Blog. Let us know if you try out this project by using the #Artesprix & #IrononInk or post your project to the Artesprix Facebook Group. Be sure to order your Decorative Signs ASAP because they’re only available during the month of October. If you want to learn more about me, visit my About Me here.
Now, go make something amazing!
Naomi Garcia
**This post may contain affiliate links. That means that I may receive compensation if you purchase through the links I have provided. The price you pay for the product or service is not higher, but I may get compensated.**
Products in this post
Artesprix Heat Tape
$8.49


