Hi Everyone! My name is Sarah from A Paper Moment. In this Blank of the Month Blog, we will be exploring how to create neurographic art with this month’s featured sublimation blank, the Decorative Sign. What is neurographic art? To put it simply, it is a form of mindfulness art that allows you to create free flowing pieces.
**This post may contain affiliate links. That means that I may receive compensation if you purchase through the links I have provided. The price you pay for the product or service is not higher, but I may get compensated.**
What are Artesprix Sublimation Arts & Crafts Supplies?
Artesprix has produced specially formulated products that permanently transfer a design you create onto a polyester or polyester coated substrate (the blank) through a mechanism called sublimation. Sublimation is a chemical process in which the combination of heat and pressure allows the solid form of the design to turn into a gas and permanently integrate into your project so it won’t peel or fade. What’s great is that along with the Artesprix sublimation arts and craft supplies such as Sublimation Markers, Paints, and Inks, you can easily utilize items you may already have such as stamps, stencils, and electronic cutting machines for quick and easy projects.
Supplies:
Decorative Sign
Sublimation Markers - Basic Chisel
Sublimation Ink Pad - Black
Sublimation Stamps - Hand Lettered Basics
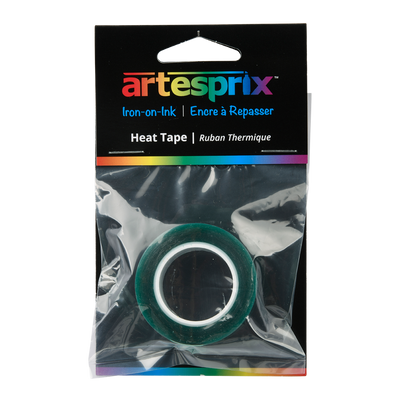
Heat Tape
Protective Paper Roll
Protective Project Mat
Multi-Purpose Cleaner
Acrylic Stamp Block
Circle stencil or any round objects to trace
Copy/Printer paper
Pencil
Heat Source
Heat Protective Gloves
Step-by-Step Tutorial:
Step 1: With pencil, trace the 8x10” Decorative Sign onto a piece of copy paper.
Pro Tip: Pencil will not transfer in the sublimation process.
Step 2: With the Black Basic Chisel Sublimation Marker, draw free flowing squiggle lines and loops across the paper.
Step 3: Round off any points where the lines intersect so there aren’t any sharp corners.
Step 4: Use different sized circle stencils or any round objects to trace random circles to fill some white space and create balance, overlapping the squiggles. Add any additional squiggle lines if you feel they will help create a cohesive, balanced piece.
Step 5: Round off the intersecting lines created from the circles and any additional squiggle lines.
Step 6: Trace over all the lines to create thicker lines. The design will start to look like neurons.
Step 7: From top right corner to bottom left corner, color in rainbow order the entirety of the space.
Pro Tip 2: Color outside the traced pencil lines.
Step 8: Pick out 3 of the Artesprix Sublimation Stamps from the Hand Lettered Basics set. Use an acrylic block and the Black Sublimation Ink Pad to stamp onto the colored piece in the larger open areas. These are Sublimation stamps, which are non-reversed stamps intended for transferring.
Step 9: Secure the design onto the white side of the Decorative Sign with Heat Tape.
Step 10: Create a “sublimation sandwich” with Protective Paper, the blank with the attached design towards the top, Protective Paper.
Step 11: Press your design for 105 seconds at 400℉.
Step 12: Do a “peek test” by lifting one corner with heat protective gloves to see if your design is vibrant and fully transferred. If it is not, place the corner back down and press again.
Pro Tip 4: Step 12 only works if you don’t move the tape out of place so that you may transfer again if needed with less risk of ghosting.
Step 13: Use the supplied ribbon to hang up your new neurographic art!
I hope you find this project a freeing way to create art. Neurographic art can create a sense of calm and potentially aid in reducing stress. You don’t need expertly honed art skills to create a beautiful piece. Artesprix Arts and Craft Supplies make it easy to seamlessly create art you can display in your home.
If you feel inspired, be sure to share your sublimation projects on the Artesprix Iron-on-Ink Inspirational Group on Facebook. Also use the hashtags #Artesprix and #IrononInk on your socials so we can see what you’re creating! Finally, check out the Artesprix Blog for more tutorials and inspiration. To see more of my creations, visit me @apapermoment.
Have a great day!
Sarah Goulet
**This post may contain affiliate links. That means that I may receive compensation if you purchase through the links I have provided. The price you pay for the product or service is not higher, but I may get compensated.**

