Boho Inspired Jewelry Pendant Sublimation Sun Catcher
Artesprix Design TeamInk Pads, Inks, Jewelry
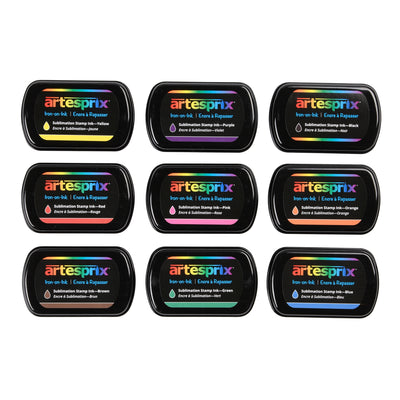
Products in this post
Summer is here! Which means sunshine and warm weather. I love the way the sunshine streams through the window and have wanted to create a beaded sun catcher for our front door. Then I received the Artesprix July Blank of the Month Jewelry pendants and dreamed, yes literally dreamt, of adding some custom sublimated pendants to the sun catcher.

What are Artesprix Sublimation Craft products?
Artesprix Sublimation Inks are specially formulated heat transferred ink. These inks allow you to create personalized designs on polyester coated surfaces and polyester fabrics. Using plain copy paper, you create your design,, you then transfer the finished design onto your compatible blank using a heat source and pressure. The results are vibrant, colorful, and best of all permanent! Before Artesprix you needed a fancy printer to experience this level of personalization, but not anymore!

Supplies:
For Sublimation Pendants:
Jewelry Pendent 2 count blanks
Sublimation Stamp Ink Refills
Sublimation Stamp Pad
Multipurpose Cleaner
Brayer
Stamps
Mirror Stamp
Acrylic Stamp Block
Stencil: Ranger Dina Wakely Pebble Heart Media Stencils
Copy paper
Pencil
Heat Tape
Protective Paper Roll
Scissors
For Sun Catcher:
Tree Branch
Pruners or small saw
Fishing Line (16#)
1/2” Split Rings (6)
Numerous glass and plastic beads
Bead spacers
3-Chandelier Glass pendants
48 g. Glass seed beads. (John Bead Opaque Czech Glass Seed Beads mixed colors)
36” (approx) -26 gauge silver floral wire
20 inches silver chain
2 jump rings
Superglue
Craft knife
Super glue
Step-by-Step Tutorial:
Step 1: Add a couple of drops of Artesprix Sublimation Stamp Ink fluid to your Mirror Stamp. Gently mist with a bit of Artesprix Stamp Cleaner. Use a brayer to spread ink/cleaning fluid over the surface of the plate. Don’t get too precise with your braying, you want some variations in coverage and color intensity to add visual interest to your pendent.

Step 2: When you are satisfied with how it looks, press copy paper down onto the stamp plate. Repeat this step to help clean off the plate.

Pro Tip: Save all of the sheets of paper. You can transfer artesprix designs at any time. They are great to have on hand when you are in a pinch!

Step 3: Repeat with 2nd color, then add a stencil. Mist again with Artesprix Multipurpose Cleaner. Press paper onto the stencil covered stamp plate to absorb excess ink through the stencil. Remove the stencil and immediate use the inked side like a stamp, pressing the inked side of the stencil onto one of your other background layers. Then taking another “background layer” press it down on the stamp plate.

Step 4: Determine which part of your design will be for your pendants. Once you place your pendant down, remove metal circle from pendant and trace with a pencil.
Step 5: Using your Black Sublimation Stamp Pad and stamps, stamp within your template.

Step 6: Secure your metal blank, white side to the design, with heat tape.
Step 7: Create your "sublimation sandwich". I placed a piece of protective heat paper. Place your secured project between two layers of protective paper. Ensure that the finished design is closer to the heat. We only want the heat to have to go through the paper.
Step 8: Time to make the magic. Using your heat press, press your project for 45 seconds at 400℉.

Step 9: CAREFULLY Do a "peek test" to see if your colors transferred. OOooOoOOoo!! Look how bright they are! Metal projects get very hot!
Step 10: Once cooled remove the protective layer of adhesive off of the pendant and adhere the transferred design into the bezel.

Create the Suncatcher:
Step 10: Head outside and find a pretty branch! Using a saw or pruners cut off the branch approximately 13 inches long. Trim off any smaller branches, leaves, from the branch you cut.

Step 11: Cut five 36” lengths of fishing line. Fold them in half and attach them to a 1/2” split ring using a hitch knot. Thread 3 of the chandelier pendants unto 3 of the split rings. Thread the two Sublimated pendants unto the remaining two. String beads and spacers unto the double thickness of fishing line. You will create 1-15” length of beads two 13” lengths of beads ending with the sublimated pendants and two 11” strands of beads ending with a chandelier pendant.

Step 12: Double knot the end of the fishing line. Knot the strands of beads to the stick, beginning with the 15” strand in the middle, then 13” strands to either side of that, then 11” strands on the end. Make a small notch where you desire the strands to stay and move the strands so they nestle into the notches. Superglue the knots and the strands into the notches.
Step 13: Using the jump rings, attach the ends of the chain to itself making a loop, about one inch in from the end.

Step 14: Thread the glass seed beads onto the 36” length of wire. Attach the beaded wire to one end of the stick, winding it around the stick and between the beaded strands. Twist the wire at the end to secure.
Pro Tip #2: Sounds like a lot of wire, but trust me you want to have more done than less.

Step 15: Loop the chain around the ends of the sun catcher to hang.

Hang your sun catcher in a sunny window to catch the rays!
I hope this has inspired you to create a sun catcher of your own. Better yet, I hope this has inspired you to infuse your creation with sublimation artwork! Or better yet, find a use for a sublimation blank outside what they are marketed for, the possibilities are endless! These "Jewelry Pendants" are only available for the month of July so be sure to grab yours before they are gone!
Happy Crafting!
Betsy Burnett


